Kemper Profiler to L1 Pro
Connect a Kemper Profiler to an L1 Pro
- Question How do I connect a Kemper Profiler to an L1 Pro
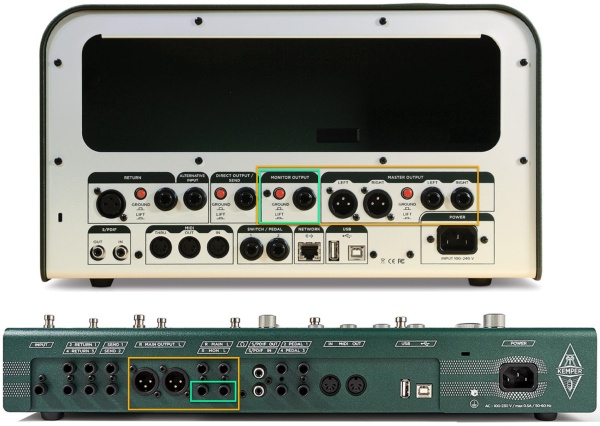
- Kemper Outputs summary
- All XLR outputs are balanced, line-level
- All 1/4-inch outputs are unbalanced, line-level
- L1 Pro Inputs summary
- All XLR inputs are balanced, microphone level (not a good match for the Kemper XLR outputs)
- All 1/4-inch inputs
- Tip-Ring-Sleeve inputs are balanced, line-level (best match for line-level sources)
- Tip-Sleeve inputs are unbalanced, instrument-level
- Short answer for long cable runs
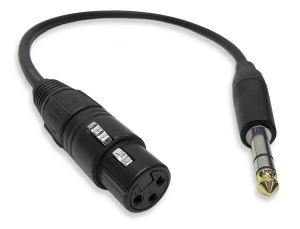
- Use XLR Female to 1/4 inch (6.3 mm) Tip-Ring-Sleeve cables (XLR to Kemper, 1/4 inch (6.3 mm) Tip-Ring-Sleeve to L1 Pro)
- Short answer for short cable runs
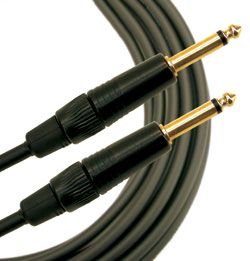
- Use 1/4 inch (6.3mm) Tip-Sleeve to 1/4 inch (6.3 mm) Tip-Sleeve cables from any Kemper 1/4-inch output to any L1 Pro 1/4-inch input
- Answer - you have lots of options using the information above
Summary
- For best results for long cable runs, use a balanced, line-level connection
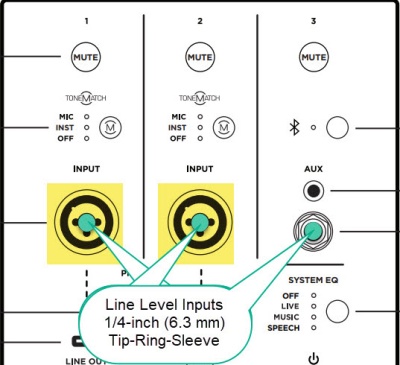
Connect the output(s) of a line-level source (e.g., on the Kemper the line-level outputs are XLR) to the line-level inputs of the L1 Pro. On the L1 Pro these are the 1/4-inch (6.3 m) Tip-Ring-Sleeve jacks on L1 Pro inputs 1, 2, 3. (Note the green dots in the picture).
- Note
- The 1/4 inch (6.3 mm) Tip-Ring-Sleeve inputs are line-level balanced.
The XLR jacks on the L1 Pro are microphone-level signal sources, not line-level outputs.
- Don't connect Line-Level sources to the XLR Inputs (Inputs 1 and 2) on the L1 Pro.
- Connecting a line-level source (such as mixer output) to a mic-level input will cause the sound to be loud and distorted because the line signal is much stronger than what the mic input will accept. Inputs and outputs on many mixers are switchable for either mic or line-level operation. If the mixer has the option to switch the output to mic-level, then you can use the XLR inputs on the L1 Pro.
Kemper Profiler Outputs Specifications
From the Kemper Profiler Technical Specifications
- Analog Outputs PROFILER Head, PowerHead, Rack, and PowerRack
MAIN OUTPUT L and R: XLR balanced, 1/4-inch TS unbalanced with ground lift, output level: XLR +4 dBu, TS +4 dBu
MONITOR OUTPUT: 1/4-inch TS unbalanced with ground lift, output level: +4 dBu
DIRECT OUTPUT/SEND: 1/4-inch TS unbalanced with ground lift, output level: +4 dBu, output dynamic range: >108 dB
HEADPHONE Output: 1/4-inch TRS stereo, 32-600 ohms, 330 mW @ 32 ohms, 220 mW @ 600 ohms
- Analog Outputs PROFILER Stage
MAIN OUTPUT L and R: XLR balanced, 1/4-inch TS unbalanced with ground lift, output level: XLR +4 dBu, TS +4 dBu
MONITOR OUTPUT L and R: 1/4-inch TS unbalanced with ground lift, output level: +4 dBu SEND 1 +2: 1/4-inch TS unbalanced, output level: +4 dBu, output dynamic range: >108 dB
Connection Options
Balanced 1/4 inch tip-ring-sleeve connection (Line Level)
Set the Helix 1/4 outputs to Line level and use 1/4 inch (6.3 mm) Tip-Ring-Sleeve cables to inputs 1, 2, or 3. If connecting to inputs 1 or 2 set the ToneMatch switch to OFF and Tone controls to 12:00 o'clock and Reverb off.
Balanced XLR to 1/4 inch tip-ring-sleeve connection mono (Line Level)
This leaves inputs 1 and 2 open for other inputs.
Set the Helix XLR output(s) to Line level if using an XLR to 1/4 inch (6.3 mm) Tip-Ring-Sleeve cable.
On the L1 Pro - running mono, connect to input 3 (that's as close to FRFR as you can get). If you want to run left/right outputs (there's no real point because the L1 Pro is mono anyway),
Balanced XLR connection (Mic Level)
Set the Helix XLR outputs to MIC level to use XLR cables to L1 Pro inputs 1 and 2. Set the ToneMatch switch to OFF and Tone controls to 12:00 o'clock and Reverb off.
Ordinary guitar cable (avoid using cables longer than 6 meters) (Instrument Level)
Set the output on the Helix 1/4 inch output(s) to Instrument level and use an ordinary guitar cable (1/4 inch tip-sleeve) to inputs 1 or 2. Set the ToneMatch switch to OFF and Tone controls to 12:00 o'clock and Reverb off.


