Mixer to Two L1 Model II
Contents
Introduction

If you have questions about this article, please post a reply in
the community discussion about connecting a mixer to two L1 systems
Please include a link to the owners manual for your mixer.
Connections Overview
The L1 Model II Analog Inputs are 1/4 inch (6.3 mm) Tip-Ring-Sleeve balanced inputs.
Most modern mixers have balanced outputs. Please refer to the owners guide for your mixer to determine if the outputs are balanced.
XLR inputs are balanced.
or
1/4 inch (6.3 mm) Tip-Ring-Sleeve inputs are balanced and usually marked as balanced if they are.
If your mixer has both kinds of outputs, use whichever is most convenient for you. There is no advantage to one over the other.
Connect a Third Party Mixer to Two L1 Model II
XLR Outputs

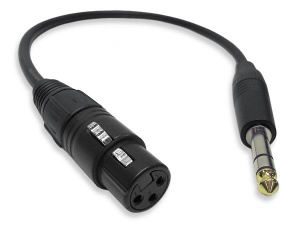
The output from the Third Party Mixer is a balanced mono XLR and the input on the L1 Model II is a balanced mono 1/4 inch (6.35 mm) Tip-Ring-Sleeve so use a cable like this.
 .
.
XLR Female to 1/4" Male TRS Cable
1/4 inch (6.3 mm) Tip-Ring-Sleeve Outputs

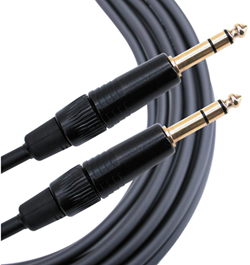
The output from the Third Party Mixer is a balanced mono 1/4 inch (6.35 mm) Tip-Ring-Sleeve and the input on the L1 Model II is a balanced mono 1/4 inch (6.35 mm) Tip-Ring-Sleeve so use a cable like this.
 .
.
1/4" TRS Balanced Patch Cable (audiopile.net)
1/4 inch (6.3 mm) Tip-Sleeve Outputs
If your mixer has unbalanced 1/4 inch (6.3mm) Tip-Sleeve outputs you can use 1/4 inch (6.3mm) Tip-Sleeve cables. Unbalanced cable runs beyond twenty-five feet (7.6 meters) are not recommended. They may be subject to signal loss and line noise. For more information see: Balanced vs Unbalanced
L1 Model II Gain Staging
For each L1 Model II
L1 Model II Analog Input
The Analog input is a ¼ inch balanced input jack.

Analog input trim (volume, or gain) control
Setting the trim level on the Model II Power Stand is a one-time step. Once you have matched the output of the ToneMatch mixer to the input of the L1 you don't need to adjust it again.

- Set the Trim control on the power stand to the 0 (zero) position.
- Connect the Third Party Mixer Main Output to the Analog Input
- Adjust the volume of the Third Party Mixer Main Output to the reference or nominal output level.
- While playing the source, increase the Trim level so that the Signal/Clip indicator glows green or yellow. This will probably be around 9:00-11:00 o'clock
- If the Signal/Clip indicator glows red, decrease the Trim level so that it glows only green or yellow.
