ToneMatch Mixer to S1 Pro
Here's a quick overview of how you can connect a ToneMatch Mixer[1] to an S1 Pro
- Leave the ToneMatch Mixer[1] and S1 Pro turned off until you have things connected
- Connect the ToneMatch power supply to the ToneMatch Mixer[1] (Power supply sold separately for the T4S ToneMatch mixer)
- Connect the ToneMatch Mixer[1] Right Output to S1 Pro System channel 1 or 2

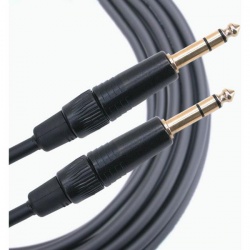
- Use a 1/4 inch Tip-Ring-Sleeve cable for best results


On the S1 Pro System channel:

- Turn off the reverb
- Set both tone controls to the center position
- Set the channel volume off
- Turn on the ToneMatch Mixer[1]
On the ToneMatch Mixer[1]
- Set the Rotary Selector to PAN/AUX
- Press the CH EDIT button for each channel you are using and pan the input hard RIGHT
- Note: Steps 1 and 2 above are one-time-only. You don't have to change this unless you get another S1 Pro and want to run in stereo
- Connect all your sound sources to the ToneMatch Mixer[1]
- Turn on the S1 Pro
- Bring up the channel volume on the S1 Pro to about 11:00 o'clock
- Control the volume using the ToneMatch Mixer[1] Master Volume
- If you see the S1 Pro channel 1 light turning solid red occasionally, turn down the volume on the ToneMatch Mixer[1]
- Or if you see the S1 Pro channel 1 light turning solid red frequently, turn down the volume on the S1 Pro System