Difference between revisions of "L1® for Studio Monitoring"
m (L1 for Studio Monitoring moved to L1® for Studio Monitoring: ®) |
m (ST moved page L1® for Studio Monitoring to L1® for Studio Monitoring) |
||
| (13 intermediate revisions by 2 users not shown) | |||
| Line 1: | Line 1: | ||
| − | '''<big>The {{Model II}}, {{T1}}, and the modern home recording studio</big>''' | + | '''<big>The {{Model II no link}}, {{T1 no link}}, and the modern home recording studio</big>''' |
| − | + | [[Image:Studio2008.jpg|300px|right| T1® L1® Laptop]] | |
The {{Model II}} & {{T1}} make an excellent alternate monitoring system for the multi-track recording studio, and particularly, for live recording. | The {{Model II}} & {{T1}} make an excellent alternate monitoring system for the multi-track recording studio, and particularly, for live recording. | ||
I have been using the {{Classic}} since 2004 and the {{Model II}} since it came out. Either {{L1 no link}}'s flat response is perfect for checking overall instrument tone and balance, especially the reverb levels. Multiple monitoring systems are typical in most all studios, and the {{L1 no link}} is a fine cross reference tool, when used in conjunction with other [http://www.mackie.com/products/hrmk2series nearfield monitors] | I have been using the {{Classic}} since 2004 and the {{Model II}} since it came out. Either {{L1 no link}}'s flat response is perfect for checking overall instrument tone and balance, especially the reverb levels. Multiple monitoring systems are typical in most all studios, and the {{L1 no link}} is a fine cross reference tool, when used in conjunction with other [http://www.mackie.com/products/hrmk2series nearfield monitors] | ||
| − | The L1's use in the studio as a PA monitor during tracking and dubbing sessions is also substantial. The {{L1 no link}} frees us from fatigue inducing headphones, and it's smooth response at low volumes does not leak unwanted (boomy or shrill) frequencies into open microphones in the room. It's even spread, when it does leak into | + | The {{L1 no link}}'s use in the studio as a PA monitor during tracking and dubbing sessions is also substantial. The {{L1 no link}} frees us from fatigue inducing headphones, and it's smooth response at low volumes does not leak unwanted (boomy or shrill) frequencies into open microphones in the room. It's even spread, when it does leak into microphones tends to give the recording a fuller room sound without the honk of a typical floor type monitor. |
| − | As a | + | As a remote live recording sound system the {{L1 no link}} <i>really</i> shines! Easily portable, sets up in a small space, and is the live PA and playback/dubbing monitor all in one. The {{T1 no link}} expands greatly on it's usefulness. An {{L1 no link}}, a {{T1 no link}}, a laptop, and a firewire or other digital in/out recording interface, and you are ready to roll. They days of washing machine size recorders, mixing consoles, and large wall mount monitor speakers are over...thankfully. |
Here is an example of a recent set up that I used for recording a 4 piece band on location, in a small living room. | Here is an example of a recent set up that I used for recording a 4 piece band on location, in a small living room. | ||
| − | Setting up the {{L1 no link}} and other gear near a corner of the room, I used the single rack space 8-in/8-out [http://www.presonus.com/products/Detail.aspx?ProductId=43 Presonus Firewire Project] | + | Setting up the {{L1 no link}} and other gear near a corner of the room, I used the single rack space 8-in/8-out [http://www.presonus.com/products/Detail.aspx?ProductId=43 Presonus Firewire Project] ''''mixer'''' for my six microphone inputs. Those signals ran though the Firewire cable into a laptop recording on six individual tracks. |
The Presonus has 10 assignable outputs of which two were the main output monitor running into the T1<sup>®</sup> channels 4/5, which we used for playback of the completed songs. | The Presonus has 10 assignable outputs of which two were the main output monitor running into the T1<sup>®</sup> channels 4/5, which we used for playback of the completed songs. | ||
| Line 17: | Line 17: | ||
During tracking we used the Project's individual outputs for vocal, acoustic guitar, bass, and [[PorchBoard Floor Bass]] into T1<sup>®</sup> channels 1 through 3. We used Bose preset EQ for the vocal and acoustic guitar channels, (none needed for bass & PorchBoard). This gave a great sound in the room, and allowed us to concentrate on the music and the mix without a thought about the recording. Quite a nice freedom. | During tracking we used the Project's individual outputs for vocal, acoustic guitar, bass, and [[PorchBoard Floor Bass]] into T1<sup>®</sup> channels 1 through 3. We used Bose preset EQ for the vocal and acoustic guitar channels, (none needed for bass & PorchBoard). This gave a great sound in the room, and allowed us to concentrate on the music and the mix without a thought about the recording. Quite a nice freedom. | ||
| − | Set up was quick, simple, and required very little space in the room. At the end of the day I made quick mixes using the {{L1 no link}}. After remixing everything in the studio later with my studio monitors, I found | + | (As a sidenote, you can also plug mics needing monitoring in the T1 first, then route to the interface via the T1's Direct Out. I have done this and it works great, as the output from the T1 is Pre-Fader, so volume sent to the recording interface is controlled by the Trim control, while the signal to the L1 is from the Fader.) |
| − | that I much preferred the {{L1 no link}} mix! It sounded much more like what we | + | |
| + | Set up was quick, simple, and required very little space in the room. At the end of the day I made quick mixes using the {{L1 no link}}. After remixing everything in the studio later with my studio monitors, I found that I much preferred the {{L1 no link}} mix! It sounded much more like what we heard in the room as we recorded. | ||
Click [http://www.studio9music.com/studio9/music/BurrAndTheBoys BurrAndTheBoys] for a look at some set up pictures and audio clips of the {{L1 no link}}'s rough mix, as well as an example of the *remix*. | Click [http://www.studio9music.com/studio9/music/BurrAndTheBoys BurrAndTheBoys] for a look at some set up pictures and audio clips of the {{L1 no link}}'s rough mix, as well as an example of the *remix*. | ||
Between the {{L1 no link}}, the {{T1}}, and the Presonus Project, my recording setup has been reduced in size, weight, and number of components, and at the same time increased productivity, efficiency, and quality. | Between the {{L1 no link}}, the {{T1}}, and the Presonus Project, my recording setup has been reduced in size, weight, and number of components, and at the same time increased productivity, efficiency, and quality. | ||
| + | |||
| + | == Live Recordings == | ||
| + | |||
| + | These mixes are *quickies* made in the living room after we recorded them. | ||
| + | We used the L1 as the monitor speaker. | ||
| + | |||
| + | * [http://www.studio9music.com/studio9/music/BurrAndTheBoys/01_For%20The%20Good%20Times.mp3 For the Good Times.mp3] | ||
| + | * [http://www.studio9music.com/studio9/music/BurrAndTheBoys/02_It%27s_Such_A_Pretty_World.mp3 It's Such A Pretty World.mp3] | ||
| + | * [http://www.studio9music.com/studio9/music/BurrAndTheBoys/03_Talk_Back_Tremblin_Lips.mp3 Talk Back Tremblin Lips.mp3] | ||
| + | * [http://www.studio9music.com/studio9/music/BurrAndTheBoys/04_Getting_Over_You_Again.mp3 Getting Over You Again.mp3] | ||
| + | |||
| + | Mini-on-location Control room: | ||
| + | |||
| + | [[Image:Laptop-T1-FSP.jpg|400px]] | ||
| + | |||
| + | Chuck and Guitar | ||
| + | |||
| + | [[Image:ChuckAndGtr.jpg|400px]] | ||
| + | |||
| + | Burr | ||
| + | |||
| + | [[Image:BurrsSeat.jpg|400px]] | ||
| + | |||
| + | Drums and Steel | ||
| + | |||
| + | [[Image:DrumsAndSteel.jpg|400px]] | ||
| + | |||
| + | Sketcher image of the ins and outs of the session | ||
| + | |||
| + | [[Image:CabinSetup.jpg|800px]] | ||
Latest revision as of 17:12, 26 March 2017
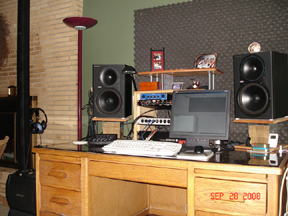
The L1® Model II, T1 ToneMatch® Audio Engine, and the modern home recording studio
The L1 Model II & T1 ToneMatch Audio Engine make an excellent alternate monitoring system for the multi-track recording studio, and particularly, for live recording.
I have been using the L1 Classic since 2004 and the L1 Model II since it came out. Either L1®'s flat response is perfect for checking overall instrument tone and balance, especially the reverb levels. Multiple monitoring systems are typical in most all studios, and the L1® is a fine cross reference tool, when used in conjunction with other nearfield monitors
The L1®'s use in the studio as a PA monitor during tracking and dubbing sessions is also substantial. The L1® frees us from fatigue inducing headphones, and it's smooth response at low volumes does not leak unwanted (boomy or shrill) frequencies into open microphones in the room. It's even spread, when it does leak into microphones tends to give the recording a fuller room sound without the honk of a typical floor type monitor.
As a remote live recording sound system the L1® really shines! Easily portable, sets up in a small space, and is the live PA and playback/dubbing monitor all in one. The T1 ToneMatch® Audio Engine expands greatly on it's usefulness. An L1®, a T1 ToneMatch® Audio Engine, a laptop, and a firewire or other digital in/out recording interface, and you are ready to roll. They days of washing machine size recorders, mixing consoles, and large wall mount monitor speakers are over...thankfully.
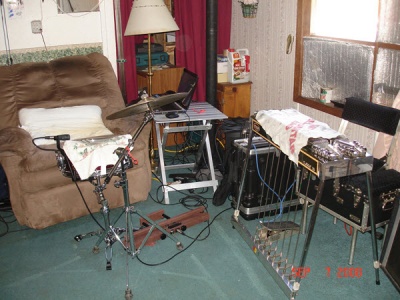
Here is an example of a recent set up that I used for recording a 4 piece band on location, in a small living room.
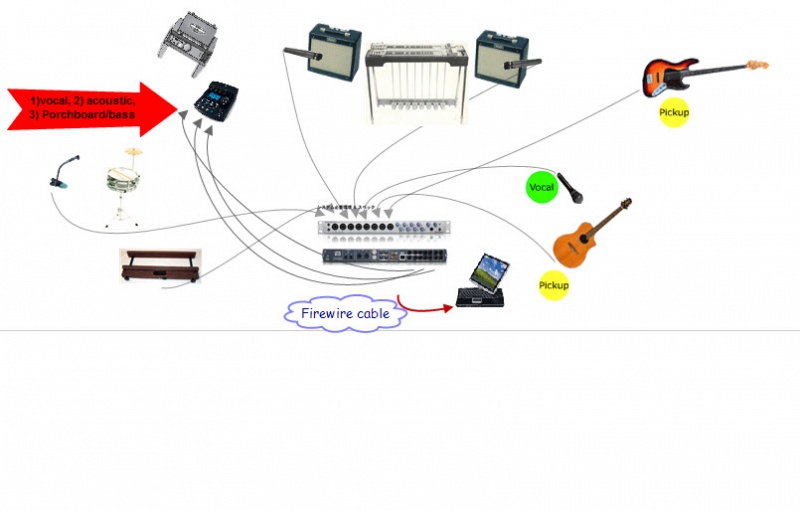
Setting up the L1® and other gear near a corner of the room, I used the single rack space 8-in/8-out Presonus Firewire Project 'mixer' for my six microphone inputs. Those signals ran though the Firewire cable into a laptop recording on six individual tracks.
The Presonus has 10 assignable outputs of which two were the main output monitor running into the T1® channels 4/5, which we used for playback of the completed songs.
During tracking we used the Project's individual outputs for vocal, acoustic guitar, bass, and PorchBoard Floor Bass into T1® channels 1 through 3. We used Bose preset EQ for the vocal and acoustic guitar channels, (none needed for bass & PorchBoard). This gave a great sound in the room, and allowed us to concentrate on the music and the mix without a thought about the recording. Quite a nice freedom.
(As a sidenote, you can also plug mics needing monitoring in the T1 first, then route to the interface via the T1's Direct Out. I have done this and it works great, as the output from the T1 is Pre-Fader, so volume sent to the recording interface is controlled by the Trim control, while the signal to the L1 is from the Fader.)
Set up was quick, simple, and required very little space in the room. At the end of the day I made quick mixes using the L1®. After remixing everything in the studio later with my studio monitors, I found that I much preferred the L1® mix! It sounded much more like what we heard in the room as we recorded.
Click BurrAndTheBoys for a look at some set up pictures and audio clips of the L1®'s rough mix, as well as an example of the *remix*.
Between the L1®, the T1 ToneMatch Audio Engine, and the Presonus Project, my recording setup has been reduced in size, weight, and number of components, and at the same time increased productivity, efficiency, and quality.
Live Recordings
These mixes are *quickies* made in the living room after we recorded them. We used the L1 as the monitor speaker.
- For the Good Times.mp3
- It's Such A Pretty World.mp3
- Talk Back Tremblin Lips.mp3
- Getting Over You Again.mp3
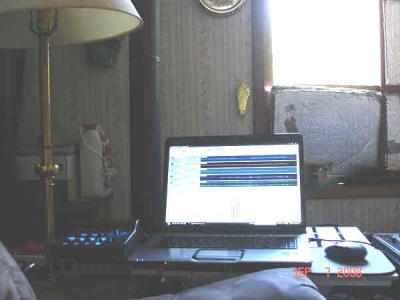
Mini-on-location Control room:
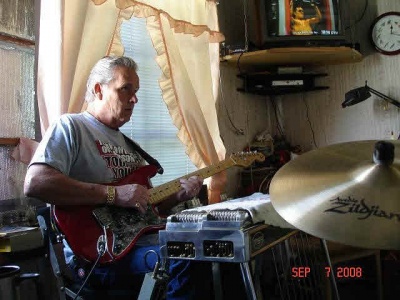
Chuck and Guitar
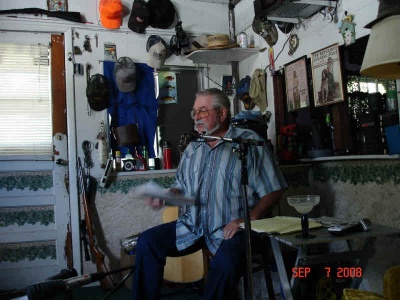
Burr
Drums and Steel
Sketcher image of the ins and outs of the session
