L1® Model I


Acoustical Output Compared to the L1 Classic and the L1 Model II
The maximum output volume of the L1 Classic, the L1 Model I, and the L1 Model II are virtually identical.
In the L1 Classic, the L1 Cylindrical Radiator® loudspeaker is powered by two (2) 250 Watt amplifiers. In the Model I and Model II, the L1 Cylindrical Radiator® loudspeaker is powered by one (1) 250 Watt amplifier. The Classic, the Model I, and the Model II all use a second 250 Watt amplifier to power one or two B1 bass modules (update: or a single B2 Bass Module).
Although these numbers serve as a point of reference they do not tell the whole story. During the design of the L1 Model I and the L1 Model II the impedance of the L1 Cylindrical Radiator® loudspeaker was lowered. As a result of the lower impedance, a single 250W amplifier now powers the system to within 1.75 dB of the max SPL of the L1 Classic. Several other changes were made to the signal processing and acoustical sections to further reduce this small difference. Particular attention was paid to this change and many A/B comparisons were conducted by Bose to confirm that there was no significant audible difference between the two systems.
— Source: Ken-at-Bose, Neil-at-Bose
PS1 Power Stand Input/Output Panel
Appearance

full sized version of the image
Overview

Interactive Version
Note: L1 Model I does not have the section highlighted in white (below, right) with Amp 1 In, Amp 2 In, Amp 3 In, Amp 1 Out, Amp 2 Out.

full sized version of the image
Signal/OL LEDs: Channels 1 and 2

There are two LEDs on the PS1 Power Stand (Classic) / Model I near the Trim knob labelled Signal/OL -- one for Channel 1 and another for Channel 2.
These LEDs indicate when the signal level channel's preamplifier reaches certain important thresholds. The trim controls located near the LEDs adjust the amount of gain in the preamplifier.
- The LEDs turn from off → green when the signal level exceeds a small amount.
- The LEDs turn from green → red when the signal reaches a level that's about 10 dB below a level that would clip the preamp and cause objectionable distortion.
When the LED is off (but you are playing an instrument you think is connected to the PS1 or singing/talking into a microphone you think is connected): Increase the level of the trim control. If the LED still does not turn green or red, check instrument/microphone and cables to the PS1.
When you see green only: This indicates that there's some signal in the channel but not enough. While singing or playing the loudest you ever plan to in the performance, increase the trim level until the LED is only flickering red. This is the optimal gain.
When you see red most of the time: Decrease the trim level until you see only flickering red. This is the optimal gain.
Phantom Power LEDs: Channels 1 and 2

The LEDs near the Phantom Power button are either off or red when phantom power is turned on. — more information about Phantom Power
Power / System Status LED
This LED normally is a steady green when the power is on.

If it is not lit or if it is yellow/amber, contact Support.
Note: This LED may briefly flicker yellow /amber when the power is first turned on; this is normal. Within a couple of seconds, it should settle to a steady green.
Bass Line Out and B1 behavior

The behavior of the bass line out and B1 Bass Module outputs on the L1 Classic / L1 Model I / L1 Model II are based on the philosophy that adding B1 Bass Modules should give the user more dynamic range (can play louder) but should not alter the tone of the instrument, including tone adjustments made using the R1 Remote, the T1 ToneMatch Audio Engine or other tone-shaping equipment.
This philosophy is notably different from other manufacturers, who take the approach that it's okay (or desirable) that adding more bass speakers causes the instrument tone to become "bassier".
With this philosophy in mind, here is how the bass line out and B1 outputs work.
No cable plugged into the Bass Line out
| B1s connected | Output | EQ | Bass Signal Gain | Notes |
|---|---|---|---|---|
| 1 | 40Hz-180Hz | B1 specific EQ | Reference Level | |
| 2 | 40Hz-180Hz | B1 specific EQ | Reference Level -6 dB | Why? Because when you add a second B1, if you did not change the signal strength you would get 6 dB more bass relative to the mids and highs. This would alter the tone of the instrument. To keep the tone the same, while still allowing the more dynamic range (system can play louder by 6 dB) the signal level must be reduced by 6 dB. |
Cable connected to the Bass Line Out
| B1s connected | Output | EQ | Bass Signal Gain | Notes |
|---|---|---|---|---|
| 0 | 40Hz-180Hz | Flat EQ | Reference Level -6 dB | |
| 1 | 40Hz-180Hz | B1 specific EQ on Bass Line Out and B1 Out | Reference Level - 6 dB | If you are using a PackLite® power amplifier model A1 Extended Bass Package this is a total of 3 B1s (2 on the A1 and 1 on the Power Stand) |
| 2 | 40Hz-180Hz | B1 specific EQ on Bass Line Out and B1 Out | Reference Level -12 dB | If you are using a PackLite® power amplifier model A1 Extended Bass Package this is a total of 4 B1s (2 on the A1 and 2 on the Power Stand) |
With More Than 4 B1s
The Power Stand does not measure the exact number of PackLite® power amplifier model A1s, so there is a slight error if you use anything but 1,2, or 4 B1s.
For 6 B1s you will be 3.5 dB bass heavy, for 8 B1s it'll be 6 dB heavy.
B2 EQ
Bass Line Out: Model II post firmware 1.4 with System EQ 1.04


September 2012
- Bose released Model II Power Stand Model II firmware 1.4 with System EQ 1.04 to support the B2 Bass Module with the three position Bass Level Switch ( + Normal - ). Note: Support and behaviors for B1(s) is unchanged.
- The behavior of the bass line out with the B2 Bass Module Bass Module outputs on the Model 1S and Model II are based on the philosophy that adding B2 Bass Modules should give the user more bass output immediately. This changes the tonal balance as soon as you add a second B2 using an PackLite® power amplifier model A1 connected to the Bass Line Out. This is unlike the behaviour with B1 bass modules where the signal is attenuated as you add more B1s to maintain the tonal balance at lower volume levels.
- Note: If no bass modules are detected at the Bass Module Output the Bass Line Out EQ will be set to the B2 curve with the B2 switch set to Normal.
- — Source Craig-at-Bose
No cable plugged into the Bass Line out
| B2 Bass Modules connected | Output | EQ | Bass Signal Gain | Notes |
|---|---|---|---|---|
| 1 | 40Hz-200Hz | B2 specific EQ as set by the B2 Bass Level Switch ( + Normal - ) is present at the Bass Module Out and the Bass Line Out | Reference Level | There are three B2 EQ settings possible using the B2 Bass Level Switch ( + Normal - ) |
Cable connected to the Bass Line Out
| B2 Bass Modules connected | Output | EQ | Bass Signal Gain | Notes |
|---|---|---|---|---|
| 0 | 40Hz-200Hz | B2 EQ as though B2 attached and B2 Bass Level Switch set to Normal position | Reference Level | This presents the B2 EQ with the B2 Bass Level Switch set to the Normal position. (No resistance detected between the 2+ and 2- pins of an NL4 plug) |
| 1 | 40Hz-200Hz | B2 specific EQ as set by the B2 Bass Level Switch ( + Normal - ) is present at the Bass Module Out and the Bass Line Out |
Reference Level | If you are using a PackLite® power amplifier model A1 Extended Bass Package this is a total of two B2s (one on the A1 and one on the Power Stand) |
Powered Subwoofers
The Model II is an integrated system that supports Bose B1 and B2 bass modules. Connecting powered subwoofers to the Model II Power Stand Bass Line Out is not supported because EQ curves for the B1 or B2 are present at the Bass Line Out. This may or may not result in good results with a powered subwoofer.
If you want to use a powered subwoofer, connect your signal source to the subwoofer and connect the subwoofer high pass filter output to the L1® (any model).
Output if no B1 Bass Modules detected at the Bass Module Output (powered output) the signal at the Bass Line Out is:
- 40-180 Hz with B2 EQ applied if you have the current L1® Model II Power Stand Firmware Updates
- If you do not have the current firmware the signal at the Bass Line Out is: 40-180 Hz Bandpass (that is: NO B1 EQ) [2]
- The system Crossover for the Cylindrical Radiator®s is 180 Hz
If one or two B1 Bass Modules is detected or emulated using resistors across NL4 2+ / 2- pins
- 40-180 Hz with different EQ curves
- The system Crossover for the Cylindrical Radiator®s is 180 Hz
For details on how to do this see: Activating B1 EQ Curves and Using a Different Sub
- Note — Operation of the B2 with the Model I/Classic is only supported with the B2 Bass Level Switch set to Normal.
- See: Is the B2 Bass Module Compatible with the L1® Classic or Model I
Bass Module Output (powered output)
For the sake of those attaching third party passive speakers (an unsupported application), the output characteristics are the same as for the the B2 Bass Module (section immediately above).
- ↑ MikeZ-at-Bose talks about L1® Model I in the Bose Community Message Boards
- ↑ Hilmar-at-Bose intelligent crossover
A) When there are no bass sources attached, lower the crossover and try to get as much bass out of the L1 as is reasonably feasible (110 Hz) in this case
B) If there are bass sources bring the crossover up to 180 Hz (where the L1 starts to get really efficient) AND adjust the bass gain so that the overall spectral balance is maintained no matter how many bass sources are attached.
Original Source - Hilmar-at-Bose
Use the proper cables
Warning - Use Blue B1 Cables NL4 cables with your L1 Classic / L1 Model I / L1 Model 1S L1 Model II
If you are using a B1 Bass Module with your Power Stand it is ESSENTIAL for proper operation that you use the BLUE cable supplied with the B1 Bass Module or B2 Bass Module. This is required so that the L1 Classic/L1 Model I/L1 Model 1S/L1 Model II Power Stand can correctly identify when there are bass modules connected to it and if so, how many.
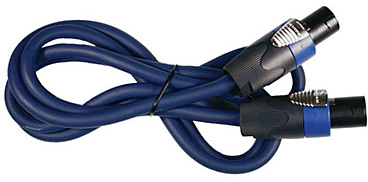
Please click the picture above for ordering information.
- Note
- The B2 Bass Level Switch will not change the sound of the B2 Bass Module if you are not using the correct cable.
See: PS1 Power Stand / Bass Line Out for details about how the Power Stand adapts to the number of bass modules are connected to it.
You may also use high quality NL4 cables (four conductor cables).
Alternate and longer cables for B1s
Crossover
If you don't plug in a B1 and connect a powered sub to the bass line out, the cross over will be at 180 Hz and the "Bass Line Out" will deliver a flat 40Hz to 180 Hz signal. The 110 Hz is only used when there is no B1 AND nothing connected to the "Bass Line Out". In this case we assume that the L1s have to provide full bandwidth to the best of their ability.[1]
Connecting Other Equipment (inputs)
Connector Types
This section is an overview of connections you can make from a other equipment (mixer, music storage device, etc.) to the PS1 Power Stand (Classic) / Model I.
Audio equipment inputs and outputs are either balanced (three conductors) or unbalanced (two conductors). Balanced signals have the potential to be more resistant to hum and noise.
In addition different kinds of connectors are used for the input and outputs.
Here are the main types:
- XLR, male (prongs) and female (receptacles for prongs), usually balanced
- ¼ inch, male (shaft) and female (receptacle for shaft), balanced (tip-ring-sleeve on shaft) or unbalanced (tip-sleeve)
- RCA, male and female, always unbalanced
- 1/8 inch mini (male and female), balanced (tip-ring-sleeve on shaft) or unbalanced (tip-sleeve)
Cable Types and Connection to the PS1
Note: The PS1 Power Stand (Classic) / Model I Channels 1 and 2 ¼ inch inputs are unbalanced. There are many kinds of cables that will work but no connection that uses the ¼ input will be balanced because the internal connection is unbalanced.
XLR (balanced) to XLR (balanced)

This is the same as a microphone cable but is also used to connect a balanced line output to a balanced line input.
¼ Inch Tip-Sleeve (unbalanced) to ¼ Inch Tip-Sleeve (unbalanced)
![]()
These cables are prone to noise if you are running long lines (greater than 20 feet). Consider using shorter cable runs, or running a balanced line. You can use a short unbalanced cable to a DI or Direct Box (to convert from unbalanced to balanced) and run an XLR to XLR cable from the Direct Box to the Bose System.
¼ Inch Tip-Ring-Sleeve (balanced) to ¼ Inch Tip-Sleeve (unbalanced)

No issues.
¼ Inch Tip-Ring-Sleeve (balanced) to ¼ Inch Tip-Ring-Sleeve (balanced)
![]()
No issues but no better than a simple ¼ Inch Tip-Sleeve to Tip-Sleeve cable because the ¼ Inch input on the Bose System is Tip-Sleeve (unbalanced).
XLR (balanced) to ¼ Inch Tip-Ring-Sleeve (balanced)

No issues but because all four ¼ Inch inputs on the PS1 inputs are unbalanced, this cable provides no advantage over an unbalanced cable.
XLR Female to ¼ Inch Tip-Sleeve
![]()
No particular benefit to using this kind of cable as compared to the one above.
¼ Inch Tip-Ring-Sleeve (balanced) to XLR Male (balanced)

Specialized instrument cable (probably Guitar)
This is probably a specialty cable that was supplied with the instrument. It is intended for a microphone input on a mixer and will work fine with the Bose System.
XLR Female (balanced) to ¼ Inch Tip-Sleeve (unbalanced)
![]()
This is often used as a Microphone adaptor cable. Can be problematic. Sometimes you see these being used for home karaoke machines and are not suitable for professional use. The ¼ Inch input was designed for high impedance line-level inputs and may not provide enough gain for a microphone which is probably low impedance.
¼ Inch Tip-Sleeve (unbalanced) to XLR Male (balanced)
![]()
This is probably an Instrument adaptor. May be problematic. You are probably running an impedance mismatch (high impedance from the instrument to low impedance balanced XLR).
Things you can do if the signal is too high for PS1
- check to see if there is a 'pad' built-in on the mixer (most Mackie mixers have this on the panel beside the XLR outs)
- turn down the main outs on the mixer
- use a 20 dB Pad (attenuator) between the mixer and the Bose System.
PS1 Connections Lines Out
Line Out (XLR balanced) for Channels 1 and 2
- post trim (+4 dBu nominal)
Insert Send
- post trim,
- post channel volume
SPDIF Data OUT
- Post trim
- Input Trim
- R1 Remote Channel volume
- Insert returns
- Pre
- Preset
- Tone controls
- R1 Remote Master volume.
- SPDIF is channels 1 & 2 only.
The Data OUT is a SPDIF output with a sampling rate of 48KHz.
Set your recording software as below if given the options
- 24 Bit
- 48 KHz
- S/PDIF (RCA)
See: Recording Through the PS1 — Message Board Discussion.
Line Outs (XLR balanced) for Channels 1 and 2
- post trim (+4 dBu nominal)
For Channels One or Two you can run an XLR cable to the House or recording console like this. The outputs are post-trim (+4 dBu nominal).

This is not suitable for connection to another PS1 Power Stand (Classic) / Model I as the output level is too high for a PS1 Power Stand (Classic) / Model I Channel 1 or 2 input. If you want to connect one L1® to another please see: PS1 Powerstand / Daisy Chain
Line Out from Insert Point
- access from the "ring" connection at the Insert Point
- post trim
- post R1 Remote Channel Level
For Channels One or Two insert a 1/4 inch cable halfway into the Insert jack to get a signal that is controlled by the volume control on the Remote. This is also known as the Half Insert method. For more information about 1/4 cables see Tip Ring Sleeve connections. The rectangular box shown below the input panel is a DI, used to output the signal to a console or house system.

Line Out from Channels 3 or 4
There is no output from the PS1 Power Stand (Classic) / Model I for Channels 3 or 4. To share inputs with an external system use a DI.

Lower Section Only
Q: Can I run with only the lower section of the L1 Cylindrical Radiator® loudspeaker?
A: From a technical standpoint it is safe to operate the system with only the lower section of the L1® Model I , however the spatial and spectral performance of will be greatly reduced, so this has only a very limited application. - Hilmar-at-Bose[1]
Correcting the Tone
Try inserting a ¼ inch connector in the Bass Line Out of the Power Stand. This will cause the internal logic to reduce the Bass output, and this should give you a better overall tonal balance when running with only one section of the L1® Model I.
For very detailed notes about this see Half Stack.
Physical Features
Boot

full sized version of the image
The 'flange' at the back edge of the boot (appears at the bottom of the silver colored recess). This prevents you from accidentally inserting the L1 Classic Cylindrical Radiator into the L1 Model I Power Stand.
No Sound
Damaged Connections in the L1® boot
Inspecting for damaged connectors in the PS1 Powerstand boot.

Height
The fully assembled height of the L1 Model I is 83 inches. (211 cm)
Clearance required to assemble the system is approximately 86.5 inches. (220 cm)
Orange L1® Markers
The L1 Model I has orange L1® Markings on the Power Stand and the L1 Cylindrical Radiator® loudspeaker sections. The other Models do not have these.

Power Stand
L1 Cylindrical Radiator® loudspeaker sections

Compatibility with Other Members of the L1® Family of Products
Cylindrical Radiator®s
Cylindrical Radiator®s are not interchangeable across models
Specifically (and without exception)
- The Cylindrical Radiator speaker sections of the L1 Classic, the L1 Model I and L1 Model 1S and the L1 Model II are not compatible with each other.
- The Cylindrical Radiator speaker sections of the L1 Classic can only be used with the Classic PS1 power stand (no orange markings on the input/output panel).
- The Cylindrical Radiator speaker sections of the L1 Model I (orange markings on the back of both sections) can only be used with the Model I PS1 power stand (orange markings on the input/output panel).
- The Cylindrical Radiator speaker sections of the L1 Model II can only be used with the L1 Model II power stand.
- The Cylindrical Radiator speaker sections of the L1 Model 1S can only be used with the L1 Model 1S power stand.
T1 ToneMatch® Audio Engine, T4S/T8S ToneMatch® Mixers
- The ToneMatch mixers can be used with the
PackLite® power amplifier Model A1
- The PackLite® power amplifier model A1 can be used with
B1 Bass Module
- The B1 Bass Module can be used with the
B2 Bass Module
- The B2 Bass Module can be used with the
- L1 Classic Normal Mode only
- L1 Model I Normal Mode only
- L1 Model 1S all modes
- L1 Model II all modes but L1® Model II Power Stand Firmware version 1.4 or later required
Using the Model I with the T1 ToneMatch Audio Engine
Connection to L1 Model I / L1 Classic with NO Remote
Here are details on how to connect a T1 ToneMatch Audio Engine to a L1 Classic or L1 Model I

Notes:
The recommended setting for Channel 3 or Channel 4 Level is 3 (see below).
With this setting you will not distort or clip the Model 1 no matter what you do on the T1. You can even use the Model 1 without the remote. More on this later.
For these conditions:
- T1 ToneMatch® Audio Engine going into L1® Model I/L1® Classic into Channel 3/4
- Balanced OR Unbalanced 1/4" cable
- Remote unplugged, OR, master volume on Remote at 12 o clock
- Proper gain staging required on the T1® itself
This will give you the same gain going into the L1® Model I/L1® Classic as if you were going through the ToneMatch® input on a L1 Model II.
If you are using the Remote on your L1® Model I/L1® Classic, then you will need to compensate a bit. If you are running the Remote master volume at max, then stick with 2 on Ch 3/4. When using a T1®, run the master volume of the R1 above 12 o'clock .
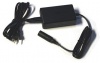
This is the power supply for the ToneMatch mixers (T1 ToneMatch Audio Engine and T4S/T8S ToneMatch® Mixers).
The T8S ships with a ToneMatch power supply because the T8S cannot draw power from an L1 Model 1S or L1 Model II Power Stand.
You will need the ToneMatch power supply to power your T1 or T4S mixer when running with an L1 Classic, L1 Model I, L1 Compact, S1 Pro System or non-Bose equipment. You will need a one of these if you have two ToneMatch mixers running into a single L1® Model II or L1® Model 1S. — details below the picture.
If you connect your T1 ToneMatch Audio Engine or T4S mixer to a L1 Model II or L1 Model 1S then the T1 ToneMatch® Audio Engine or T4S draws its power through the ToneMatch cable.
If you connect your ToneMatch mixer to an an L1 Classic, L1 Model I, L1 Compact or S1 Pro System or non-Bose equipment then you will need the ToneMatch power supply
If you are attaching two ToneMatch mixers to a single L1® Model II or L1 Model 1S then you will need this power supply to support the second ToneMatch mixer - the one connected to the Power Stand Analog Input.
See: Connecting Two T1®s to a Model II for details.
Connection to L1 Model I / L1 Classic with Remote
If you are using Channel 3 for the T1 ToneMatch® Audio Engine AND you want to use the PS1 Power Stand Channels 1 or 2 or 4 for other inputs, then you will want to connect the R1 Remote to the PS1 Power Stand.

Excerpt from the T1 ToneMatch Audio Engine Manual - page 20 - Note: this recommended input setting is now 3. See the note above.

With this setting you will not distort or clip the Model 1 no matter what you do on the T1. You can even use the Model 1 without the remote.
The T1 ToneMatch Audio Engine controls are a heck of a lot faster then the R1 controls. There is no perceivable lag.
Input setting recommendation now 3
MikeZ-at-Bose wrote[2] Bill-at-Bose and I have revisited this.
For these conditions:
- T1 ToneMatch® Audio Engine going into L1® Model I/L1® Classic into Channel 3/4
- Balanced OR Unbalanced 1/4" cable
- Remote unplugged, OR, master volume on Remote at 12 o clock
- Proper gain staging required on the T1® itself
I'm going to revise the original recommendation of 2 for Ch 3/4 to 3 - under the above conditions.
This will give you the same gain going into the L1® Model I/L1® Classic as if you were going through the ToneMatch® input on a L1 Model II.
If you are using the Remote on your L1® Model I/L1® Classic, then you will need to compensate a bit. If you running the Remote master volume at max, then stick with 2 on Ch 3/4. I would recommend against running the master volume below 12 o'clock when using a T1®.
Hopefully this is helpful - please ask away with any questions for clarification.
MikeZ
This is the power supply for the ToneMatch mixers (T1 ToneMatch Audio Engine and T4S/T8S ToneMatch® Mixers).
The T8S ships with a ToneMatch power supply because the T8S cannot draw power from an L1 Model 1S or L1 Model II Power Stand.
You will need the ToneMatch power supply to power your T1 or T4S mixer when running with an L1 Classic, L1 Model I, L1 Compact, S1 Pro System or non-Bose equipment. You will need a one of these if you have two ToneMatch mixers running into a single L1® Model II or L1® Model 1S. — details below the picture.
If you connect your T1 ToneMatch Audio Engine or T4S mixer to a L1 Model II or L1 Model 1S then the T1 ToneMatch® Audio Engine or T4S draws its power through the ToneMatch cable.
If you connect your ToneMatch mixer to an an L1 Classic, L1 Model I, L1 Compact or S1 Pro System or non-Bose equipment then you will need the ToneMatch power supply
If you are attaching two ToneMatch mixers to a single L1® Model II or L1 Model 1S then you will need this power supply to support the second ToneMatch mixer - the one connected to the Power Stand Analog Input.
See: Connecting Two T1®s to a Model II for details.
Bose L1® Model I
URL http://worldwide.bose.com/pro/en_us/web/l1_model1/page.html
Release Date: 2007-03-29
Height: 82.5 inches
Weight: 97 pounds (includes B1)
Power Stand Depth:26 inches
Power Stand Width:26 inches
Description: Bose Spatial Dispersion™ system technology delivers sound evenly across the stage and throughout the audience. The L1 Model I and L1 Model II systems project sound waves forward and to the sides at nearly 180 degrees and with little vertical dispersion, reducing unwanted room reverberation. Amplified sound is spread more evenly across the stage and into the audience. The volume level drops off much more slowly than with a conventional speaker.
Description: High-performing, powered, portable two-way loudspeaker system with a 160° H x 0° V nominal dispersion designed for the production and reproduction of live music, music playback, speeches and A/V sound reproduction
Spatial Dispersion™ loudspeaker technology produces wide, uniform sound coverage throughout the entire listening area—even off to the extreme sides
Consistent front-to-back coverage, 24 drivers mounted in a vertical line array design produce a loss of only 3 dB in sound pressure level per doubling in distance
Integrated ToneMatch® presets for popular vocal microphones and instruments
Integrated 4-channel mixer with wired remote control
Lightweight, interlocking components for easy transport
Expandable bass design supports the use of multiple B1 bass modules