Difference between revisions of "T8S to One L1 Model II"
m (→Connecting the T8S to the {{Model II}}) |
m |
||
| (10 intermediate revisions by the same user not shown) | |||
| Line 1: | Line 1: | ||
| + | {{T8S icon}}{{Model II icon}} | ||
| + | <div class="tocdiv"> | ||
| + | <div>__TOC__</div> | ||
| + | <div><h2>Introduction</h2> | ||
| + | Connect a {{T8S}} to a single {{Model II}} or {{Model 1S}} | ||
| + | |||
| + | Connect the ToneMatch Power Supply to the {{T8S}} for power. | ||
| + | |||
| + | Always use the ToneMatch Power Supply connected to the {{T8S}} ToneMatch port. | ||
| + | |||
| + | Do not use the ToneMatch port to connect to a {{Model II}}. The {{T8S}} draws more power than the {{Model II}} can supply. | ||
| + | </div> | ||
| + | </div> | ||
| + | |||
| + | |||
Connect the ToneMatch Power Supply to the {{T8S}} for power. | Connect the ToneMatch Power Supply to the {{T8S}} for power. | ||
== Connect the T8S to {{Model II}} == | == Connect the T8S to {{Model II}} == | ||
| + | === 1/4 inch (6.3 mm) Tip-Ring-Sleeve Output=== | ||
[[File:T8S to L1 Model II x 1.png|600px]] | [[File:T8S to L1 Model II x 1.png|600px]] | ||
| Line 8: | Line 24: | ||
OR | OR | ||
| + | |||
| + | === XLR Output === | ||
[[File:T8S to L1 Model II x 1 XLR.png|600px]] | [[File:T8S to L1 Model II x 1 XLR.png|600px]] | ||
| Line 14: | Line 32: | ||
Balanced XLR |Source= [[T8S]] |Target= {{Model II}} | Balanced XLR |Source= [[T8S]] |Target= {{Model II}} | ||
}} | }} | ||
| + | |||
| + | {{T8S Mono Output}} | ||
| + | |||
== {{Model II}} Analog Input == | == {{Model II}} Analog Input == | ||
| Line 28: | Line 49: | ||
[[Image:Model II Analog Input Trim.png]] | [[Image:Model II Analog Input Trim.png]] | ||
| − | # Set the '''Trim''' control on the power stand to the | + | # Set the '''Trim''' control on the power stand to the 9:00 o'clock position.<br>[[File:L1 Model II Analog Input for T4S T8S.png]] |
# Connect the {{T8S}} Main Output to the Analog Input | # Connect the {{T8S}} Main Output to the Analog Input | ||
# Adjust the volume of the {{T8S}} Main Output to the maximum output without distortion. This is probably between 10:00 o'clock and 12:00 o'clock on the Master Output | # Adjust the volume of the {{T8S}} Main Output to the maximum output without distortion. This is probably between 10:00 o'clock and 12:00 o'clock on the Master Output | ||
| − | # While playing the source, increase the '''Trim''' level so that the '''Signal/Clip''' indicator glows green or yellow. This will probably be around 9:00-11:00 o'clock | + | <!-- # While playing the source, increase the '''Trim''' level so that the '''Signal/Clip''' indicator glows green or yellow. This will probably be around 9:00-11:00 o'clock on the {{model II}} analog input trim--> |
# If the '''Signal/Clip''' indicator glows red, decrease the '''Trim''' level so that it glows only green or yellow. | # If the '''Signal/Clip''' indicator glows red, decrease the '''Trim''' level so that it glows only green or yellow. | ||
| − | [[Image:Model II Analog Input | + | [[Image:L1 Model II Analog Input for T4S T8S.png|Model II Analog Input]] |
---- | ---- | ||
[[Category:T8S]] | [[Category:T8S]] | ||
[[Category:Model II]] | [[Category:Model II]] | ||
Latest revision as of 10:03, 9 May 2022
Introduction
Connect a T8S ToneMatch mixer to a single L1 Model II or L1 Model 1S
Connect the ToneMatch Power Supply to the T8S ToneMatch mixer for power.
Always use the ToneMatch Power Supply connected to the T8S ToneMatch mixer ToneMatch port.
Do not use the ToneMatch port to connect to a L1 Model II. The T8S ToneMatch mixer draws more power than the L1 Model II can supply.
Connect the ToneMatch Power Supply to the T8S ToneMatch mixer for power.
Connect the T8S to L1 Model II
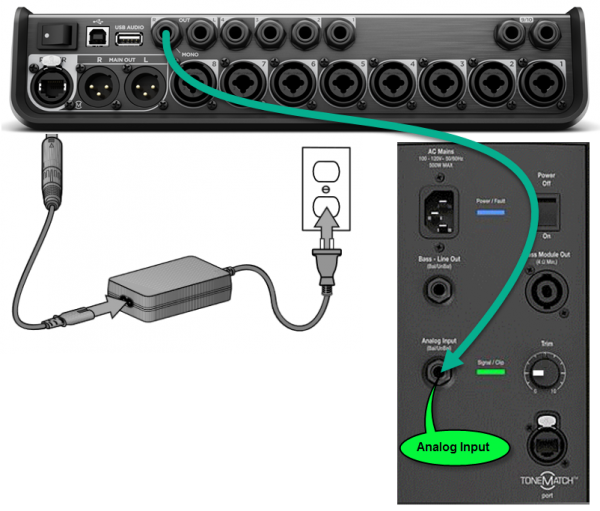
1/4 inch (6.3 mm) Tip-Ring-Sleeve Output
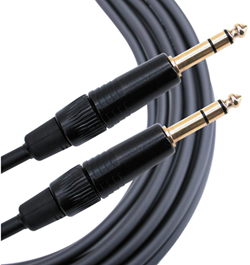
The output from the T8S ToneMatch mixer is a balanced mono 1/4 inch (6.35 mm) Tip-Ring-Sleeve and the input on the L1 Model II is a balanced mono 1/4 inch (6.35 mm) Tip-Ring-Sleeve so use a cable like this.
1/4" TRS Balanced Patch Cable (audiopile.net)
OR
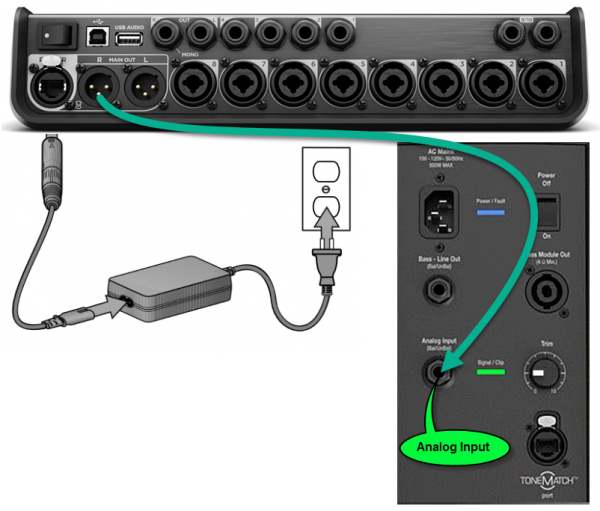
XLR Output
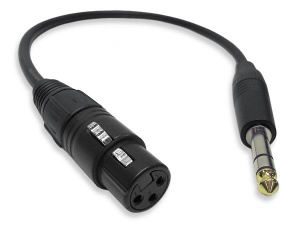
The output from the T8S is a balanced mono XLR and the input on the L1 Model II is a balanced mono 1/4 inch (6.35 mm) Tip-Ring-Sleeve so use a cable like this.
XLR Female to 1/4" Male TRS Cable
Mono Output
On the back of ToneMatch Mixer[1]s, there is an indication below the Right output (MONO).
- Please note
- There is no hardwired summed mono output on the ToneMatch mixers. Any input signal that is panned hard Left will not be heard through the Right output. To get a mono output please see below.
General Information
As you move the pan control away from the center, the sound level increases slightly in one direction and decreases in the other. If you pan inputs hard to one side (e.g., Right) and the Right output will be slightly louder (theoretically, up to +3 dB louder) than if you had panned the inputs up the middle. And panned hard Right - there will be no signal at the Left Output.
T8S ToneMatch® mixer
- Pan all inputs hard RIGHT
- Use the ¼ inch (6mm) Right Output to a powered loudspeaker (e.g. S1 Pro, L1® Compact, F1 Model 812). For best results use a ¼ inch (6mm) jack Tip-Ring-Sleeve cable
OR
- Use the XLR Right Output to powered a loudspeaker (e.g. S1 Pro, F1 Model 812). or L1® Compact with XLR to ¼ inch (6mm) jack Tip-Ring-Sleeve.
- Note
- Anything panned hard LEFT will not be heard at the RIGHT Output.
Mono using Aux Output
You can create a summed mono output by directing your input channels (1-8) to an Aux Output. See Aux Outputs for details.
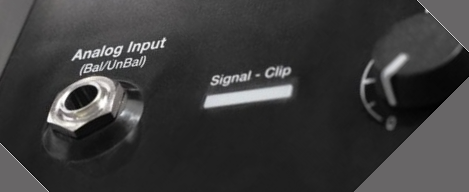
L1 Model II Analog Input
The Analog input is a ¼ inch balanced input jack.
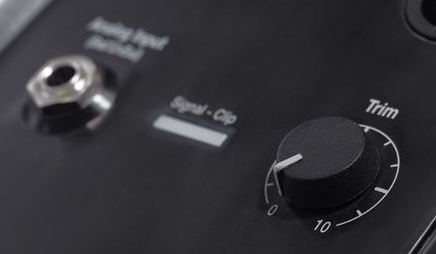
Analog input trim (volume, or gain) control
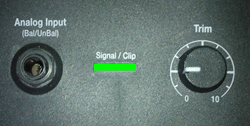
Set the L1 Model II Analog Input trim control to match the output of the T8S ToneMatch mixer.
- Set the Trim control on the power stand to the 9:00 o'clock position.
- Connect the T8S ToneMatch mixer Main Output to the Analog Input
- Adjust the volume of the T8S ToneMatch mixer Main Output to the maximum output without distortion. This is probably between 10:00 o'clock and 12:00 o'clock on the Master Output
- If the Signal/Clip indicator glows red, decrease the Trim level so that it glows only green or yellow.

