Difference between revisions of "Sub1 and Sub2 Technical Training"
m |
m |
||
| (5 intermediate revisions by the same user not shown) | |||
| Line 1: | Line 1: | ||
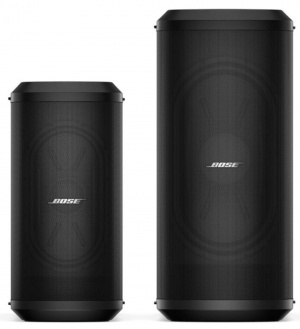
[[File:Sub1 Sub2.jpg|link=L1 Pro|thumb|Bose Sub1 and Sub2]] | [[File:Sub1 Sub2.jpg|link=L1 Pro|thumb|Bose Sub1 and Sub2]] | ||
| − | <html> | + | <html> <!-- |
<iframe width="560" height="315" src="https://www.youtube.com/embed/kQ4Pon0DLcs" title="YouTube video player" frameborder="0" allow="accelerometer; autoplay; clipboard-write; encrypted-media; gyroscope; picture-in-picture" allowfullscreen></iframe> | <iframe width="560" height="315" src="https://www.youtube.com/embed/kQ4Pon0DLcs" title="YouTube video player" frameborder="0" allow="accelerometer; autoplay; clipboard-write; encrypted-media; gyroscope; picture-in-picture" allowfullscreen></iframe> | ||
| + | --> | ||
| + | </html> | ||
| − | + | === Documentation === | |
[[Media:Sub1-Sub2 Owners Guide.pdf|Sub1/Sub2 Owners Guide]] | [[Media:Sub1-Sub2 Owners Guide.pdf|Sub1/Sub2 Owners Guide]] | ||
| Line 10: | Line 12: | ||
| − | + | === {{S1 Pro}} === | |
| − | + | {{Sub with S1Pro}} | |
| − | |||
| − | |||
---- | ---- | ||
[[Category:L1 Pro]] | [[Category:L1 Pro]] | ||
[[Category:Sub]] | [[Category:Sub]] | ||
[[Category:S1 Pro]] | [[Category:S1 Pro]] | ||
| + | |||
| + | === Cooling === | ||
| + | ;Question: | ||
| + | How are the Sub1/Sub2 cooled? | ||
| + | ;Answer: | ||
| + | Sub1 and Sub2 have extruded aluminum heat sinks mounted to the backside of the I/O panel. This pulls heat out of the electronics and transfers some to the air moving through the acoustic volume of the sub and helps to cool.<ref>[https://www.facebook.com/groups/BoseL1/permalink/10159635582172446/?comment_id=10159637158957446 Bose Professional]</ref> | ||
Latest revision as of 18:34, 29 July 2022
Documentation
S1 Pro system
Preferred Method
Connections with Sub1 or Sub2 and the S1 Pro system
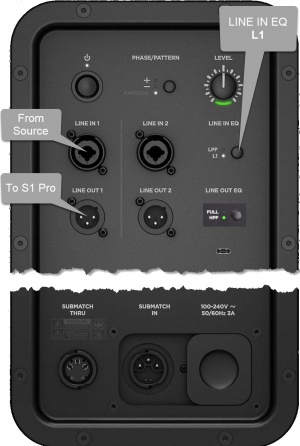
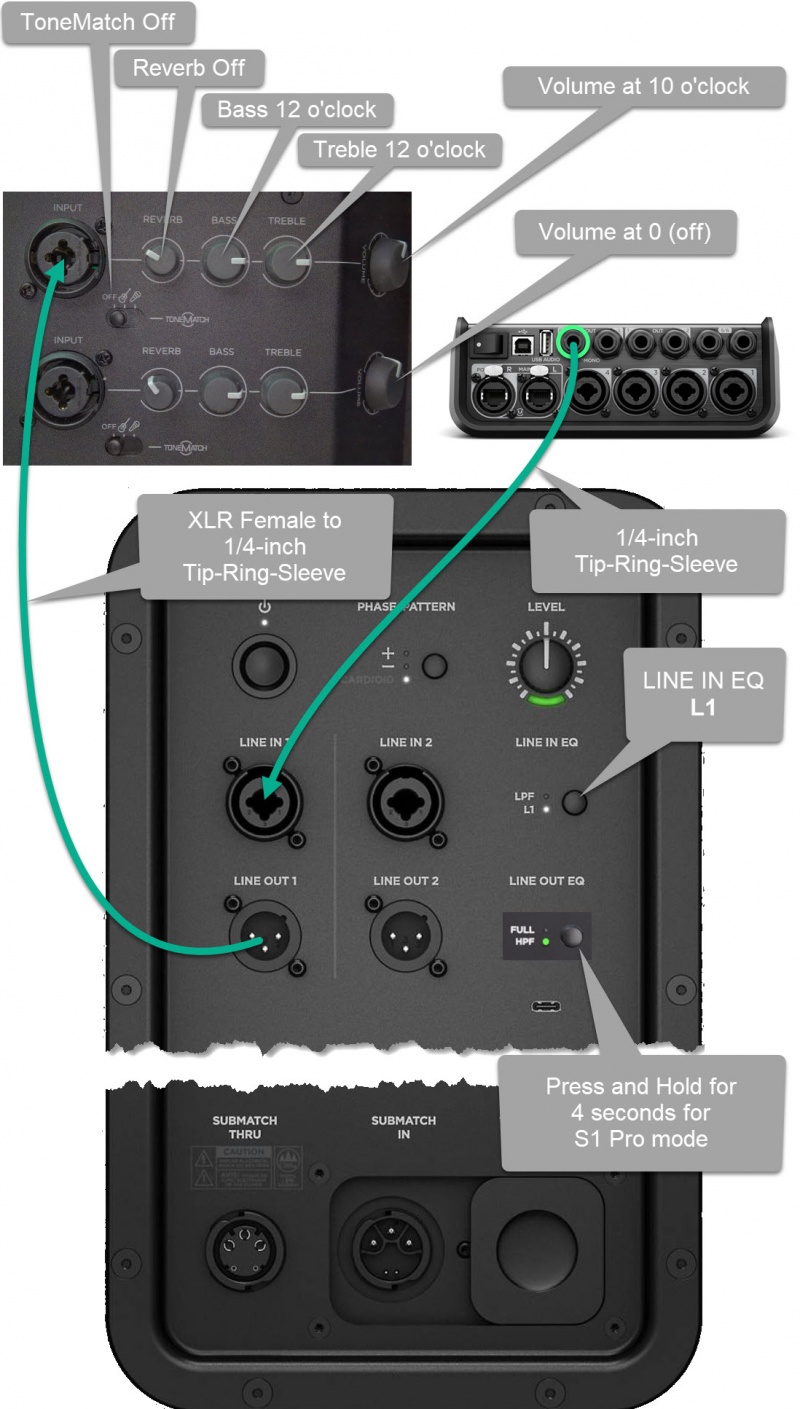
For best results, the signal flow should go from
- The signal source (e.g., ToneMatch Mixer[1], mixer, DJ console) output to
- The Sub1 or Sub2 subwoofer LINE IN 1 ()
- The Sub1 or Sub2 subwoofer LINE OUT 1 to
- The S1 Pro system with channel volume set to 10 o'clock.
- Note these settings on the Sub1 or Sub2
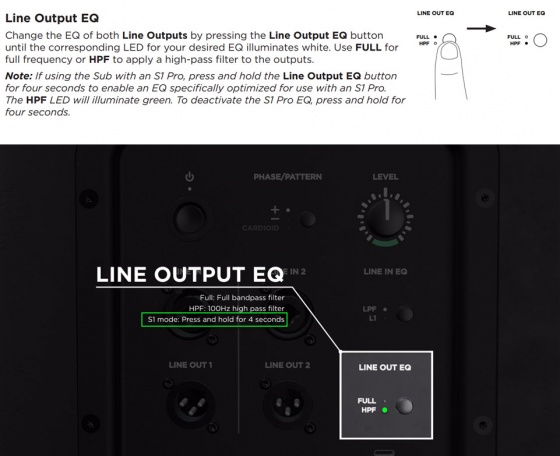
- 👉 Set LINE IN EQ to L1
- 👉 Set LINE OUT EQ to S1 (Press and hold LINE OUT EQ button for 4 seconds)
Set up this way,
- The Sub1 or Sub2 handles frequencies from 40 Hz (Sub1) 37 Hz (Sub2) to 150 Hz
- The S1 Pro system handles frequencies above 150 Hz
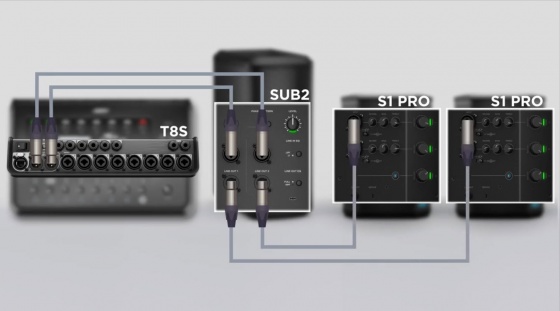
- Mono - Example with a T4S as the audio source
- Start with the Volume on S1 Pro and Sub, as shown. Adjust as necessary from there.
The picture shows a stereo setup. The signal flow is from left to right.
- Recommended cable
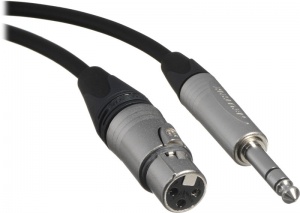
Use an XLR to 1/4 inch (6.35 mm) Tip-Ring-Sleeve cable for best results.
If you use an XLR to XLR cable, the signal may be too hot for the S1 Pro system.
Alternative Connection
- Can I connect the S1 Pro Line Out to the Sub?
The method described above is preferred, but you can use the S1 Pro system as the sound source (e.g., microphone and guitar and backing tracks via Bluetooth) Note the following:
- The S1 Pro system will sound the same as without the subwoofer (62 Hz - 17 kHz)
- The Sub1 or Sub2 will cover from 40 Hz (Sub1) 37 Hz (Sub2) to 150 Hz
- You will be able to push S1 Pro system harder (louder) if you route the signal as described at the top of this article
Cooling
- Question
How are the Sub1/Sub2 cooled?
- Answer
Sub1 and Sub2 have extruded aluminum heat sinks mounted to the backside of the I/O panel. This pulls heat out of the electronics and transfers some to the air moving through the acoustic volume of the sub and helps to cool.[2]
