Difference between revisions of "Template:T8S to L1 Pro"
m |
m |
||
| (13 intermediate revisions by the same user not shown) | |||
| Line 1: | Line 1: | ||
| − | <noinclude></noinclude> | + | <noinclude>__TOC__</noinclude> |
=== T8S to Single {{L1P}}=== | === T8S to Single {{L1P}}=== | ||
There is a single ToneMatch port on the {{T8S}}. You can use this | There is a single ToneMatch port on the {{T8S}}. You can use this | ||
* To connect to an {{L1P}} ToneMatch Port using a [[ToneMatch Cable]] [[File:ToneMatch Cable.jpg|thumb|ToneMatch cable|link=ToneMatch_Cable]] or Network Cable [[File:Cat5.jpg|thumb|Network cable|link=ToneMatch_Cable#CAT5_or_CAT6_or_CAT7_or_CAT8_cable]] | * To connect to an {{L1P}} ToneMatch Port using a [[ToneMatch Cable]] [[File:ToneMatch Cable.jpg|thumb|ToneMatch cable|link=ToneMatch_Cable]] or Network Cable [[File:Cat5.jpg|thumb|Network cable|link=ToneMatch_Cable#CAT5_or_CAT6_or_CAT7_or_CAT8_cable]] | ||
| + | ** Note: The maximum length of the network cable is 50 feet. | ||
** Note: This is the mixer LEFT output. Anything panned hard RIGHT will not be heard. | ** Note: This is the mixer LEFT output. Anything panned hard RIGHT will not be heard. | ||
All of the Analog outputs (XLR or 1/4 inch (6.3 mm) Tip-Ring-Sleeve) still function while using the ToneMatch Port. | All of the Analog outputs (XLR or 1/4 inch (6.3 mm) Tip-Ring-Sleeve) still function while using the ToneMatch Port. | ||
| Line 8: | Line 9: | ||
[[File:T8S ToneMatch Port to L1 Pro32.jpg]] | [[File:T8S ToneMatch Port to L1 Pro32.jpg]] | ||
| − | To run stereo, connect the second powered loudspeaker to one of the {{T8S}} RIGHT Outputs (XLR or 1/4 inch (6.3 mm) Tip-Ring-Sleeve) to the second L1 Pro Input three. | + | To run stereo, connect the second powered loudspeaker to one of the {{T8S}} RIGHT Outputs (XLR or 1/4 inch (6.3 mm) Tip-Ring-Sleeve) to the second L1 Pro Input three. You can use an XLR to XLR cable. However, you may need to turn down the channel volume level to match the input sensitivity to the signal level. |
| − | [[File:XLR Female to TRS.jpg| | + | [[File:XLR Female to TRS.jpg|200px]] |
| Line 17: | Line 18: | ||
* ToneMatch port on the {{T8S}} to [[ToneMatch Power Supply]] for power and use the Analog Outputs (XLR or 1/4 inch (6.3 mm) Tip-Ring-Sleeve) to the L1 Pro Input three. DO NOT USE an XLR to XLR cable. The output of the {{T8S}} outputs is too hot for the L1 Pro XLR inputs. | * ToneMatch port on the {{T8S}} to [[ToneMatch Power Supply]] for power and use the Analog Outputs (XLR or 1/4 inch (6.3 mm) Tip-Ring-Sleeve) to the L1 Pro Input three. DO NOT USE an XLR to XLR cable. The output of the {{T8S}} outputs is too hot for the L1 Pro XLR inputs. | ||
| − | [[File:XLR Female to TRS.jpg| | + | [[File:XLR Female to TRS.jpg|200px]] |
| + | === {{T8S}} to Two {{L1P}} Stereo === | ||
| + | ==== ToneMatch Port and 1/4 inch (6.3 mm) ==== | ||
| + | [[File:T8S ToneMatch Port to L1 Pro32 x2.jpg|800px]] | ||
| − | === {{T8S | + | ==== 1/4 inch (6.3 mm) Tip-Ring-Sleeve ==== |
| + | {{:T8S to 2 L1 Pro 1/4}} | ||
| + | ==== XLR ==== | ||
| + | #Connect your audio sources (instruments or microphones) to the inputs on the ToneMatch mixer | ||
| + | #Connect the T8S power supply from the Power port of the T8S to a power outlet | ||
| + | #Connect an XLR cable from the Main Out R port of the mixer to the right-side L1 system | ||
| + | #*Tip: If connecting to channels 1 or 2 on the second system, set the ToneMatch selector for that channel to OFF | ||
| + | #Connect an XLR cable from the Main Out L port of the mixer to the left-side L1 system. | ||
| + | #*Tip: If connecting to channels 1 or 2 on the second system, set the ToneMatch selector for that channel to OFF. | ||
| + | <ref>[https://support.bose.com/s/display-articles?productId=01t8c00000OydHYAAZ&articleId=ka08c000001gBWrAAM&language=en_US Bose Support Article]</ref> | ||
| + | === {{T8S}} to Two Single {{L1P}} Mono Daisy Chain === | ||
| + | Connect the {{T8S}} to the first {{L1P}} | ||
| − | + | [[File:T8S ToneMatch Port to L1 Pro32.jpg|400px]] | |
| − | {{L1 Pro Daisy Chain}} | + | |
| + | Then connect the output of the first {{L1P}} to the second {{L1P}} | ||
| + | |||
| + | {{:L1 Pro Daisy Chain}} | ||
| Line 31: | Line 49: | ||
[[Category:T8S]] | [[Category:T8S]] | ||
[[Category:L1 Pro]] | [[Category:L1 Pro]] | ||
| + | [[Category:Connections]] | ||
Latest revision as of 11:59, 10 September 2024
Contents
T8S to Single L1 Pro[1]
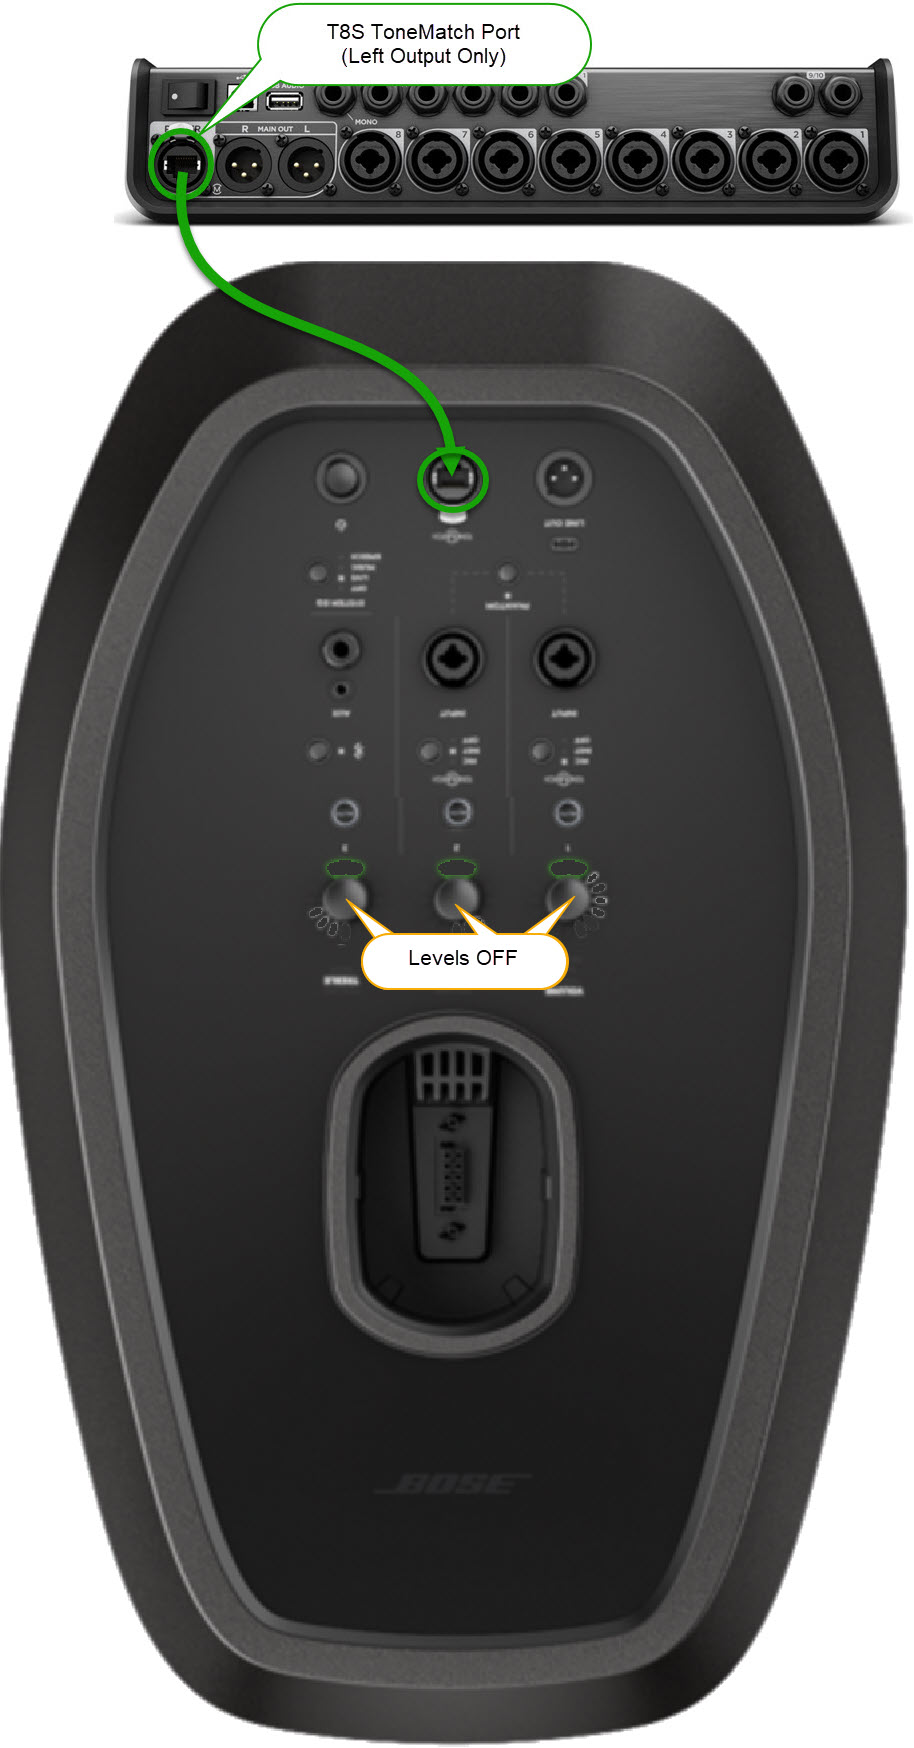
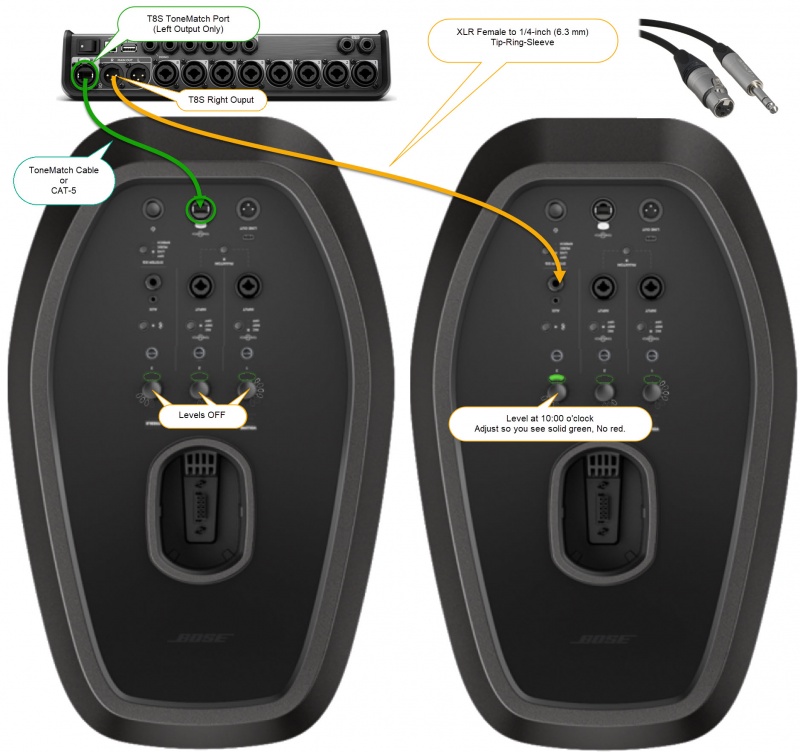
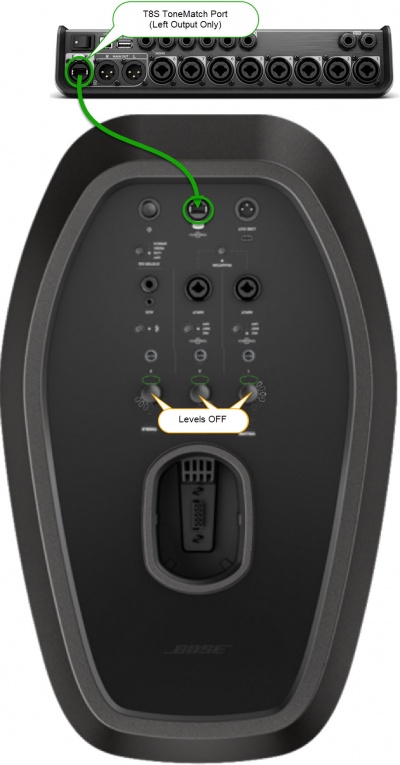
There is a single ToneMatch port on the T8S ToneMatch mixer. You can use this
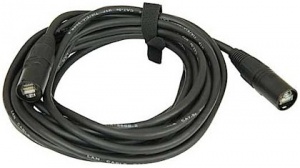
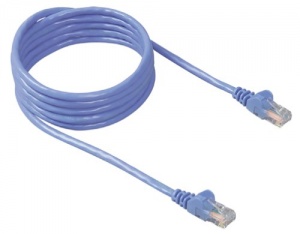
- To connect to an L1 Pro[1] ToneMatch Port using a ToneMatch Cable or Network Cable
- Note: The maximum length of the network cable is 50 feet.
- Note: This is the mixer LEFT output. Anything panned hard RIGHT will not be heard.
All of the Analog outputs (XLR or 1/4 inch (6.3 mm) Tip-Ring-Sleeve) still function while using the ToneMatch Port.
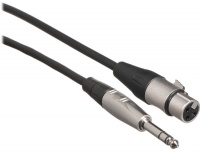
To run stereo, connect the second powered loudspeaker to one of the T8S ToneMatch mixer RIGHT Outputs (XLR or 1/4 inch (6.3 mm) Tip-Ring-Sleeve) to the second L1 Pro Input three. You can use an XLR to XLR cable. However, you may need to turn down the channel volume level to match the input sensitivity to the signal level.
- Alternate connection
- ToneMatch port on the T8S ToneMatch mixer to ToneMatch Power Supply for power and use the Analog Outputs (XLR or 1/4 inch (6.3 mm) Tip-Ring-Sleeve) to the L1 Pro Input three. DO NOT USE an XLR to XLR cable. The output of the T8S ToneMatch mixer outputs is too hot for the L1 Pro XLR inputs.
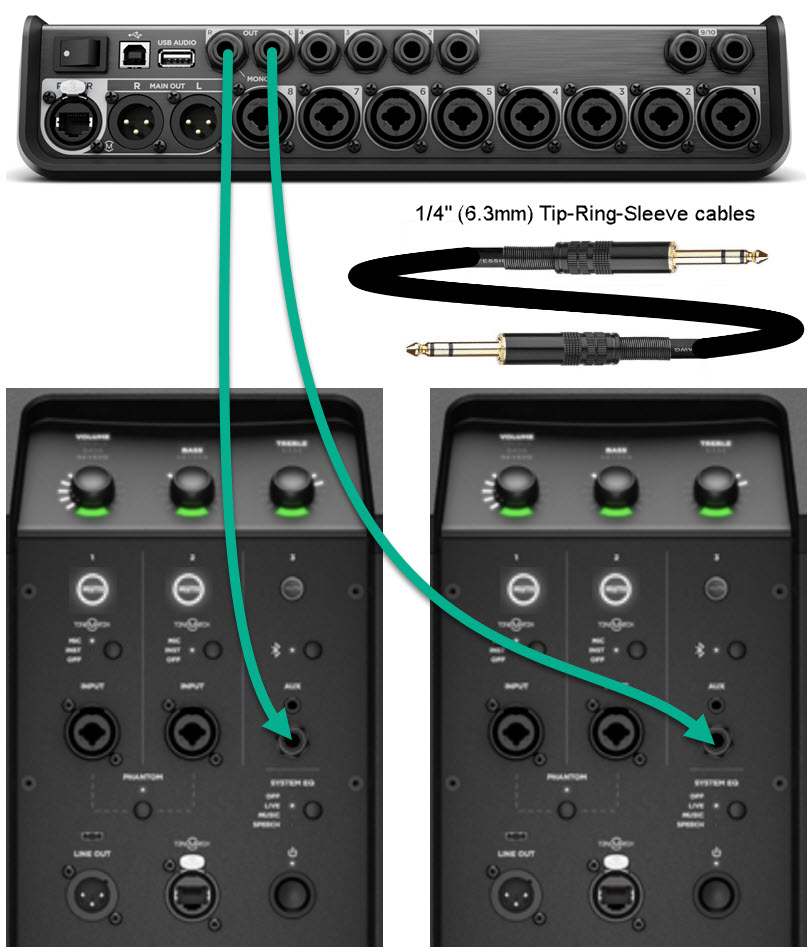
T8S ToneMatch mixer to Two L1 Pro[1] Stereo
ToneMatch Port and 1/4 inch (6.3 mm)
1/4 inch (6.3 mm) Tip-Ring-Sleeve
This assumes that you are powering the T8S with the ToneMatch Power Supply.
XLR
- Connect your audio sources (instruments or microphones) to the inputs on the ToneMatch mixer
- Connect the T8S power supply from the Power port of the T8S to a power outlet
- Connect an XLR cable from the Main Out R port of the mixer to the right-side L1 system
- Tip: If connecting to channels 1 or 2 on the second system, set the ToneMatch selector for that channel to OFF
- Connect an XLR cable from the Main Out L port of the mixer to the left-side L1 system.
- Tip: If connecting to channels 1 or 2 on the second system, set the ToneMatch selector for that channel to OFF.
T8S ToneMatch mixer to Two Single L1 Pro[1] Mono Daisy Chain
Connect the T8S ToneMatch mixer to the first L1 Pro[1]
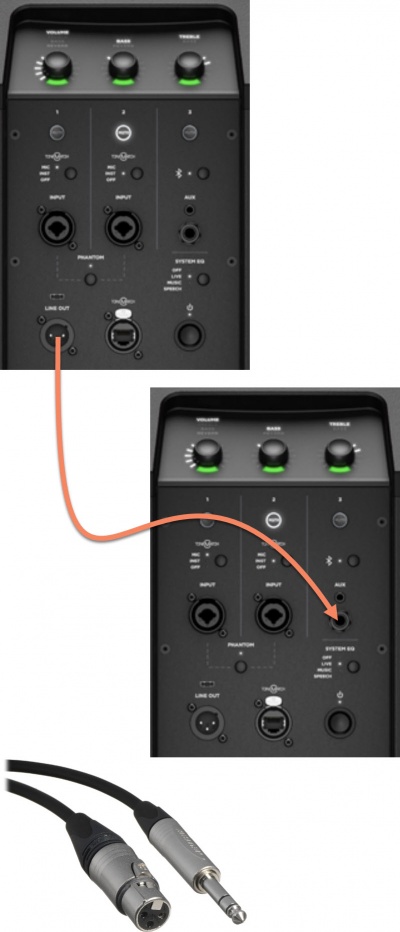
Then connect the output of the first L1 Pro[1] to the second L1 Pro[1]
To connect two L1 Pro systems (daisy chain) to use the second system as an extension of the first
- Use an XLR female to 1/4 inch (6.3 mm) Tip-Ring-Sleeve to connect the L1 Pro Line Out to a second L1 Pro (any model) input three
- Turn down the volume on the second L1 Pro
- Set the level you want on the first L1 Pro
- Set the volume on the second L1 Pro to suit the application
- Note: Running two L1 Pros daisy chained in close proximity offer little tangible benefit and can cause issues with multiple source interference. See Dual Mono for details.
- Note
The Line Out is post-fader. That is, it is the combined signal of all inputs and ToneMatch processing, EQ and Reverb. That includes inputs, 1, 2, 3, Bluetooth, and ToneMatch Port (used for T4S/T8S ToneMatch® Mixers).
The Line Out is pre-System EQ. That is, the signal at the Line Out is flat. It is not affected by the setting of the System EQ switch. [3]
This applies to any two L1 Pro systems (L1 Pro8, L1 Pro16, L1 Pro32).
- Second L1 Pro Louder than the First
Because the output level of the first L1 Pro Line Out is post-fader (see above) is higher than the original source. If you set the volume controls on the second L1 Pro to the same settings as the first L1 Pro, the second one will be louder. To get the levels the same,
- Turn down the volume on the second L1 Pro
- Set the level you want on the first L1 Pro
- Set the volume on the second L1 Pro to suit the application. Do that by ear.
- Dual Mono
When you run the same sound through two L1 systems, you should consider the consequences, both good and bad. See Dual Mono for details.
