Difference between revisions of "S1 Pro to L1 Model I"
m (added images) |
m (Text replacement - "Category:S1" to "Category:S1 Pro") |
||
| Line 30: | Line 30: | ||
[[Category:How To]] | [[Category:How To]] | ||
| − | [[Category:S1]] | + | [[Category:S1 Pro]] |
[[Category:Model I]] | [[Category:Model I]] | ||
[[Category:Connections]] | [[Category:Connections]] | ||
}} | }} | ||
Latest revision as of 21:20, 16 November 2019
If you want to use your S1 Pro System as a monitor and use an L1 Model I as the Front of House system you can connect your microphone and instrument to the S1 Pro System and connect the S1 Pro System to the L1 Model I
How To
Connect S1 Pro System to L1 Model I
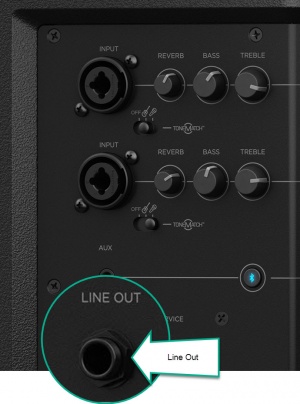
You can connect to the S1 Pro system as you would when using it alone. Then run a cable from the S1 Pro Line Out
The S1 Pro System Line Out is post Volume, Tone, and ToneMatch presets on channels 1 and 2. It also includes the post volume signal from channel 3.
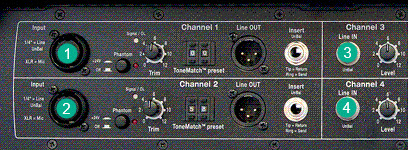
to any of the 1/4" inputs on the L1 Model I. You can use an ordinary Tip-Sleeve instrument cable.
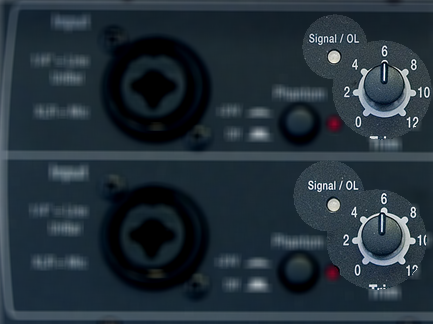
If you use the L1 Model I inputs on channels 1 or 2, set the Preset to 00. Set the input trim so that when you are running the S1 Pro at the loudest you will perform, the L1 Model I Signal/OL lights are solid green. Occasional red flickers are okay.
Additional Information
Note: All the 1/4" inputs on the L1 Model I are unbalanced. That means, there's no need or advantage to using a balanced Tip-Ring-Sleeve cable. Also, if you use a 1/4" Tip-Ring-Sleeve to XLR cable into channels 1 or 2, you may find it difficult to do the gain staging because the signal from the S1 Pro may be too hot for the XLR inputs.


