Difference between revisions of "Trim Controls Volume Controls Master Volume"
m (before removing table) |
m |
||
| Line 13: | Line 13: | ||
== Background == | == Background == | ||
| − | + | ToneMatch mixers accept inputs from various sources from very low output devices (like microphones or bare piezo pickups found in some guitars) up to line-level devices (like other mixers). | |
| − | + | ||
| − | |||
| − | |||
| − | |||
| − | |||
| − | |||
| − | |||
| − | |||
| − | |||
| − | |||
| − | |||
| − | |||
| − | |||
| − | |||
| − | |||
| − | |||
| − | |||
| − | |||
| − | |||
| − | |||
| − | |||
| − | |||
| − | |||
| − | |||
| − | |||
| − | |||
| − | |||
| − | |||
| − | |||
| − | |||
| − | |||
| − | |||
| − | |||
| − | |||
| − | |||
| − | |||
| − | |||
| − | |||
| − | |||
| − | |||
| − | |||
| − | |||
| − | |||
| − | |||
| − | |||
| − | |||
| − | |||
| − | |||
| − | |||
| − | |||
| − | |||
| − | |||
| − | |||
| − | |||
| − | |||
| − | |||
| − | |||
| − | |||
| − | |||
| − | |||
| − | |||
| − | |||
| − | |||
| − | |||
| − | |||
| − | |||
| − | |||
| − | |||
| − | |||
| − | |||
| − | |||
| − | |||
| − | |||
| − | |||
| − | |||
| − | |||
== Gain Staging == | == Gain Staging == | ||
| + | Setting the levels starts with gain staging - setting the input trim for each input to the ToneMatch mixer. The purpose of this step is, so all the inputs have the same signal strength when you start mixing with the channel volume controls. | ||
| − | + | The exact position of the Trim will vary depending on signal strength of your input source. The correct setting for any particular source may be different from your other sources. | |
[[Image:T1TrimPots.png|T1® Trim Pots]] | [[Image:T1TrimPots.png|T1® Trim Pots]] | ||
| Line 106: | Line 32: | ||
=== Set Input Trim === | === Set Input Trim === | ||
| − | Turn the Trim setting up until the Trim Light is solid green with occasional flickers of | + | Turn the Trim setting up until the Trim Light is solid green with occasional flickers of red. Use the Trim lights as your guide. (The exact position of the Trim knob is not important). |
[[Image:TrimlightsOK.gif]] | [[Image:TrimlightsOK.gif]] | ||
| − | If you see | + | If you see solid red (below), turn the Trim down. You are definitely nearing or in compression. Turn the Trim down until there are only occasional red flickers. |
[[Image:TrimlightsNo.gif]] | [[Image:TrimlightsNo.gif]] | ||
| + | |||
| + | ==Channel Volume== | ||
| + | |||
| + | The channel volume controls are where you set the relative volume for each source. | ||
| + | |||
| + | If you want the microphone to be as loud as the guitar, then you'll probably set both of them to 12:00 o'clock. There's nothing particularly significant about that setting, except you would set the volume controls the same. 12:00 o'clock is convenient to remember as a starting point. It gives you lots of room to make adjustments up or down. | ||
| + | |||
| + | From there, you can turn things up or down to fine tune the balance. If you need the vocals louder, turn up the volume on that channel (or turn down the volume on the guitar channel). | ||
| + | |||
| + | When you get the balance of all the inputs right, then you can control the overall volume with the Master volume. | ||
| + | |||
| + | ==Master Volume== | ||
| + | |||
| + | Control the volume of all the inputs simultaneously with the Master Volume Control. It's unlikely you'll have to turn it much above 12:00 o'clock. | ||
| + | |||
| + | On the [[T8S]] use the meters. The average output level should be near 0dBU. If you hit OL (overload will appear RED) turn down the master volume. | ||
| + | |||
---- | ---- | ||
Latest revision as of 05:27, 22 December 2018
- Introduction
On the ToneMatch mixers (and many others) there are three controls that affect the volume
- Trim
- Channel Volume
- Master Volume
Questions:
- What do these controls do?
- When do you use the different controls?
- Should they all be the same?
Contents
Background
ToneMatch mixers accept inputs from various sources from very low output devices (like microphones or bare piezo pickups found in some guitars) up to line-level devices (like other mixers).
Gain Staging
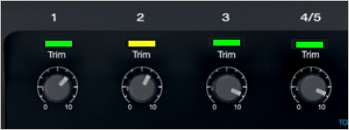
Setting the levels starts with gain staging - setting the input trim for each input to the ToneMatch mixer. The purpose of this step is, so all the inputs have the same signal strength when you start mixing with the channel volume controls.
The exact position of the Trim will vary depending on signal strength of your input source. The correct setting for any particular source may be different from your other sources.
Set Up Your Source
Set your source at the maximum that it will be when performing.
- Microphone
- Sing directly into the microphone using close microphone technique (lips just brushing the windscreen). Sing as loudly as you will sing during your performance. You want to set the Trim to work at your maximum volume.
- Instrument
- Turn your input as high as it is likely to go during performance.
Set Input Trim
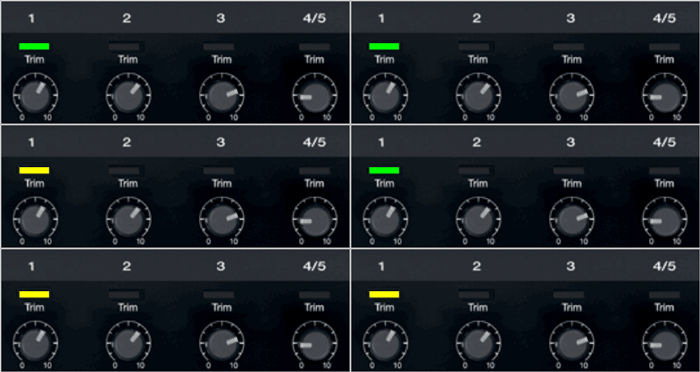
Turn the Trim setting up until the Trim Light is solid green with occasional flickers of red. Use the Trim lights as your guide. (The exact position of the Trim knob is not important).
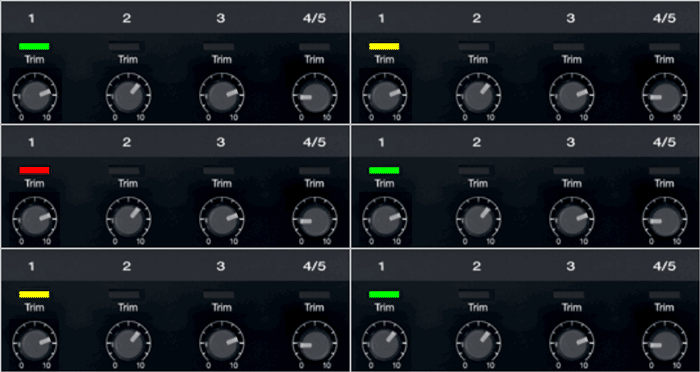
If you see solid red (below), turn the Trim down. You are definitely nearing or in compression. Turn the Trim down until there are only occasional red flickers.
Channel Volume
The channel volume controls are where you set the relative volume for each source.
If you want the microphone to be as loud as the guitar, then you'll probably set both of them to 12:00 o'clock. There's nothing particularly significant about that setting, except you would set the volume controls the same. 12:00 o'clock is convenient to remember as a starting point. It gives you lots of room to make adjustments up or down.
From there, you can turn things up or down to fine tune the balance. If you need the vocals louder, turn up the volume on that channel (or turn down the volume on the guitar channel).
When you get the balance of all the inputs right, then you can control the overall volume with the Master volume.
Master Volume
Control the volume of all the inputs simultaneously with the Master Volume Control. It's unlikely you'll have to turn it much above 12:00 o'clock.
On the T8S use the meters. The average output level should be near 0dBU. If you hit OL (overload will appear RED) turn down the master volume.
References


