T1 ToneMatch® Audio Engine / Connections to Compact
There are several possibilities for connecting a T1 ToneMatch Audio Engine to a L1 Compact
Contents
- 1 T1® to Compact Channel 2
- 1.1 ¼ Inch Tip-Ring-Sleeve (balanced) to ¼ Inch Tip-Ring-Sleeve (balanced)
- 1.2 ¼ Inch Tip-Ring-Sleeve (unbalanced) to ¼ Inch Tip-Sleeve (unbalanced)
- 1.3 Channel 2 Connection from T1 ToneMatch Audio Engine Details
- 1.4 Two T1®s to a Single Compact
- 1.5 T1®s to separate inputs on Compact Channel 2
- 1.6 Daisy Chain Two T1®s to Compact Channel 2
T1® to Compact Channel 2
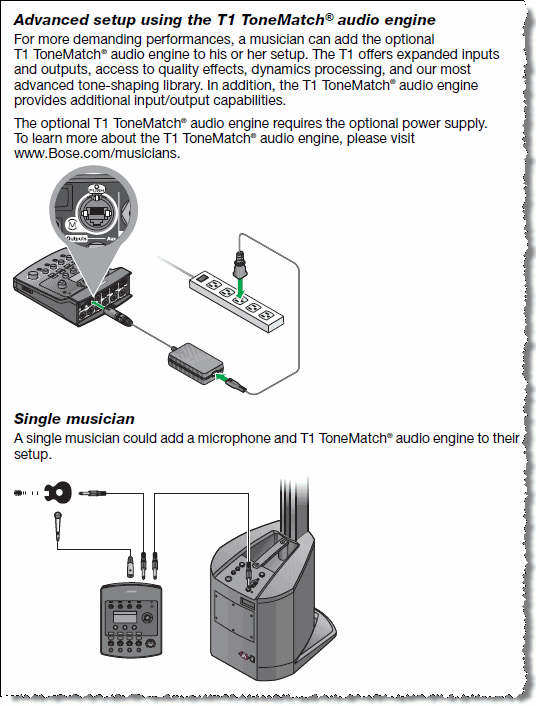
You can connect a T1 ToneMatch Audio Engine to L1 Compact
Here is an excerpt from page 12 of the L1® Compact Owner's Guide (pdf format)
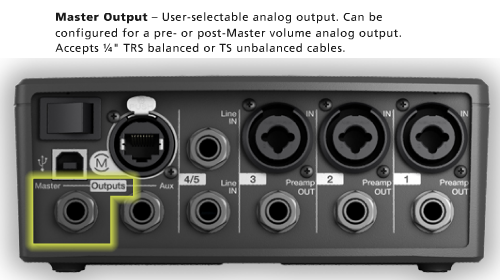
Connect FROM T1 ToneMatch Audio Engine Master or Aux Output using ¼ inch jack connections.
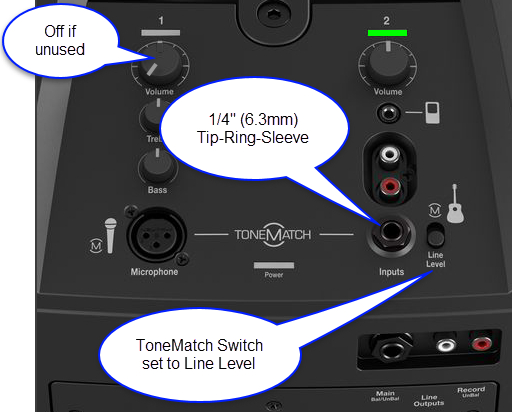
Connect TO the Compact Channel 2 volume straight up (12:00 o'clock to 1:00 o'clock) for good results. You can turn it up higher, but if you see the light on the Compact solid red (flickers of red are okay) or you hear distortion, turn down the volume on the Compact.
¼ Inch Tip-Ring-Sleeve (balanced) to ¼ Inch Tip-Ring-Sleeve (balanced)
A balanced connection is preferred and will provide better noise rejection over greater distances than the unbalanced connection.
¼ Inch Tip-Ring-Sleeve (unbalanced) to ¼ Inch Tip-Sleeve (unbalanced)
This should work fine but a balanced connection (immediately above) is preferred especially if you will have cable runs in excess of 20 feet (6 meters) or if you hear line noise, hum or hiss.
Channel 2 Connection from T1 ToneMatch Audio Engine Details
Connect the T1 ToneMatch Audio Engine Master output L1 Compact channel 2.
Turn the Channel 1 volume all the way down (fully counterclockwise) unless you have a microphone attached to it.
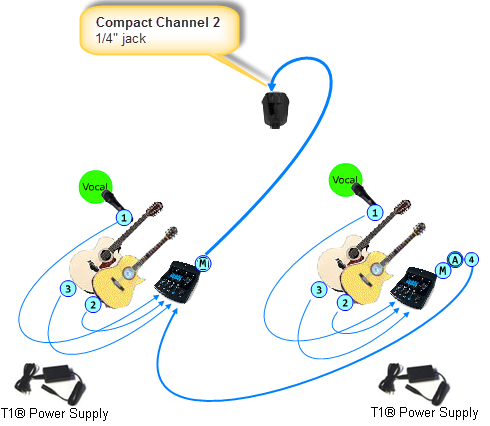
Two T1®s to a Single Compact
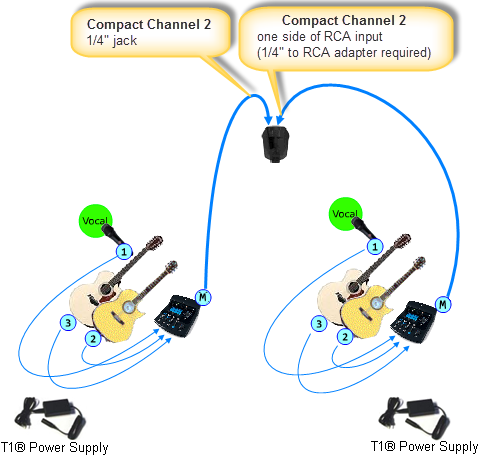
T1®s to separate inputs on Compact Channel 2
Daisy Chain Two T1®s to Compact Channel 2
For more general information see: T1 ToneMatch Audio Engine and L1 Compact


