T1 ToneMatch® Audio Engine with Compact for Karaoke
| This article describes how to use a T1 ToneMatch Audio Engine and a L1 Compact for Karaoke.
This is broken down into four sections:
|
T1 ToneMatch Audio Engine to L1 Compact
Here is an excerpt from page 12 of the L1® Compact Owner's Guide (pdf format)
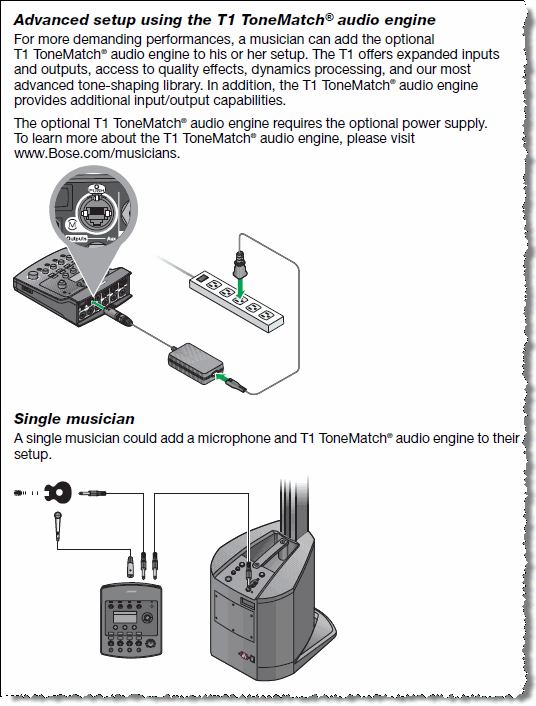
Connect FROM T1 ToneMatch Audio Engine Master or Aux Output using ¼ inch jack connections.
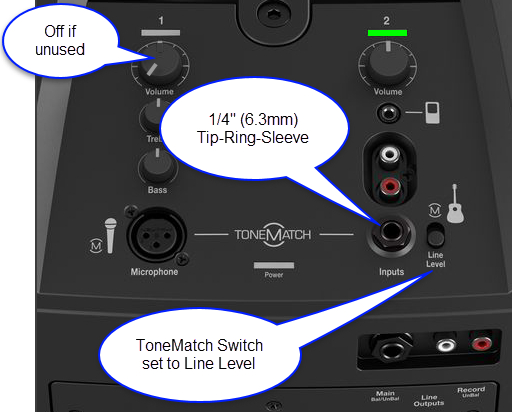
Connect TO the Compact Channel 2 volume straight up (12:00 o'clock to 1:00 o'clock) for good results. You can turn it up higher, but if you see the light on the Compact flickering red, turn down the volume on the Compact.
¼ Inch Tip-Ring-Sleeve (balanced) to ¼ Inch Tip-Ring-Sleeve (balanced)
A balanced connection is preferred and will provide better noise rejection over greater distances than the unbalanced connection.
¼ Inch Tip-Ring-Sleeve (unbalanced) to ¼ Inch Tip-Sleeve (unbalanced)
This should work fine but a balanced connection (immediately above) is preferred especially if you will have cable runs in excess of 20 feet (6 meters) or if you hear line noise, hum or hiss.
Channel 2 Connection from T1 ToneMatch Audio Engine Details
Gain Staging T1 ToneMatch Audio Engine Channels 1,2,3 for Vocals
Your first adjustment for any input to your T1 ToneMatch Audio Engine is the Trim setting. The exact position of the Trim will vary depending on signal strength of your input source. The correct setting for any particular source may be different from your other sources.
Set Up Your Source
Set your source at the maximum that it will be when performing.
- Microphone
- Sing directly into the microphone using close microphone technique (lips just brushing the windscreen). Sing as loudly as you will sing during your performance. You want to set the Trim to work at your maximum volume.
- Instrument
- Turn your input as high as it is likely to go during performance.
Set Input Trim
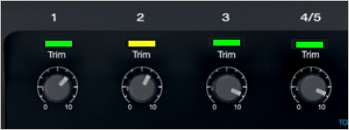
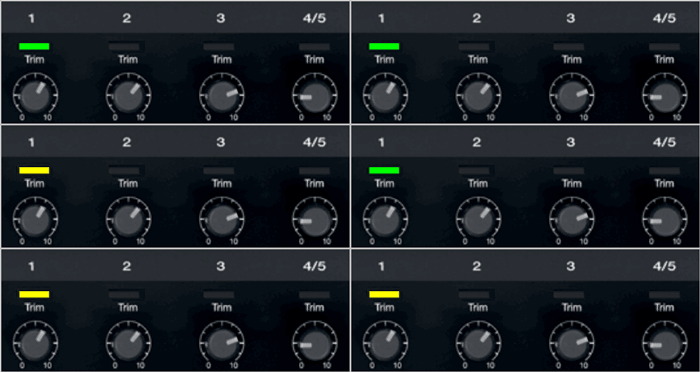
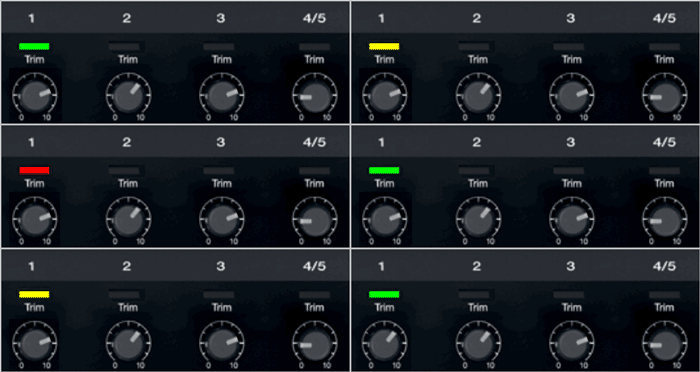
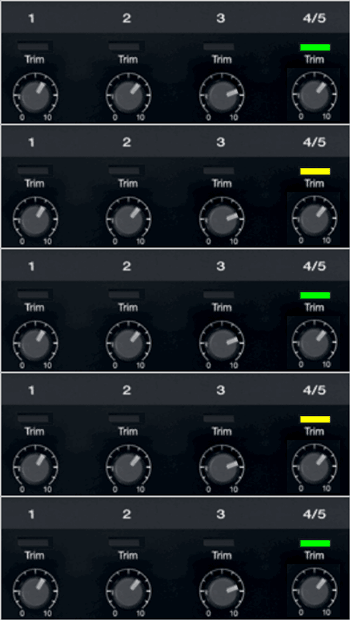
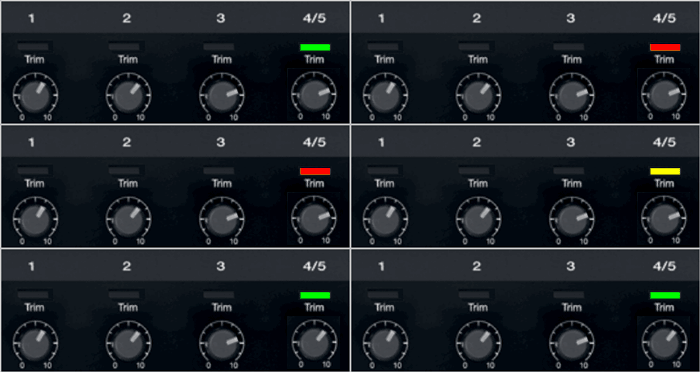
Turn the Trim setting up until the Trim Light is solid green with occasional flickers of yellow. Use the Trim lights as your guide. (The exact position of the Trim knob is not important).
If you see flickers of red (below), turn the Trim down. You are definitely nearing or in compression. Turn the Trim down until there are no red flickers.
Bill-at-Bose [1] talks about setting the gain on a T1 ToneMatch Audio Engine.
- The T1 has a three-stage trim LED. It lights up green when signal is present, yellow when you are getting pretty loud (8 to 10 dB of headroom left), and red when you dangerously close to or at full scale.
- If the T1 trim is going red, you should back off, you are definitely nearing or in compression.
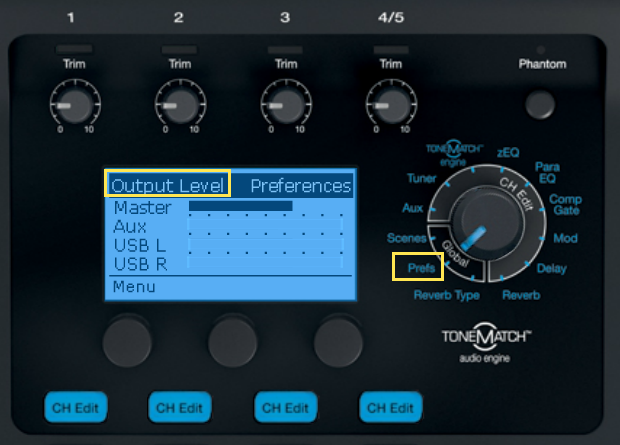
- A really helpful feature on the T1 is to go to the Prefs/Output Level menu, and see where you are relative to maximum output.
T1® Trim Pots
The T1 trim controls for CH 1-3 provide a significant gain increase when you reach the upper limit. This increase in gain is normal operation.
Most sources like typical microphones and piezo pickup systems can provide enough level without the need to add significant gain from the trim control. Certain sources like passive acoustic guitar pickups require additional gain and in these cases it can be necessary to set the trim level to the upper range of the control. When the trim control is set this high you may notice the gain change. This is normal operation. If you want to run the trim control at lower settings we recommend using a preamp or simple stomp box level booster.
The trim for CH 4/5 do not exhibit the same behavior (as the trim controls for Channels 1,2,3) as these inputs are designed for line level sources and do not have the same gain staging as CH 1-3.
Source: Craig-at-Bose 2008/11/03
Gain Staging T1 ToneMatch Audio Engine Channel 4/5 for Music Tracks
These instructions apply if you are using
- a DJ Console or
- an analog source for backing tracks
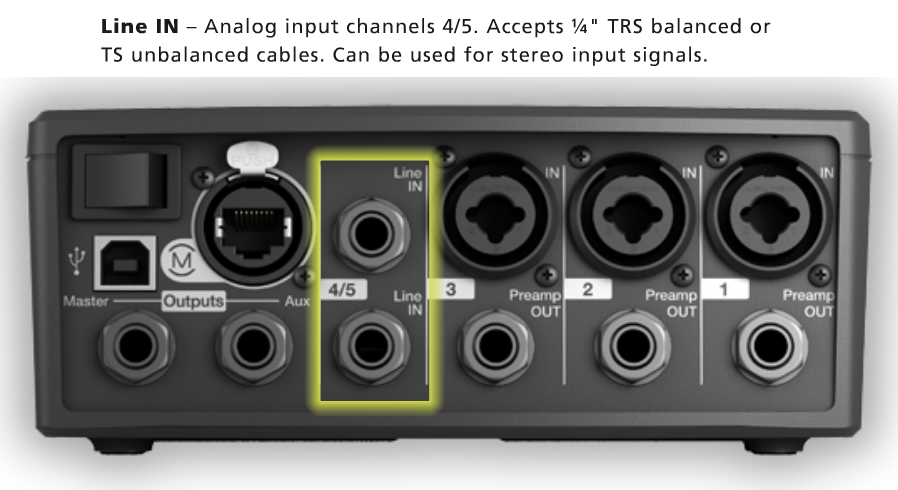
Note: If you are using a stereo source use T1 ToneMatch Audio Engine Channel 4/5 using the Analog Inputs on the back. Note: If you are connecting by USB you do not have to set the trim control. When connecting by USB the trim light will be inactive.
This is typically a one-time operation. You can do this in silence until the last stage where you bring up the Master Volume.
Do this with the T1® Master Volume all the way off, and the Channel volume all the way off. You do not need to hear the music to set the trim.
Your first adjustment for any input to your T1 ToneMatch Audio Engine is the Trim setting. The exact position of the Trim will vary depending on signal strength of your input source. The correct setting for any particular source may be different from your other sources.
Set Up Your Source
Set up your DJ console to the highest output level you will use during a show - that is ⇒ the maximum, highest output recommended in the DJ console manual. Make sure that there is no sign of clipping.
Play some music. There will be no sound. That's okay for now.
Set Input Trim
Turn the Trim setting up until the Trim Light is solid green with occasional flickers of yellow. Use the Trim lights as your guide. (The exact position of the Trim knob is not important).
If you see flickers of red (below), turn the Trim down. You are definitely nearing or in compression. Turn the Trim down until there are no red flickers.
That's it for setting the trim for that Channel and you should not need to change it unless you change DJ Consoles.
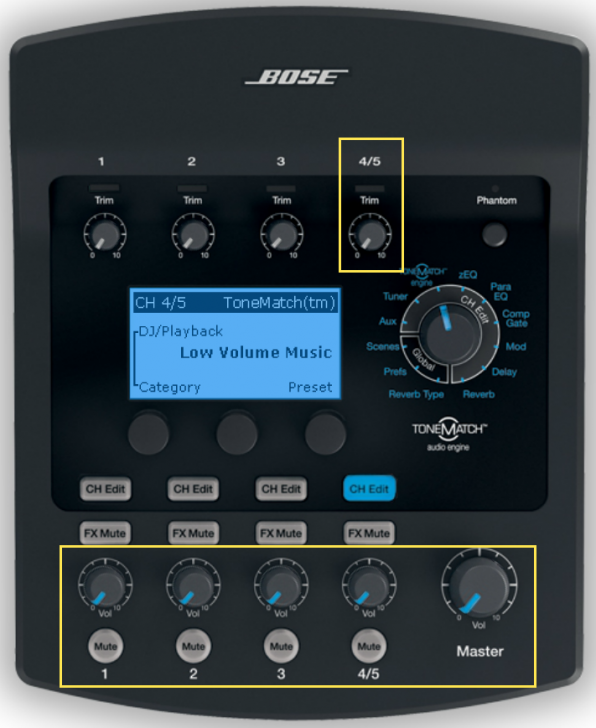
Bring up the volume on Channel 4/5 to 12:00 o'clock.
Now you can bring up the Master Volume to the required volume for the situation.
- A really helpful feature on the T1 is to go to the Prefs/Output Level menu, and see where you are relative to maximum output.
Controlling the Volume
If you have set the T1® Trim Controls as described above, you should not have to change them again unless you change microphones or the source for Channel 4/5.
Start with all of the T1® Volume Controls at zero.
Connect TO the Compact Channel 2 volume straight up (12:00 o'clock) for good results. You can turn it up higher, but if you see the light on the Compact flickering red, turn down the volume on the Compact.
- Overview
- Use the T1® Channel 1, 2, 3, 4/5 Volume controls to set the relative volume between the vocals and the background music.
- Use the T1® Master Volume to control the overall volume in the room.
- Detailed Instructions
- Play some music through T1® Channel 4/5.
- Turn up Channel 4/5 Volume to 12:00 o'clock
- Turn up the Master Volume to a comfortable listening level.
- Turn up Channel 1 (or 2 or 3) Volume and sing.
- Set the relative volume between the microphone and the music to get a good sounding mix so you can hear the vocals well above the music.
- If you have more than one microphone bring up the Channel volume for a suitable mix.
- Adjust the Master Volume for the overall volume required.
