T1 ToneMatch® Audio Engine to Compact
Contents
- 1 T1 ToneMatch Audio Engine to L1 Compact
- 1.1 ¼ Inch Tip-Ring-Sleeve (balanced) to ¼ Inch Tip-Ring-Sleeve (balanced)
- 1.2 ¼ Inch Tip-Ring-Sleeve (unbalanced) to ¼ Inch Tip-Sleeve (unbalanced)
- 1.3 Channel 2 Connection from T1 ToneMatch Audio Engine Details
- 1.4 Two T1®s to a Single Compact
- 1.5 Two T1®s to Separate Inputs on Compact Channel 2
- 1.6 Daisy Chain Two T1®s to Compact Channel 2
T1 ToneMatch Audio Engine to L1 Compact
Here is an excerpt from page 12 of the L1® Compact Owner's Guide (pdf format)
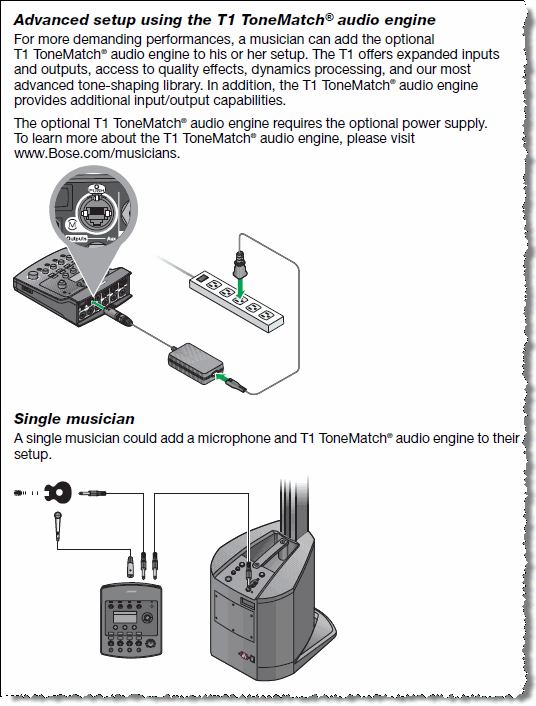
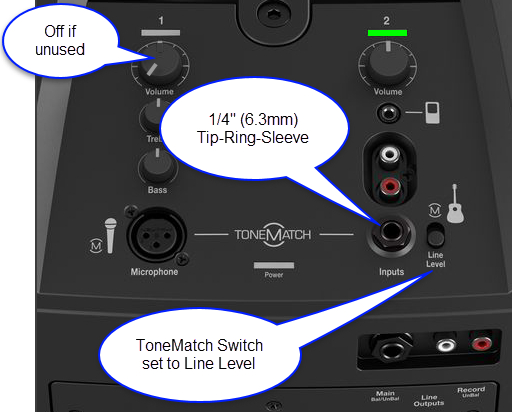
Connect FROM T1 ToneMatch Audio Engine Master or Aux Output using ¼ inch jack connections.
Connect TO the Compact Channel 2 volume straight up (12:00 o'clock to 1:00 o'clock) for good results. You can turn it up higher, but if you see the light on the Compact flickering red, turn down the volume on the Compact.
¼ Inch Tip-Ring-Sleeve (balanced) to ¼ Inch Tip-Ring-Sleeve (balanced)
A balanced connection is preferred and will provide better noise rejection over greater distances than the unbalanced connection.
¼ Inch Tip-Ring-Sleeve (unbalanced) to ¼ Inch Tip-Sleeve (unbalanced)
This should work fine but a balanced connection (immediately above) is preferred especially if you will have cable runs in excess of 20 feet (6 meters) or if you hear line noise, hum or hiss.
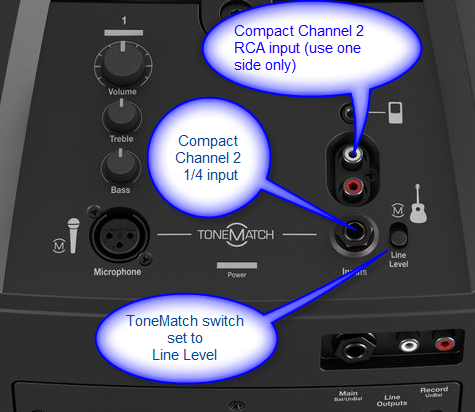
Channel 2 Connection from T1 ToneMatch Audio Engine Details
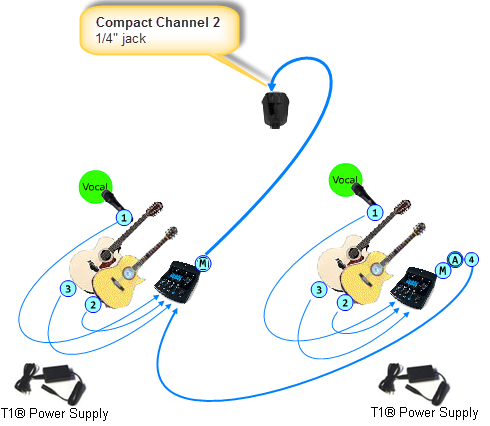
Two T1®s to a Single Compact
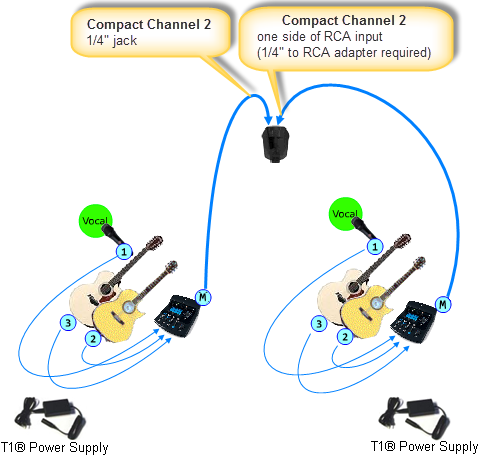
Two T1®s to Separate Inputs on Compact Channel 2
Compact Channel 2 detail
Suggested by Tom the Guitar Guy[1]
Daisy Chain Two T1®s to Compact Channel 2
Compact Channel 2 detail
- ↑ Tom the Guitar Guy in the Bose L1® Forum
For more general information see: T1 ToneMatch Audio Engine and L1 Compact
