PS1 Powerstand/ Preventing Incorrect Connections
Cover Unused Inputs
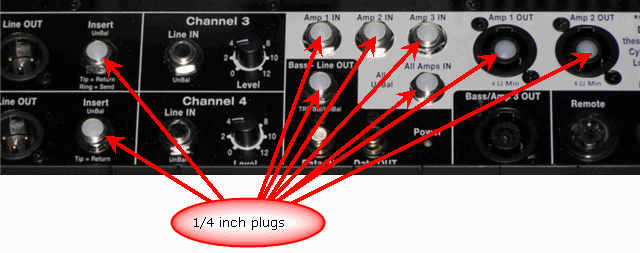
To avoid mishaps at a gig cover or plug the unused inputs on your PS1 Powerstand. This picture shows white nylon caps in the lesser used inputs of a L1 Classic Powerstand. The L1 Model I does not have the inputs in the white area near the top right.
Here is a link to the full sized version of the image.
Original Narrative for this tip
- Somewhere (that I can't find now) I read a post about getting some plugs to cover the normally unused inputs to minimize or prevent mistakes during setup (such as putting a 1/4 intended for channel 4 into the channel 2 "Insert" socket, or plugging the B1 cable into Amp 2 output) - particularly during dim lighting.
- After seeing that happen a couple of time with novice helpers (which I caught before they got used that way), I was inspired to look around the local hardware store (it happened to be at a Sears hardware, but they are pretty standard parts you'll find if the store carries "bins" of loose hardware, nuts, washers, and other small fittings). I found these 1/4" plastic plugs, in either black or white. I chose white, to help with the contrast in dim light.
- I initially tried something that stuck up further from the socket (small grey twist-on wire caps fit nicely) to make it easier to remove them, but then the door wouldn't close (the closed door comes really close to the channel 2 insert socket).
- These plugs work for the unused Speakon sockets, too. You just have to squeeze them a bit into an oval to get them inserted.
-- Dan Cornett[1] in the Bose® Pro Portable PA Community
Another look with arrows
- ↑ Dan Cornett Preventing incorrect connections


