Difference between revisions of "Gain Staging / Mixer"
(first ed) |
m (formatting) |
||
| (5 intermediate revisions by the same user not shown) | |||
| Line 5: | Line 5: | ||
# On the Mixer | # On the Mixer | ||
| − | #* Run prerecorded music into the Mixer. Set input trims so that the signal is strong but not clipping. | + | #* Run prerecorded music into the Mixer. Set input trims (on the mixer) so that the signal is strong but not clipping. |
# On the R1 Remote | # On the R1 Remote | ||
#* Set Master Level at "0". The L1™ System should be silent. | #* Set Master Level at "0". The L1™ System should be silent. | ||
| Line 12: | Line 12: | ||
# On the Mixer | # On the Mixer | ||
#* Set Output at its maximum without clipping | #* Set Output at its maximum without clipping | ||
| − | # On the PS1 Powerstand | + | # [[Image:PS1LEDSignalOL.gif|right|Signal/OL LED]]On the PS1 Powerstand |
| − | #* | + | #* Set the input trim so that you get steady green on the Signal/OL. (red flickers are okay). |
| + | #* If you set the input trim to "0" zero, and you are getting solid red on the Signal/OL LED then use a [[Pad]] to attenuate the signal. | ||
| + | #**If you don't use a [[Pad]], and | ||
| + | #** you reduce the output from the mixer, and | ||
| + | #** you raise the volume with the R1 Remote, then | ||
| + | #** you will probably raise the amount of noise in the signal path. | ||
#* Set the Channel 2 input trim to 0 | #* Set the Channel 2 input trim to 0 | ||
#* Set the Channel 3 input level to 0 | #* Set the Channel 3 input level to 0 | ||
#* Set the Channel 4 input level to 0 | #* Set the Channel 4 input level to 0 | ||
| − | #* | + | #* [[Image:R1LED.gif|right|R1 Remote LED indicators]]At this point the R1 Remote Channel LED should be doing the same thing as the PS1 Powerstand Signal O/L LED. Solid green, occasional red flickers. |
# On the R1 Remote | # On the R1 Remote | ||
#* Bring up the Master Level to 12 o'clock (straight up) | #* Bring up the Master Level to 12 o'clock (straight up) | ||
Latest revision as of 10:58, 31 March 2010
This is a quick setup for connecting a mixer to a PS1 Powerstand for a Classic or L1™ Model I.
- On the Mixer
- Run prerecorded music into the Mixer. Set input trims (on the mixer) so that the signal is strong but not clipping.
- On the R1 Remote
- Set Master Level at "0". The L1™ System should be silent.
- On the R1 Remote
- Set Channel 1 Level at 12 o'clock (straight up)
- On the Mixer
- Set Output at its maximum without clipping
- On the PS1 Powerstand
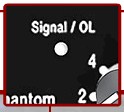
- Set the input trim so that you get steady green on the Signal/OL. (red flickers are okay).
- If you set the input trim to "0" zero, and you are getting solid red on the Signal/OL LED then use a Pad to attenuate the signal.
- If you don't use a Pad, and
- you reduce the output from the mixer, and
- you raise the volume with the R1 Remote, then
- you will probably raise the amount of noise in the signal path.
- Set the Channel 2 input trim to 0
- Set the Channel 3 input level to 0
- Set the Channel 4 input level to 0
- At this point the R1 Remote Channel LED should be doing the same thing as the PS1 Powerstand Signal O/L LED. Solid green, occasional red flickers.
- On the R1 Remote
- Bring up the Master Level to 12 o'clock (straight up)
- If everything is working, you are probably hearing the System at very close to its volume limit.
Test: On the Mixer, set the master output all the way down:
- If you are hearing a low frequency hum, check for a ground loops.
- If you are hearing a buzz, check for sources of line noise.


