S1 Pro as Monitor with Third Party Mixer and L1
Summary
This is an overview of how you can connect a third party mixer to an L1 as the main output and S1 Pro System as a monitor.
Example
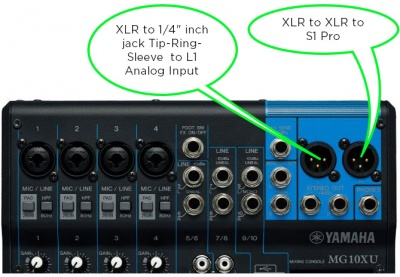
You can connect using the XLR outputs from a mixer.
This assumes you are running mono and have all mixer inputs panned up the middle.
XLR Outputs
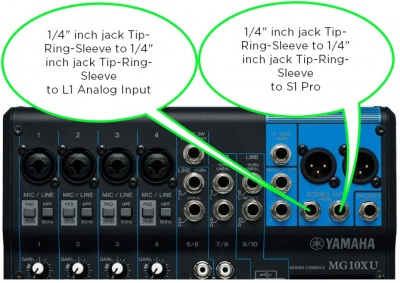
You can connect using the 1/4 inch (6.35 mm) Tip-Ring-Sleeve outputs from a mixer.
1/4 inch (6.35 mm) Tip-Ring-Sleeve Outputs
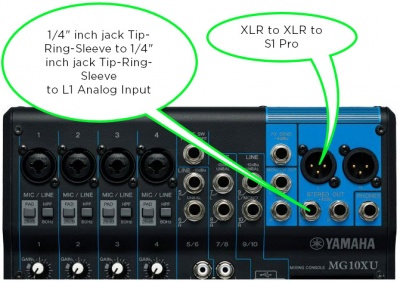
XLR and 1/4 inch (6.35 mm) Tip-Ring-Sleeve Outputs
If your mixer has both XLR and 1/4 inch (6.35 mm) Tip-Ring-Sleeve outputs, you can pan all inputs to one side (e.g., Left) and connect like this.
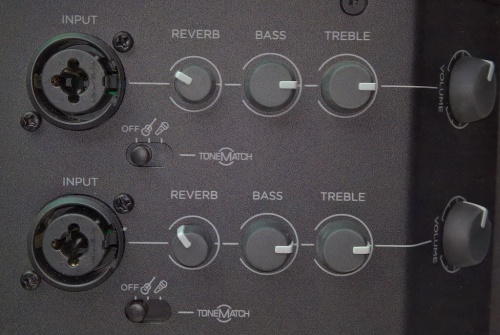
S1 Pro System Settings
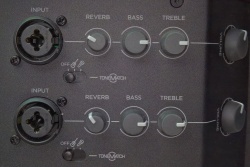
Set the controls on the S1 Pro System like this.
S1 Pro System settings
On the S1 Pro System use these settings while you are setting up.
- Reverb OFF
- Bass at 12:00 o'clock
- Treble at 12:00 o'clock
- ToneMatch switch OFF
You can adjust the Reverb, Bass, and Treble after you get your basic sound working.
S1 Pro System Gain Staging
For each channel you are using on the S1 Pro System,
- Turn the channel volume off
- Connect the mixer output to the S1 Pro System
- Set the mixer to the maximum you will use during your performance.
- While playing/singing as loud as you will during your performance, bring up the S1 Pro System channel volume until you see solid green on the channel indicator light. Occasional flickers of red are okay. If you see solid red or you hear distortion, turn down the volume.

