Difference between revisions of "Backing Tracks"
(first ed) |
(== {{T1}} ==) |
||
| Line 1: | Line 1: | ||
| + | == {{Model I}} or {{Classic}} == | ||
[[Image:Backtracks.png]] | [[Image:Backtracks.png]] | ||
| + | |||
| + | == {{T1}} == | ||
| + | [[Image:BacktracksT1.gif]] | ||
''' Details about the Stereo to Mono Adapter ''' | ''' Details about the Stereo to Mono Adapter ''' | ||
{{:Stereo Mini to 1/4}} | {{:Stereo Mini to 1/4}} | ||
Revision as of 00:59, 23 July 2007
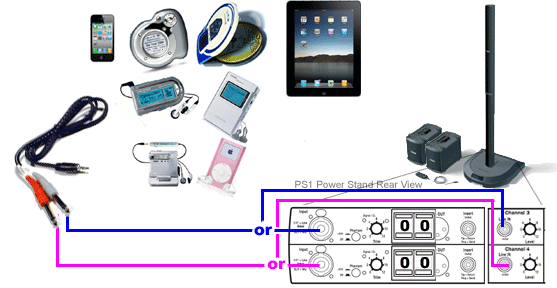
L1 Model I or L1 Classic
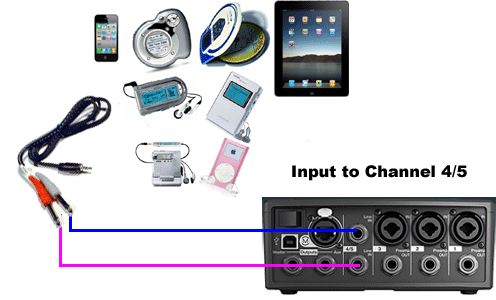
T1 ToneMatch Audio Engine
Details about the Stereo to Mono Adapter
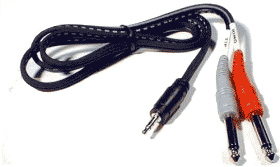
Connection: Stereo Mini (headphone or line-out source) to two Mono ¼ inch
Plug this into your MP3 Player/computer/minidisk/iPod (headphone or line out jack)
- (black end to MP3 Player) and
- coloured ends to
- PS1 Power Stand (Classic) / Model I Channels 1 and 2 OR Channels 3 and 4 OR
- T1 ToneMatch® Audio Engine Channel 4/5
Source: Hosa CMP159
If you cannot locate a cable like the one above, you can accomplish the same thing with the combined cable and adaptors below.
and attach each coloured end to one of these,

then connect to any of the ¼ inch inputs for L1 Model I or L1 Classic Channels 1/2/3/4. If you are using a T1 ToneMatch Audio Engine then you can use Channels 1,2,3 or 4/5.
If you are using the this kind of source as backing tracks, you will probably run these two connections to L1 Model I or L1 Classic Channels 3 and 4. In this case you will need to control volume and tone control from the sound source. You will not have much control through the L1 .
If you are using a T1 ToneMatch Audio Engine you will probably use Channel 4/5.


