Duo
Contents
|
In addition to the notes below that apply to your Duo show, check out:
|

One L1® per Performer
Running one L1® for each performer in a duo format is a wonderful experience for both the performers and the audience. This gives the audience all the benefits of localization, and the best possible monitoring experience for the performers. Click on either of the pictures below for detailed descriptions of the stage layouts shown here.
Model I / Classic
{{#Click:Stage Layouts / ST Duo Classic / Model I|Image:STDuoModelIClassic.png||ST Duo with Model I / Classics}}
Model II
{{#Click:Stage Layouts / ST Duo|Image:STDuoModelII.png||ST Duo with Model IIs}}
Connecting Two T1 ToneMatch® Audio Engines to a L1 Model II
In the two examples below, the L1® shown below could be an L1 Classic, L1 Model I or as shown here an L1 Model II. Note: if you are not connecting the T1 ToneMatch Audio Engine to an L1 Model II then you will require the T1 ToneMatch® Audio Engine power supply.
The L1 Model II can accept two inputs.

This makes it easy for two performers to connect their own T1®s to a L1® Model II Power Stand.
ToneMatch® Input
The ToneMatch® connection is specifically designed for a T1 ToneMatch Audio Engine. The ToneMatch® cable is supplied with the T1 ToneMatch Audio Engine and uses a male Ethercon connector at both ends.
Analog Input

The Analog connection is a ¼ inch phone jack. You can use this for a second T1® using the T1® Analog Master output (¼ inch phone jack).
This connection is made with a standard ¼ inch jack instrument cable. This can be Tip-Sleeve or Tip-Ring-Sleeve connectors.
Set Power Stand Analog Input Trim to 3 to have approximately the same level as you would have if you had connected with the ToneMatch® connection. You may have to adjust this, but 3 is a good place to start.
Note: A T1® connected to the the Analog input will require the optional T1 ToneMatch® Audio Engine power supply.
Analog Connection from the Second T1® to the Model II Power Stand

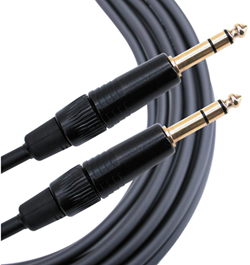
¼ Inch Tip-Ring-Sleeve (balanced) to ¼ Inch Tip-Ring-Sleeve (balanced)
A balanced connection is preferred and will provide better noise rejection over greater distances than the unbalanced connection.
![]()
¼ Inch Tip-Ring-Sleeve (unbalanced) to ¼ Inch Tip-Sleeve (unbalanced)
This should work fine but a balanced connection (immediately above) is preferred especially if you will have cable runs in excess of 20 feet (6 meters) or if you hear line noise, hum or hiss.
![]()
Connecting One T1 ToneMatch® Audio Engine to another (Daisy Chaining T1®s)
You can daisy chain (connect) one T1 ToneMatch Audio Engine into another.

In this example, we have two T1 ToneMatch Audio Engines. (T1®s)
- T1® on the left connected to the L1 Model II through the ToneMatch® Port
- T1®on the right connected to the T1® on the left through the Master Analog ¼ inch jack to the other T1® Channel 4
Use a balanced (Tip-Ring-Sleeve) cable if possible.
The output from the T1 ToneMatch Audio Engine Master Output is a balanced mono 1/4 inch (6.35 mm) Tip-Ring-Sleeve and the input on the T1 ToneMatch Audio Engine Channel 4 or Channel 5 is a balanced mono 1/4 inch (6.35 mm) Tip-Ring-Sleeve so use a cable like this.
 .
.
1/4" TRS Balanced Patch Cable (audiopile.net)
If you use an unbalanced cable (Tip-Sleeve) between the first and second T1 ToneMatch Audio Engine, you will have a lower signal to noise ratio than using a balanced cable (Tip-Ring-Sleeve). This means you will have more noise, and because you will have to turn up the volume on the second T1 ToneMatch Audio Engine you will be amplifying the noise.
This allows the performer using T1® #1 to control the overall volume of both T1®s. If the performer controlling T1® # does not adjust the volume of Channel 4, Changing the Master Volume maintains the relative balance between T1® #1 and T1® #2
Notes:
- T1® #2 will require the optional T1 ToneMatch® Audio Engine power supply
- It would be possible to have a third T1® connected to T1® #1 Channel 5
- Related discussion in the message board T1® Daisy Chain
Here's how you can do the same thing with a L1 Compact

In this example, we have two T1 ToneMatch Audio Engines. (T1®s)
- T1® on the left connected to Compact Channel 2
- T1®on the right connected to the T1® on the left through the Master Analog ¼ inch jack to the other T1® Channel 4
This allows the performer using T1® #1 to control the overall volume of both T1®s. If the performer controlling T1® # does not adjust the volume of Channel 4, Changing the Master Volume maintains the relative balance between T1® #1 and T1® #2
Notes:
- T1® #1 and #2 will require a T1 ToneMatch® Audio Engine power supply
- It would be possible to have a third T1® connected to T1® #1 Channel 5
- Related discussion in the message board T1® Daisy Chain
Connect Analog Stereo Source to an L1®
Backing Tracks — This article covers connecting devices like CD, DVD, mp3, iPods to your L1®
L1® Model II: Can I run a Stereo Source to the Model II Power Stand
A ¼ inch Tip-Ring-Sleeve connector carrying a stereo signal should not be used with the analog input on the Model II.
Even though a ¼ inch Tip-Ring-Sleeve connector can carry a stereo signal this is not how this physical connection is used on the Duo Power Stand.
The analog input on the Model II is balanced, and will therefore subtract the Left and Right signals on a stereo cable and you will hear an L-R (Left minus Right) signal in the Model II.
You cannot 'get through the gig' this way if you are a DJ or if you need to run prerecorded music or have stereo inputs.


Using a Mixer


![]()


If you are using a mixer instead of a T1 ToneMatch Audio Engine use the mixer to create a mono output and send that to the Model II Power Stand Analog input.
- If there is a stereo/mono switch then use it and send the mono output to the Model II Power Stand Analog input.
- If there is a Left/mono output then use that and send it to the Model II Power Stand Analog input.
- If there is no way to create a mono output then pan all your mixer inputs all the way to one side (e.g. Left) and then take the mixer for that side (e.g. Left) output and send it to the Model II Power Stand Analog input.
Protecting the L1® components - Cases
Hardshell Cases — this page is about protecting the L1® components while in transit.