R1 Remote
R1 Remote

These are tips for living with the R1 Remote Control Unit
Contents
Do You Have to Use the R1?
R1 Remote Recommended
Will the unit still work without the R1 Remote?[1]
The PS1 Power Stand (Classic) / Model I continuously senses activity at all preset selectors and what is connected at the input/output jacks. In general, it is not recommended to operate without the R1 Remote connected. The PS1 Power Stand (Classic) / Model I can however function without the R1 Remote. If you power the PS1 Power Stand (Classic) / Model I on without the R1 Remote connected, it will operate as if the R1 Remote was connected and at a fixed setting of 12 o'clock (center position) on all the control knobs. Alternatively, if the unit is powered on with the R1 Remote first connected and the user then disconnects the R1 Remote, it will retain the last settings of the R1 Remote before you disconnected it. This is helpful in the case where sharing may be necessary.
Full Power


Even without the R1 Remote control the system can get to full output if the input trims are carefully set.
If you do proper gain staging, the system will get to full output with all knobs at 12 o'clock. Since proper gain staging is not trivial, we provide the extra gain to take up the slack if the input is not quite hot enough.[2]
-- Hilmar talks about full power the discussion board
What do the LEDs mean?
There are two LEDs on the R1 remote control, one for Channel 1 and one for Channel 2.
The LEDs indicate that a certain level of signal has been reached at a point after the preamp and after the insert loop and before the conversion of the signal from analog to digital.
The LEDs are independent of the Master Volume Control at the bottom of the R1.
The LEDs turn from off → green when there's more than a little bit of signal in the channel.
The LEDs turn from green → red when the signal reaches a threshold that is about 10 dB below the level that would clip the A/D converter and cause objectionable distortion.
If the LED is only flickering red the signal is in a safe range and there will be no distortion.
If the LED is red most of the time the signal is too high and this is what you do.
- 1) Check the LED on the PS1 power stand for that channel. If it is red most of the time, turn down the Trim Control for that channel on the PS1 until the LED on the PS1 power stand is only flickering red.
- 2) Check the LED on the remote. If it is still red most of the time, turn the Channel Volume Control for that channel down on the R1 remote until LED is only flickering red.
After completing this procedure you may be able to get more overall volume by turning up the Master Volume Control on the R1.
Hint: Many players find it helpful to note their gain settings -- trim on the PS1, channel volume and master volume on the R1 -- and make sure these levels are set properly during setup.
Connections
Two R1 Remotes for One PS1 Powerstand
Can I have more than one R1 Remote connected to a single PS1 Powerstand?
No - Please don't try to connect more than one Remote to a Power Stand (or more than One Power Stand to a Remote) Daisy Chain Remotes?
One R1 Remote for Two PS1 Power Stands
There are two connections on the R1 Remote. Can I connect two PS1 Power Stand (Classic) / Model Is and control them simultaneously?
No. The two connections are just for convenience to allow for more flexible routing of the remote cable.
You can, however, set up one PS1 Power Stand (Classic) / Model I with one R1 Remote, then unplug the R1 Remote from the first PS1 and plug it into the 2nd PS1 to get that one set up.
The first PS1 Power Stand (Classic) / Model I will retain the settings present at the time you unplug it.
Please note: This will not let you dynamically control two Systems during a performance, but you can at least get them all set up properly even if you only have one working R1 Remote.
Vocals on the Left
I always wire up the Power Stand so that the vocals are in Channel 1. This just means that it's always the same, easy to describe, and one less thing to wonder about. (exception below)
Two Players
If you've got two players sharing a System, and hence the Remote, take a moment to wire things up so that the Channel strip that affects someone's sound is closest to them.
Leave 'em Hanging - (not)
 Here's an idea for a bracket you can mount on the mic stand. Sure, the velcro is fine but ...
Musicians Friend link to bracket
Zipper Sounds, Latency
Hilmar-at-Bose [3]
...there are two design related issues that come into play here. The reason why nearly nobody knows about this is that rarely anyone ever notices it.
1) The Level knob on the R1 Remote has a certain amount of latency. It takes a moment from the time you turn a knob until the setting actually takes effect. The exact time depends on the circumstances, but it's always less than one tenth of a second which is indeed barely (if at all) noticeable.
2) The Channel 1 and 2 Level controls produce a very slight "zipper" noise when they change between different volume setting. That noise does not affect the tone controls or the master volume. The technical reasons for that are complicated, but I'm happy to explain it, if someone is interested. Anyway, the "zipper" noise only occurs when you actually operate the control, so it doesn't occur while playing unless you play and adjust at the same time. If you need to do that (e.g. for a fade-out) and the zipper is audible and objectionable, you could maybe use the volume control on your instrument or the master volume on the remote.
Again, most people never notice these issues in the first place and if they do, it's rarely a problem of any sort.
See more about Latency and The L1®
Hilmar-at-Bose Talks about the R1 Remote settings
LEDs and the Insert Loop
From Hilmar-at-Bose [4]
The LED on the remote is after the insert loop. Depending on how much energy the signal gains (or looses) in the loop, the LEDs on the power stand and on the remote get out of sync.
Unfortunately, there isn't any easy way to set an effects processor to "unity gain". Observing the two LEDs might help with that.
In general it's not a big deal if any LED goes occasionally red, since there is still some headroom. Only if you see red pretty frequently, it's advisable to turn down.
External Mic Preamp Usage
From Hilmar-at-Bose [5]
Just a little tip: The LED on the power stand and on the remote are calibrated, if nothing is connected to the insert loop. The LEDs are in sync when the channel volume on the remote is at 12 o'clock. Occasional red is fine, since you still have reasonable head room from the point where either LED turns red to when something really bad happens.
Controlling Overall Volume, Using the Remote on Channels 3 and 4
From Hilmar-at-Bose [6]
Where you control the overall volume is partly personal preference. The best choice would be the Master Volume on the Bose remote control. If that's inconvenient (because you want to control everything from the laptop), you can do it from the laptop as well. In this case you should set the master volume on the remote to 12 o'clock. The trim settings on the power stand should be set so that the clip LEDs on the power stand turn red every now and then if you are at full volume at the laptop (or external mixer). You can also look at the LEDs on the remote. If your channel volume controls on the remote are at 12 o'clock and there is nothing plugged into the insert loop on the power stand, the LEDs on the remote and on the power stand are roughly equivalent.
If you are using Channel 1 or 2 for something else already, you should plug both channels from the laptop (or mixer) into channel 3 & 4. Gain staging is a little more complicated: turn laptop or mixer to full volume, set master volume on the remote to 9 o'clock or so (not too loud) and turn up Channel 3/4 level control until some audible distortion occurs and then back up by one notch or so. It doesn't have to be very exact, there is plenty of extra gain in the system if needed.
Another tip, if you find you don't need the remote, there is no need to bring it. If you power up the power stand with out the remote, the power stand will assume a remote with all knobs at 12 o'clock.
Muting
Channel 1 and 2 Level Controls on the Remote don't mute the channels.
Quoting Hilmar-at-Bose[7]
The channel volume controls have about 40 dB gain from all-the-way-down to all-the-way-up but don't completely mute the sound.
Packing It
Ken-at-Bose [8] says
Don't put the Remote Control in the outside pocket of the Power Stand gig bag. It'll get hit during transportation.
The gig bag for the upper half of the L1 Cylindrical Radiator® loudspeaker is designed to leave room for the Remote alongside the bayonet; this is a good protected area.
Stiff Controls
If the knobs get stiff, you can pull them out a bit. Chances are they've just gotten jammed down during packing.
Replacement Cable
You can get a replacement cable (sometimes known as a 7 pin midi cable).
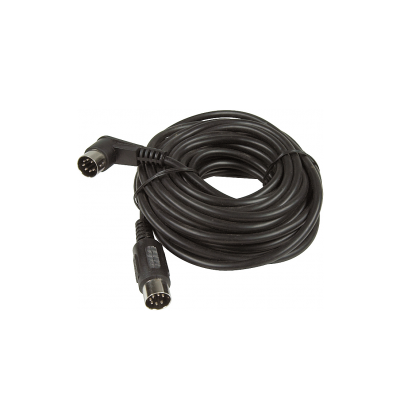
Hosa 7 pin phantom midi cable at Musicians Friend
- ↑ From the Product FAQs: Will the unit still work without the R1 remote control?
- ↑ Hilmar-at-Bose quote from the discussion board
- ↑ Hilmar-at-Bose writes about Zipper Sounds and Latency in the Bose® Musicians Community Message Boards
- ↑ Hilmar-at-Bose talks about LEDs and the Insert Loop
- ↑ Hilmar-at-Bose talks about External Mic Preamp Usage
- ↑ Hilmar-at-Bose talks about Controlling Overall Volume, Using the Remote or Channels 3 and 4
- ↑ Hilmar-at-Bose talks about Level Control on the Remote
- ↑ Ken-at-Bose about packing the remote in the Bose® Musicians Community Message Boards