Difference between revisions of "S1 Pro+ Daisy Chain Wireless"
m |
m |
||
| (2 intermediate revisions by the same user not shown) | |||
| Line 1: | Line 1: | ||
| + | {{S1 Pro+ icon}} | ||
{{DivToc | {{DivToc | ||
| Line 24: | Line 25: | ||
==== Set Up ==== | ==== Set Up ==== | ||
# Turn down the volume on both S1 Pro+ systems | # Turn down the volume on both S1 Pro+ systems | ||
| − | # On S1 Pro+ 2, pair the XLR transmitter to one of the Input channels (1 or 2). For this discussion, we'll assume you have connected to channel 1.<br> | + | # On S1 Pro+ 2, pair the XLR transmitter to one of the Input channels (1 or 2). For this discussion, we'll assume you have connected to channel 1. On S1 Pro+ 2, on the input channel, set the Bass and Treble to 12:00 o'clock, and if using channels 1 or 2, set ToneMatch to Off, and Reverb all the way down.<br> |
[[File:S1 Pro+ XLR MicLine Pair.jpg|600px]] | [[File:S1 Pro+ XLR MicLine Pair.jpg|600px]] | ||
# Connect the XLR Wireless transmitter to S1 Pro+ 1 Line Out (XLR connection)<br> | # Connect the XLR Wireless transmitter to S1 Pro+ 1 Line Out (XLR connection)<br> | ||
| Line 30: | Line 31: | ||
# On S1 Pro+ 2 channel 1 set the input to LINE input<br> | # On S1 Pro+ 2 channel 1 set the input to LINE input<br> | ||
[[File:S1 Pro+ Wireless LINE Input.jpg|600px]] | [[File:S1 Pro+ Wireless LINE Input.jpg|600px]] | ||
| + | |||
| + | ==== Levels==== | ||
# On S1 Pro+ 1, bring up the channel volumes to the desired levels | # On S1 Pro+ 1, bring up the channel volumes to the desired levels | ||
# On S1 Pro+ 2, bring up channel 1 volume to suit your application. Note: This will not necessarily match the same position on the dials as S1 Pro+ 1 | # On S1 Pro+ 2, bring up channel 1 volume to suit your application. Note: This will not necessarily match the same position on the dials as S1 Pro+ 1 | ||
Latest revision as of 13:56, 31 July 2024
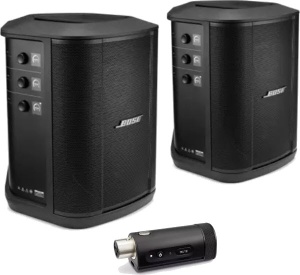
To connect an S1 Pro+ to a second S1 Pro+ using the S1 Pro+ XLR Wireless transmitter.
Terms used
- S1 Pro+ 1
- This is the master S1 Pro+ to which you have connected the sound sources that you want to be heard through both S1 Pro+ systems
- S1 Pro+ 2
- This is the remote S1 Pro+ to which you send the sound from S1 Pro 1
Set Up
- Turn down the volume on both S1 Pro+ systems
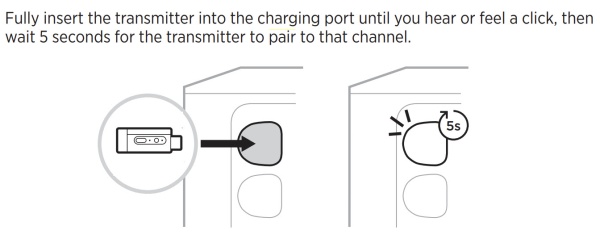
- On S1 Pro+ 2, pair the XLR transmitter to one of the Input channels (1 or 2). For this discussion, we'll assume you have connected to channel 1. On S1 Pro+ 2, on the input channel, set the Bass and Treble to 12:00 o'clock, and if using channels 1 or 2, set ToneMatch to Off, and Reverb all the way down.
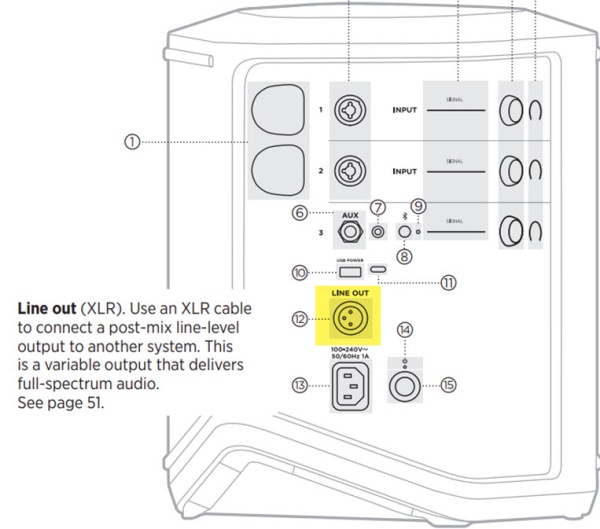
- Connect the XLR Wireless transmitter to S1 Pro+ 1 Line Out (XLR connection)
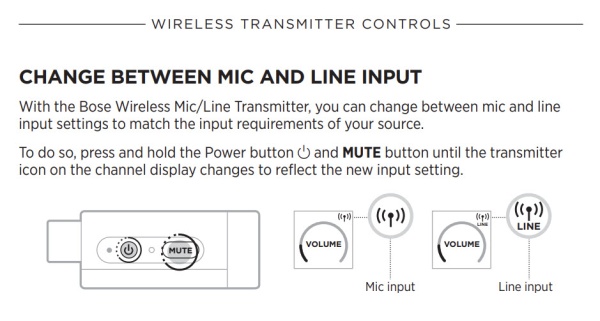
- On S1 Pro+ 2 channel 1 set the input to LINE input
Levels
- On S1 Pro+ 1, bring up the channel volumes to the desired levels
- On S1 Pro+ 2, bring up channel 1 volume to suit your application. Note: This will not necessarily match the same position on the dials as S1 Pro+ 1


