Difference between revisions of "Compact Daisy Chain"
m |
m |
||
| (7 intermediate revisions by the same user not shown) | |||
| Line 1: | Line 1: | ||
{{Compact icon}} | {{Compact icon}} | ||
| − | <noinclude>This page describes | + | <noinclude>This page describes '''how''' to make the connections. Please also see: [[Stereo / Mono / Distributed Systems]] to read when and why you would do this. |
</noinclude> | </noinclude> | ||
Use this when you want the same output from two or more Compacts, typically to This will provide additional coverage in larger spaces. | Use this when you want the same output from two or more Compacts, typically to This will provide additional coverage in larger spaces. | ||
| − | ;For best results running two Compacts with the same source, put the two Compacts at least 20 feet apart. | + | ;For best results running two Compacts with the same source, put the two Compacts at least 15-20 feet apart. |
<br>Reference [[Stereo_/_Mono_/_Distributed_Systems#Mono|Stereo / Mono / Distributed Systems - mono ]] | <br>Reference [[Stereo_/_Mono_/_Distributed_Systems#Mono|Stereo / Mono / Distributed Systems - mono ]] | ||
| Line 12: | Line 12: | ||
[[Image:Compact Daisy Chain Excerpt FromManual.gif]] | [[Image:Compact Daisy Chain Excerpt FromManual.gif]] | ||
| − | + | ; Volume Setting | |
| + | : The volume settings on the first Compact will raise and lower the output to the second L1® Compact. Set the volumes on the first L1® Compact and then bring up the level on the second L1® Compact to set the relative volumes between the two systems. If you set the volume controls of the first and second Compacts to the same level, the second L1® Compact could be louder. | ||
| + | ; Use a balanced (Tip-Ring-Sleeve) cable if possible. | ||
| + | [[File:14trstotrs.jpg|400px|right]] | ||
| + | : If you use an unbalanced cable (Tip-Sleeve) between the first and second L1 Compact, you will have a lower signal to noise ratio than using a balanced cable (Tip-Ring-Sleeve). This means you will have more noise, and because you will have to turn up the volume on the second L1 Compact you will be amplifying the noise. | ||
[[Image:Compact Daisy Chain.jpg]] | [[Image:Compact Daisy Chain.jpg]] | ||
| + | ; Hum or noise | ||
| + | * Make sure you are using a balanced cable between the two L1 Compacts (1/4 inch (6.3 mm) Tip-Ring-Sleeve) | ||
| + | * If possible, both L1 Compacts should be connected to the same power source (e.g., power bar or AC outlet) | ||
| + | * If using a laptop, try running it on battery only. Some laptop power supplies can be very noisy | ||
| + | * Check the connection to the first L1 Compact to avoid sources of hum or line noise (poor or incorrect cable connections) | ||
Latest revision as of 22:50, 1 January 2023
This page describes how to make the connections. Please also see: Stereo / Mono / Distributed Systems to read when and why you would do this.
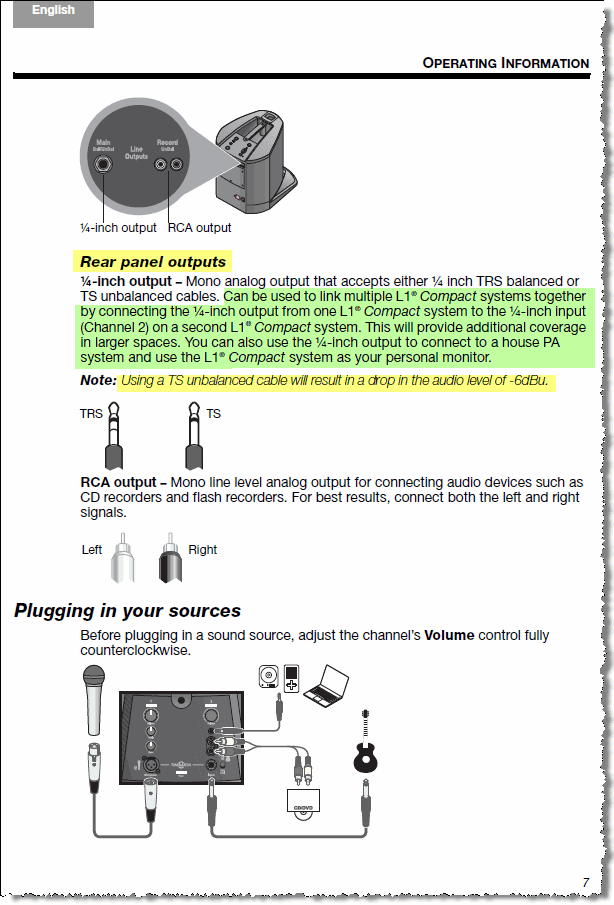
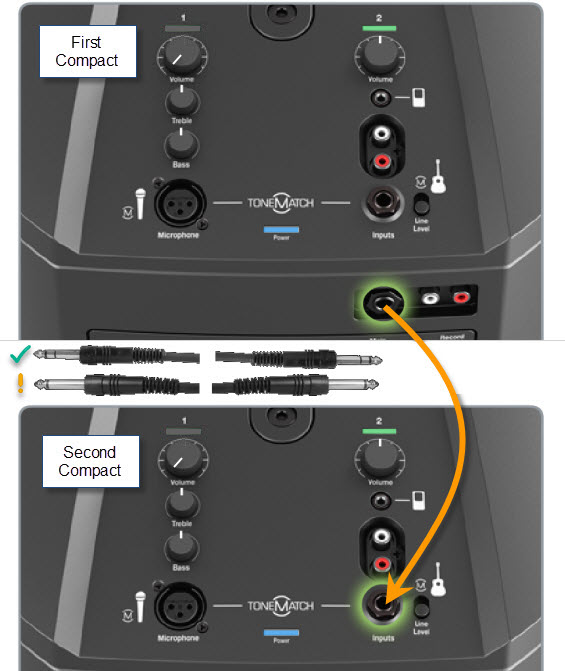
Use this when you want the same output from two or more Compacts, typically to This will provide additional coverage in larger spaces.
- For best results running two Compacts with the same source, put the two Compacts at least 15-20 feet apart.
Reference Stereo / Mono / Distributed Systems - mono
- In most situations, if you have two or more L1 Compact systems, you will want to run each sound source (microphone or instrument) to just one L1 Compact system, typically the closest one. Sometimes people want to connect two L1 Compact systems together. This is Dual Mono and not generally recommended except in very specific applications (see Stereo / Mono / Distributed systems). If you want to run Dual Mono Bose recommends that the L1 Compact systems are at least 15-20 feet apart (6 meters).
- Volume Setting
- The volume settings on the first Compact will raise and lower the output to the second L1® Compact. Set the volumes on the first L1® Compact and then bring up the level on the second L1® Compact to set the relative volumes between the two systems. If you set the volume controls of the first and second Compacts to the same level, the second L1® Compact could be louder.
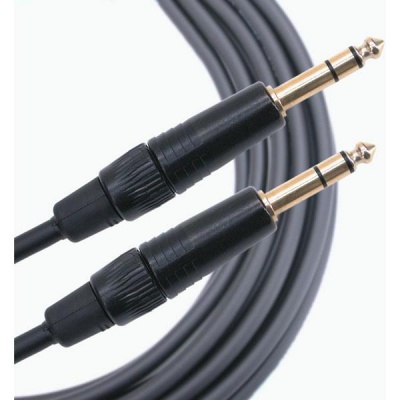
- Use a balanced (Tip-Ring-Sleeve) cable if possible.
- If you use an unbalanced cable (Tip-Sleeve) between the first and second L1 Compact, you will have a lower signal to noise ratio than using a balanced cable (Tip-Ring-Sleeve). This means you will have more noise, and because you will have to turn up the volume on the second L1 Compact you will be amplifying the noise.
- Hum or noise
- Make sure you are using a balanced cable between the two L1 Compacts (1/4 inch (6.3 mm) Tip-Ring-Sleeve)
- If possible, both L1 Compacts should be connected to the same power source (e.g., power bar or AC outlet)
- If using a laptop, try running it on battery only. Some laptop power supplies can be very noisy
- Check the connection to the first L1 Compact to avoid sources of hum or line noise (poor or incorrect cable connections)


