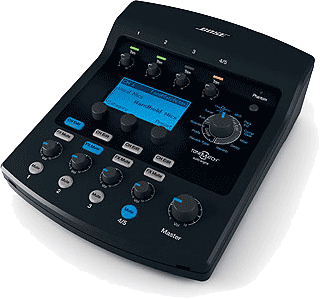
T1 ToneMatch® Audio Engine / Use without the L1® in Festival Situations
The following technique provides a way :
- To supply the Front of House engineer with four distinct signals (direct outs) that are not modified by any changes to the T1 ToneMatch Audio Engine settings (except for the T1 Input Trim controls)
- The use of the T1 Master Output for a monitor mix.
Features
- Up to four dry balanced direct output signals for the house system. These signals will not contain any ToneMatch preset, zEQ, Para EQ, Comp/Gate, Modulation, Delay or Reverb.
- The FOH engineer will have full control of the FOH sound.
- The following T1 controls will not affect FOH: Mute buttons, Input Volume controls, Master Volume control, FX Mute buttons, T1 Rotary Selector (except for the Aux position)
- One monitor mix via the T1 Master Output containing any ToneMatch preset, zEQ, Para EQ, Comp/Gate, Modulation, Delay or Reverb that you have assigned to any of the T1 channels
- Control of your monitor mix via the T1
Caveats
- The input Trim control settings should not be changed once they have been set for proper gain staging. Any changes to the Trim controls will affect the Preamp OUT signals thus affecting FOH
- The T1 power switch should never be turned on or off while the T1 is connected to the "festival sound system" until the sound engineers have muted all related inputs. Big bangs and pops will ensue with possible (expensive?) damage to the sound system. This is true for the FOH console and the monitor console if one is in use.
- Most "festival" monitor systems will have a graphic EQ already adjusted for best gain before feedback. This should minimize feedback issues with your vocal microphone.
- Acoustic Guitars with internal microphones and certain pickups may encounter feedback issues you would not necessarily have encountered with the L1 positioned behind you since the monitor speaker will likely be positioned in front of you. Consider altering the positioning of the monitor speaker as one option should you encounter feedback. Other options include: changes to the T1 EQ settings including the Para EQ, changes to the monitor graphic EQ by enlisting the assistance of the monitor engineer, a guitar sound hole feedback plug.
- Your usual favorite ToneMatch presets may or may not provide the sound that you are accustomed to hearing from your L1. If you have access locally to a "triple system" (especially monitor speakers) you may want to experiment and save some optional scenes in your T1 prior to flying out to a festival.
- Channel 4/5 Aux must be set to Dry
- Channel 1, 2 and 3 Aux must be set to Mute
- You must explain to the sound engineer that the T1 Master Output is for the monitor mix only and that the other outputs are not to be sent to your monitor.
Equipment required
- T1 ToneMatch Audio Engine
- T1 power supply, see: Spare Parts
- Non polarized AC cable for T1 power supply (included with the T1 power supply)
- Musical instruments and associated cables and accessories
- Microphone(s): bringing your own microphone is the only way to ensure you will be performing with a microphone with which you are comfortable.
- Microphone cable: yes they will likely have microphone cables you can use (see Note at end of list).
- ¼ TRS male to male XLR cables (for one T1 up to 5 cables may be required, 5 feet would be a good length.)
- Something to secure your T1 to a stool, a chair, a microphone stand or a music stand. (T1 microphone stand adapter, gaffers tape, Velcro...)
- Something to secure all the cables (connected to the T1) to a leg of the stool/chair, music stand... (double sided Velcro, string, gaffers tape)
- Notes: All your cables should be clearly marked for easy identification during tear down at the end of your set. This can be something permanent or it can be temporary with colored tape with your initials. If you bring you own microphone(s) then bringing your microphone cable(s) as well would minimize cable mix ups at tear down (all cables connected to the T1 are your cables). Of course bringing everything contained in the list may not be practical in some situations.
Connections to the T1
- Connect your instrument(s) and vocal microphone(s) to the T1 as you would if you were using your L1
- Connect a ¼ TRS male to male XLR cable to each T1 Preamp OUT connector as required
- Connect a ¼ TRS male to male XLR cable to the T1 Aux Output if you have an instrument connected to your T1 channel 4/5
- Connect a ¼ TRS male to male XLR cable to the T1 Master Output
- Connect the T1 power supply to the T1
- Note: up to five ¼ TRS male to male XLR cables will be connected between the T1 and the house system (one as a Preamp OUT (a.k.a. Direct Out) for each input being used and one Master Out for a monitor mix).
