Instruments / Drums
|
Here are several ways to connect your L1 Classic or L1 Model I to
|
Presets
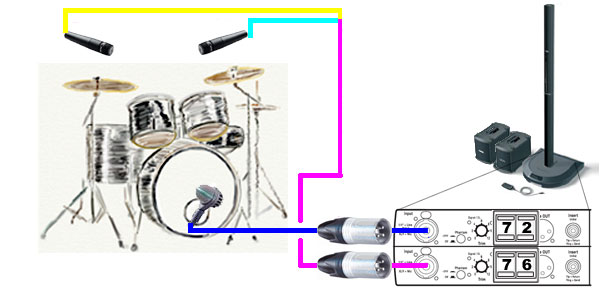
You will want to try the Kick Drum Presets
- 70 Kick Drum
- 71 Kick Drum, Audix D6
- 72 Kick Drum, AKG D112
- 73 Kick Drum, Sennheiser 601
- 74 Kick Drum, Shure Beta 52a
- 75 Generic Overhead
- 76 Drum Overhead, Differential SM57
- 77 Drum Overhead, Differential Electret
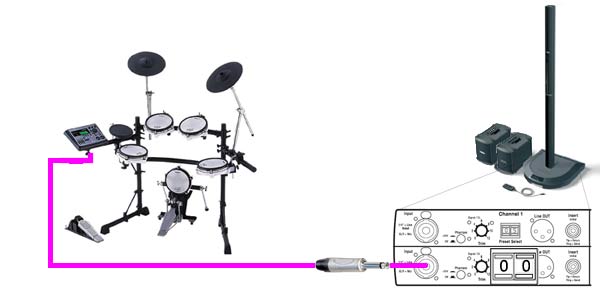
- 00 Flat when you are using a mixer
More Bass for the Kick Drum
If you want to add more low end consider getting a PackLite® power amplifier model A1. You definitely want to read B1 Bass Module/Positioning.
Out-or-Phase Overheads and Kick Drum
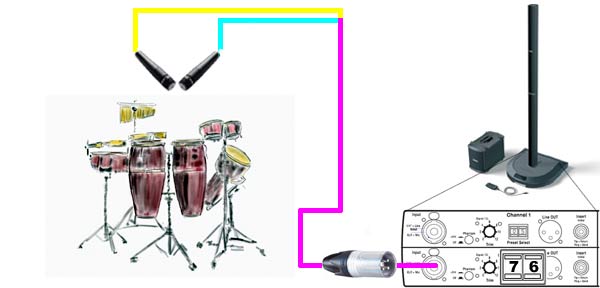
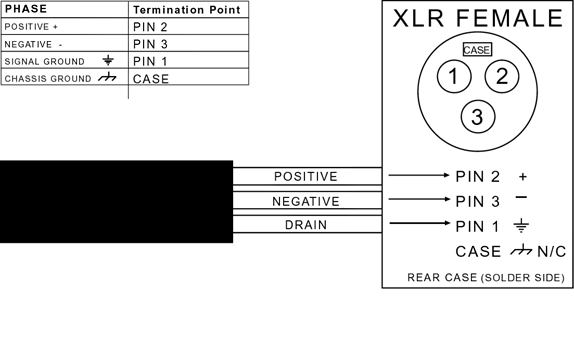
This depicts using two Shure SM57 microphones wired Out-of-Phase. This allows you to have two microphones "overhead" taking only one Channel, leaving another Channel free for the Kick Drum.
- These are not "overheads" but 57's placed below the cymbals and above the top heads of a small kit. The mics are wired out of phase, basically 2 and 3 reversed on an XLR. There's lots written about this on our forum. But the basic idea is that the pair will cancel onstage bass but pick up local instruments on the kit, in an effort to reduce rebroadcasting onstage bass from the drum mics. This way we get a stronger signal than typical overheads and cleaner bass onstage. To "mix" these, just move the mics closer to the instrument you want to emphasize. Typical setup is on either side of the snare facing the snare. Snare is everywhere and there is no need to put a mic directly on it. It's actually pretty easy to set up and adjust, moving the mics around for a good kit mix. With 3 mics and only 2 inputs on the PS1, we get a really nice amplified sound for our shows. I listened to the output of the pair recently (multitrack recordings of a recent show) and the cancelling thing really works great. Give it a try. -- see Out-of-Phase for complete notes.
Using a Mixer
If you want to have more than two or three microphones for Drums, then you can use a mixer for a submix running to one Channel on your Power Stand. Use another Channel (1 or 2) free for the Kick Drum so you can use a Preset. Although it is not shown here, you could run the mixer to Channels 3 or 4. This would leave you with Channel open for a Vocal microphone.
Electronic (V-Drums)
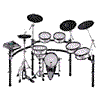
This is as simple as it gets. Your Drum Module controls all the sound and you take the output to one Channel on your L1™. There is no particular advantage to splitting the out the Kick Drum.
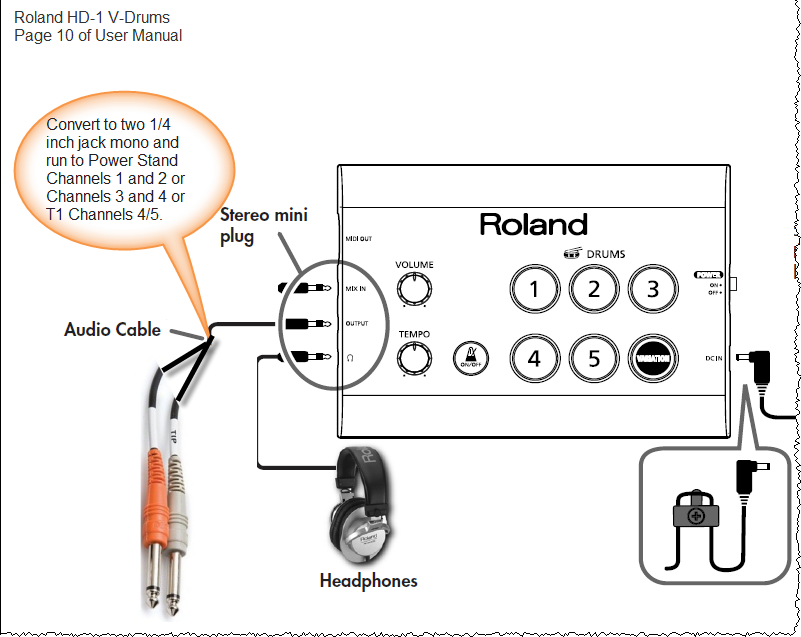
Roland HD-1
Adapted from Roland HD-1 User Manual
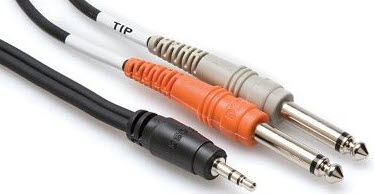
Use a cable like this:
Source: Amazon Hosa CMP159
Percussion with Out-of-Phase Overheads
We are using the same approach for Out-of-Phase microphones as we discussed above.
Out-of-Phase Overheads
Originally posted by Cliff-at-Bose: in Out of Phase Overheads [1]
These are not "overheads" but 57's placed below the cymbals and above the top heads of a small kit. The mics are wired out of phase, basically 2 and 3 reversed on an XLR. There's lots written about this on our forum. But the basic idea is that the pair will cancel onstage bass but pick up local instruments on the kit, in an effort to reduce rebroadcasting onstage bass from the drum mics. This way we get a stronger signal than typical overheads and cleaner bass onstage. To "mix" these, just move the mics closer to the instrument you want to emphasize. Typical setup is on either side of the snare facing the snare. Snare is everywhere and there is no need to put a mic directly on it. It's actually pretty easy to set up and adjust, moving the mics around for a good kit mix. With 3 mics and only 2 inputs on the PS1, we get a really nice amplified sound for our shows. I listened to the output of the pair recently (multitrack recordings of a recent show) and the cancelling thing really works great. Give it a try.
Hilmar-at-Bose talks about Wiring Two SM57s with a Y cord [2]
Here's the nerds view.
Wiring the the two mics out of phase creates essentially a "dipole". Everything that is in the middle (i.e. equal distance) between the two microphones will get equally but out-of-phase so it cancels when the two microphone signals are summed together. In essence it creates a "blind spot" for the microphones for whatever is right in the middle plane. For the drums, that's mainly the kick (as Larry pointed out) and also the drummer (when he/she is hemming and hawing, squeaking with the chair, yelling about or in general having a grand old time).
Another nice trick is to place the L1 that gets the mic signal somewhere in the middle plane of the microphones. This drastically reduces potential for feedback and unwanted regeneration. Sound sources that are significantly closer to any one of the microphones are not much affected by the whole procedure.
the original discussion ← is highly recommended.
Sources for the Cables
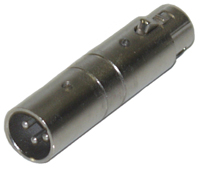
Hilmar-at-Bose talks about buying an out-of-phase adapter.[3]
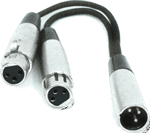
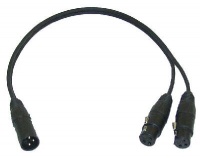
The Y-adapters are pretty rare, I don't think you can buy them on line. You can buy an ordinary 2-female/1-male XLR Y adapter like YMFF type
and put an XLR phase inverter on one of the female ends.
Do it yourself Phase Reversal
You can buy or make an ordinary 2-female/1-male XLR Y adapter like YMFF type
You will need to swap the wires on 2 and 3 on one of the ends that goes to a microphone.
Out of Phase Condenser Microphones - Not Recommended
Hilmar-at-Bose talks about Wiring Two Condenser microphones with a Y cord[4]
I would NOT recommend the out-of-phase Y adapter (or any kind of Y-adapter for that matter) with condenser mics. These mics have build in preamplifiers and connecting the outputs directly will present the mics with the wrong input impedance.
Again, I would only recommend the adapter for dynamic microphones (like for example a Shure SM57). If you want to use KSM109s (which are nice microphones), you may have to use a little mini-mixer to combine the microphone signals. You can still use the XLR phase inverter on one channel to get the cancellation effect. The 109s should work for near field as well as for overhead. For near-field you might have to engage the -15 dB pad on the microphones.
Overhead Condensers
MikeZ-at-Bose suggested:
- The C1000's are great mics. With L1's the way to do overheads is to place the overhead mic stand *behind* the drummer, with the mics pointing slightly toward the audience. Its sort of backwards from how its usually done, but it works really well. You will not need the para EQ if you set the condensers in this way.
Source: MikeZ-at-Bose talking about micing Drums
Using the T1 ToneMatch Audio Engine Kick Gate
Introduction
KickGate is a Bose® proprietary technology on the ToneMatch Mixer[5] that allows you to raise the level of a kick drum channel while eliminating the risk of feedback from the microphone.
In addition, KickGate cleans up the sound of kick drum so that it's tight and clean as it is without amplification.
KickGate settings are available in the Comp/Gate menu on the ToneMatch Mixer[5].
KickGate Frequently Asked Questions
Using the KickGate
- Connect the appropriate type of microphone.
- Select an appropriate ToneMatch™ preset.
- Adjust the channel input Trim control so that the hardest kick drum hits turn the input channel LED yellow, but not red.
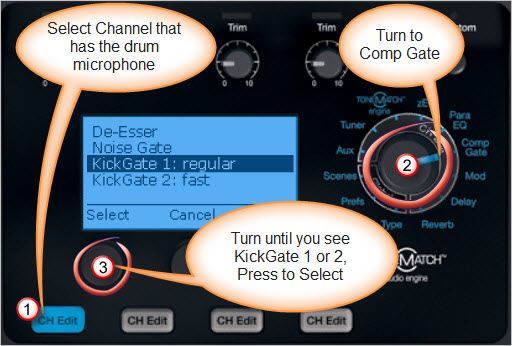
- Select Comp/Gate with the T1 rotary selector.
- Rotate the Type button to scroll down the list, highlight KickGate 1 or KickGate 2, and press Select.
Choose KickGate 2 when using a double bass drum pedal.
- While playing the kick drum, increase the volume to the desired performance level.
- Play the kick drum at the softest level you intend to use in the performance and check that you can hear it.
- While playing softly, increase the Thresh level until some of the kick drum hits get cut off. Then lower the Thresh level by 3dB.
- While playing the kick drum normally, rotate the Tight button counter-clockwise to reduce the tightness and
add more “boom” to the sound. Tightness can be adjusted from 0 (slowest) to 100% (fastest).
How does KickGate affect EQ, effects, etc, on the kick drum?
The gate is meant to kill feedback from the dedicated microphone on a kick drum only. No other processing is linked to the KickGate, so you won't lose any special preset goodness or other drum sweetening.
Can/should I use it with Electronic Drums
KickGate will stay closed (allow no signal through) unless it thinks it detects a kick drum hit, so cymbals, snare, et cetera on the same channel as kick probably won't get through (won't be heard), or worse, they'll get through sometimes and not others.
Furthermore, the kick drum sound on an electronic kick drum has little or no chance of feedback, and therefore, KickGate is not needed.
Do not use KickGate with electronic drums.
[Drumr added information 3/16/2010]
The Kick Gate can be used with electronic drums, IF the kick signal is sent to the T1 in it's own channel, NOT as a part of the L/R group mix. Your sound module must have at least one extra output other than the L/R mix. The Roland TD-12 has L/R and additional outputs 1 & 2.
I have done this in a few boomy rooms, however, the gate is not all that effective when trying to tame *the room* as opposed to cutting of the sample's sonic envelope. The decay envelope of the electronic kick is better reduced internally in the drum sound module you are using. This is typically done with the *muffling* and *decay* edit screens, if available in your module.
What if I use electronic drums on some gigs and acoustic drums on others?
Here's real-world advice from a real world drummer, drumr's advice
KickGate is an indispensable feature of the T1 engine.
But be very careful when doing *other* gigs, and using V-drums after setting up your T1 with the kick gate for your acoustic drums.
I can't tell you how many times, I run a vocal mic or my V-drum Overhead instruments into a channel that still has the kick gate engaged from the last gig.
I know, I should always bring up a fresh *scene* for those other gigs, but I forget. I go in and change presets, and look at reverb & echo, but always forget about the Gate.
My gigs are divided between acoustic drums, electronic drums, and open mic settings. Things change almost every gig.
When it's a vocal in the afflicted channel, it's easier to spot...but for short duration sounds like many in a drum kit, it's harder.
- ↑ Cliff-at-Bose: in Out of Phase Overheads Original post in the Bose® Musicians Community Message Boards
- ↑ Hilmar-at-Bose talks about Wiring Two SM75s with a Y cord Original post in the Bose® Musicians Community Message Boards
- ↑ Hilmar-at-Bose talks about buying an out-of-phase adapter
- ↑ Hilmar-at-Bose talks about out of phase condenser microphones
- ↑ 5.0 5.1 T4S ToneMatch mixer or T8S ToneMatch mixer or T1 ToneMatch Audio Engine
