Template:T1 to Model I or Classic
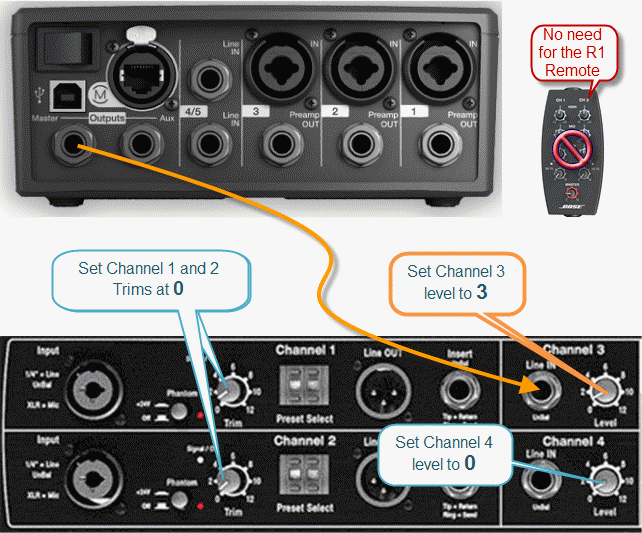
Here are details on how to connect a T1 ToneMatch Audio Engine to a L1 Classic or L1 Model I
Notes:
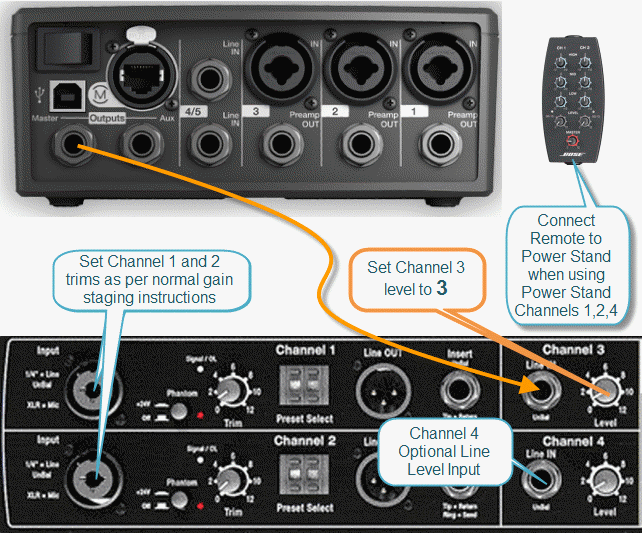
The recommended trim setting input Ch 3 or Ch 4 is 3 (see below).
With this setting you will not distort or clip the Model 1 no matter what you do on the T1. You can even use the Model 1 without the remote. More on this later.
For these conditions:
- T1 ToneMatch® Audio Engine going into L1® Model I/L1® Classic into Channel 3/4
- Balanced OR Unbalanced 1/4" cable
- Remote unplugged, OR, master volume on Remote at 12 o clock
- Proper gain staging required on the T1® itself
This will give you the same gain going into the L1® Model I/L1® Classic as if you were going through the ToneMatch® input on a L1 Model II.
If you are using the Remote on your L1® Model I/L1® Classic, then you will need to compensate a bit. If you are running the Remote master volume at max, then stick with 2 on Ch 3/4. When using a T1®, run the master volume of the R1 above 12 o'clock .
Connection to L1 Model I / L1 Classic with Remote
If you want to use the PS1 Power Stand Channels 1 or 2 or 4, then you will want to connect the R1 Remote to the PS1 Power Stand.
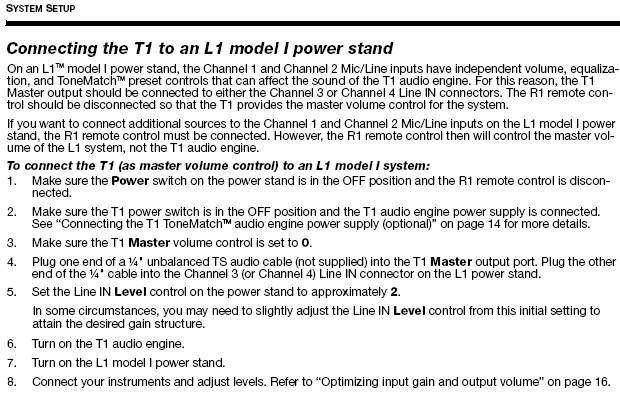
Excerpt from the T1 ToneMatch Audio Engine Manual - page 20 - Note: this recommended input setting is now 3. See the note above.


