T1 ToneMatch® Audio Engine / Tips & Tricks
Introduction
Here are some tips and tricks to get the most out of your ToneMatch Mixer.
This article applies to all ToneMatch mixers (T1/T4S/T8S).
Feedback
Feedback: Para EQ
The technique takes some practice and experimentation. But the effort is worth it because the technique can be used in many different situations.
You'll be using the parametric equalizer on the T1 ToneMatch Audio Engine to improve vocal microphone feedback. The parametric equalizer has a frequency adjustment to select the pitch (note) you want to shape, and a boost or cut adjustment to increase or decrease that pitch like a regular tone control. It also has a bandwidth knob, to set how wide a range of pitches around the single pitch you are adjusting.
- Turn the volume down on the microphone channel; mute any other microphone channels.
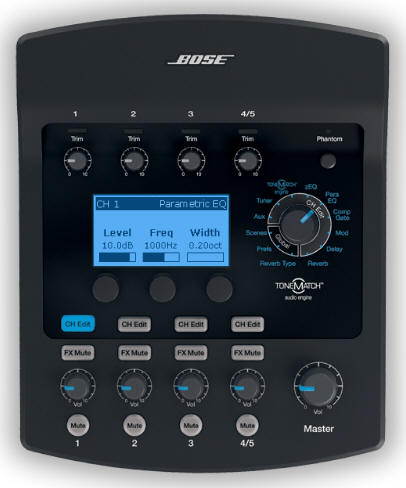
- Set the Para EQ Level to 10 dB boost (boost, not cut)
- Set the Para EQ Width to 0.20 oct
- Slowly turn up the volume of the microphone creating feedback to just before feedback. You'll probably start to hear the pitch that feeds back but don't let the feedback start.
- Start changing the Para EQ frequency control. At some point, the system will begin to feedback on the same pitch you were hearing without the boost. With some tuning and listening, you now have the Para EQ frequency set to the same (or very nearly the same) frequency causing feedback. You may need to change the volume of the microphone channel to avoid going into loud feedback.
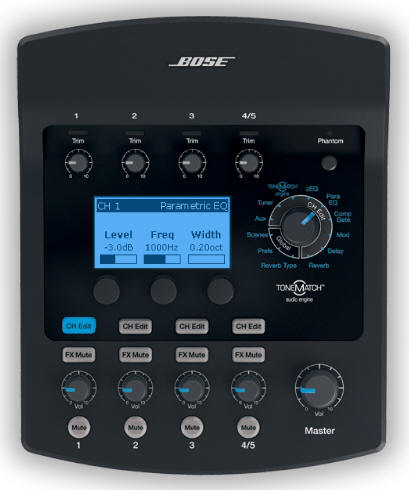
- Change the ten dB boost to a cut, to notch out the frequency. Start with a cut of about 3 dB and use more only if necessary. That microphone should now be able to be used with less feedback.
If there are multiple microphones in the system you may find that the whole system feeds; if so, repeat this procedure for the other microphones (muting the other microphones while adjusting the Para EQ on one of them).
Once you know the frequency for one microphone (and the T1 tells you this in Hz), you can start by applying the same notch to other microphones -- but you may find that some adjustments are needed for each due to differences in the microphones and their different locations.
How much does this hurt the sound? You should experiment a little, since -- it depends. The notch will have different effects on the tone depending on how deep it is (how much you cut), how wide it is (keep it as narrow as you can), and where it is relative to your voice or instrument. Use your ears to tell you if you've gone too far.
This technique was described in a field report by Bill-at-Bose.
Here is a video about the relationship between the ToneMatch Presets, zEQ, ParaMetric EQ.
Feedback: Comp Gate / Noise Gate
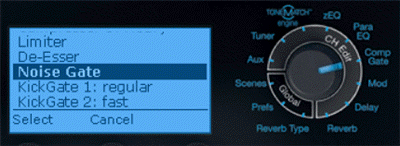
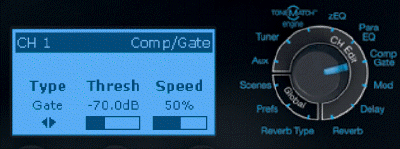
Use the CompGate - Noise Gate to effectively mute the microphone when there is not a strong vocal.
You will have to experiment to find the best setting.
From the Bose® Pro Portable PA Community
It seems so obvious now that the Noise Gate is the answer; still, your post prompted my epiphany. We play electric and definitely louder than an acoustic act. (ex: I use either two customized Blues Jr's in stereo, my '65 Super Reverb, or my ProTube Twin Amp on stage) The tonematch's Noise Gate solved the feedback resulting form my need to push the vocal mike to the max. Also, I don't have to stand in between the microphone and the Bose to avoid that ensuing ring. The band was awestruck by my the improvement in my "mixing prowess". Of course, I didn't tell them that you cued me in. Thanks, (and don't tell anyone you told me, ha!)
Feedback Problems - Esparka
Para EQ Isolating a Problem Frequency
This started with a question from John Nell [1]
- I understand the concept of notch filters. I'm thinking the ParaEQ works in a similar way, and I understand Level and Freq options. I'm having trouble understanding the Width function. I understand the bell curve concept around a center frequency, but can someone diagram for me the .20 to 5.00 octave width? Exactly, what does this look like on the bell curve? What do the values, .20 and 5.00 mean visually? A diagram to explain it would be great, but I don't understand the "octave" part of it.
If you set the Frequency to say... E3 and the width to 1.0 octave, then my reading of the of the documentation suggests that the widest part of the curve would be one octave wide, or half an octave on either side of E3.
If you set the width to 0.5 then the base of the curve (on the Y-axis) would be one half octave, or one quarter octave on either side of E3.
In other words, the narrower the width, the more precise the effect whether you are increasing or decreasing the frequency.
I don't think in terms of precisely how many notes on either side the width is affecting - just that the smaller the width, the more highly focused my efforts will be. Or if you like, the smaller the base of the curve will be, or ... smaller width suggests that it will affect fewer notes around the central frequency selected with the middle knob.
Examples
So some concrete examples.
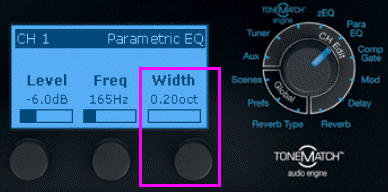
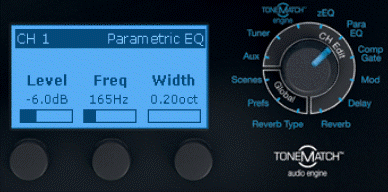
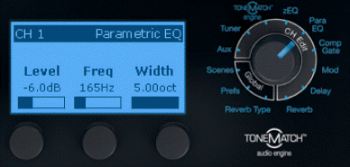
I have a big body jazz guitar that really likes to resonate at about 165Hz. That's an octave above the open (lowest Guitar) E string. So rather than having to mute that string all the time, I just dial up that frequency and set the width as narrow as I can - 0.2 (1/5 th of an octave) and setting the Level to -6 dB. This seems to do the trick, and since this Guitar really *loves* that note, dialing it back just balances things out a bit. I used -6 dB because I needed that much to tame the problem. In real life you fine tune the cut by ear. Use much as you need, but as little as possible.
If you have a wolf tone in your Bass, you could probably tame it with the Para EQ.
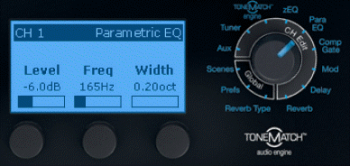
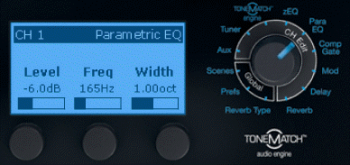
Starting with the T1 ToneMatch Audio Engine looking like this
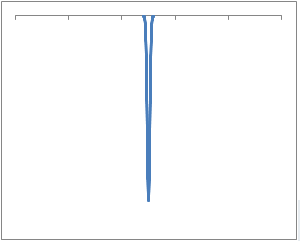
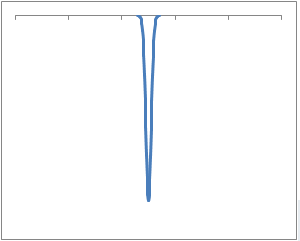
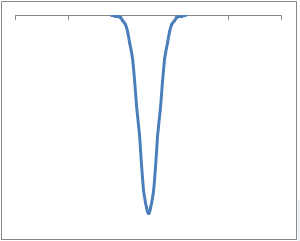
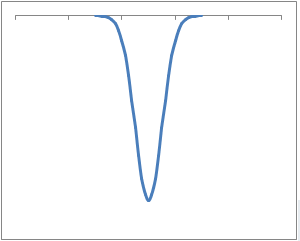
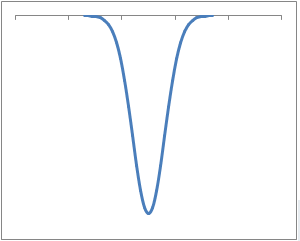
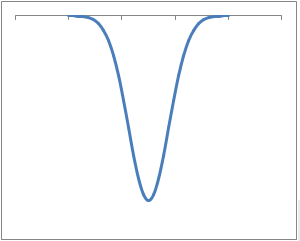
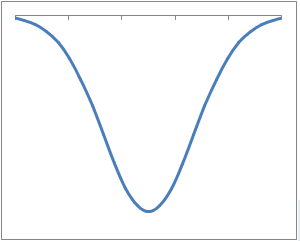
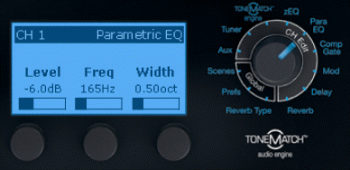
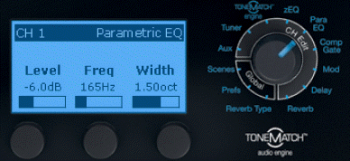
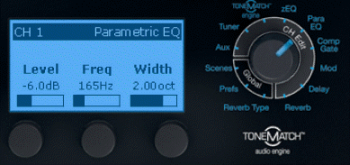
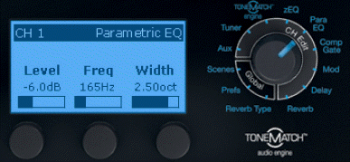
imagine that we are increasing the Width parameter. In the plots below the center point (lowest representing -6dB ) is the Frequency that you select with the middle button, in this case, 165 Hz (E3, not shown in the Simulator). The tick marks on the X-axis are roughly one octave.
The plots below suggest the widening range of notes that will be affected by the Level (-6 dB) as we go increase the Width. The plots point down because we are applying a negative level. The depth of the plot (distance down) would vary up and down as we changed the Level. I have kept these constant so we can focus on the Width parameter.
The following are extremely rough approximations. For anyone reading - there is nothing scientific about these plots. The appearance suggests a level of precision that is way beyond what I did to create these images. (Normal distribution curve, manipulated the standard deviation). Just go for the rough visual impression. Thanks!
|
|
|
|
|
|
|
|
|
|
|
|
|
The discussion continues here: T1 Newbie Questions/Solutions
Related articles
Related reading
- The EQ Primer (external link)
Usage Tips
A/B Comparisons using Bypass
Introduction to Bypass
- This applies to all ToneMatch mixers.
Hi Folks,
At the recent L1 users conference in Colorado, we found out that a high percentage of T1 owners did not know about the BYPASS feature that's employed in many places in the T1.
The BYPASS feature is extremely useful in deciding if a particular adjustment is giving you the sound you want. It's a form of an A/B switch.
For example, if you want to hear how a particular ToneMatch preset sound on and off, you would use bypass. If you wanted to hear how a particular reverb sounded you could turn it on and off, on and off. And so on. Most effects have this valuable feature.
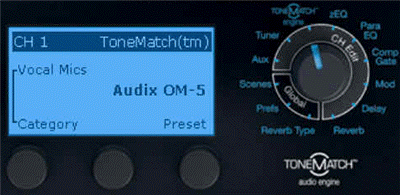
As an example, here's the screen after you've chosen a Tonematch preset for Channel 1. In this case, I've chosen the preset for an Audix OM5.
Tutorial
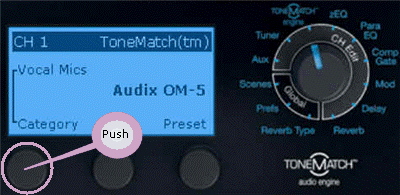
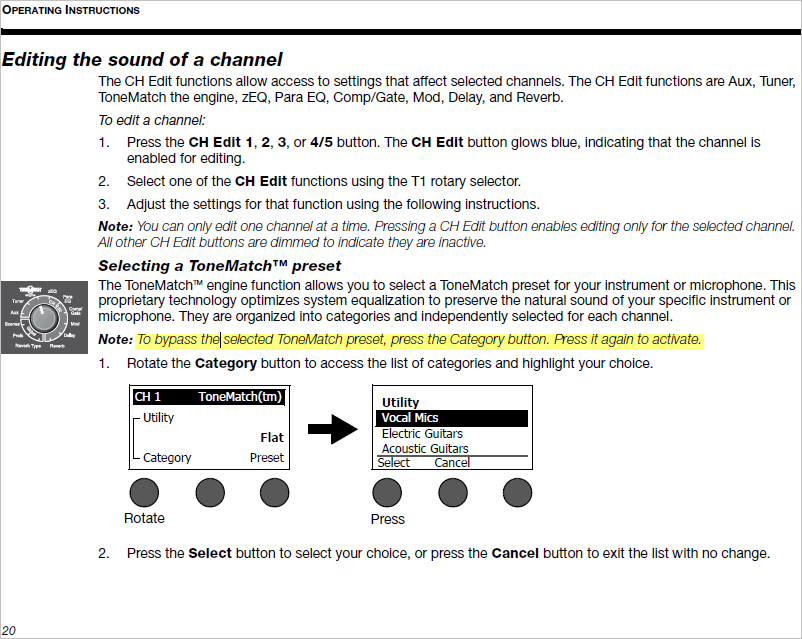
To go into bypass mode, just click on the rotary-push knob below the word "category" on the screen.
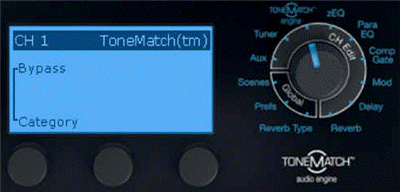
Here's what the screen looks like after you push the button.
Quick Tutorial on Highly Useful BYPASS Feature... - Ken-at-Bose
What Happens When You Bypass a Preset?
- What happens when you select a channel ‘Bypass’ button on the T1® audio engine?
- Pressing the ‘Bypass’ button on a channel will change it’s current ToneMatch® preset to the generic “Utility Flat” preset. This enables you to audition between specific ToneMatch® presets and the ‘Utility Flat’ setting, helping you decide which preset you will ultimately choose.
- In contrast, the key frequency adjustments for zEQ do not change when the ToneMatch® preset is ‘Bypassed’. For instance say that you originally had a ‘Kick Drum’ preset selected and then pressed ‘Bypass’, the key zEQ adjustment points would still remain focused on fine tuning a kick drum.
Source: Neil-at-Bose
Bypass Reverb
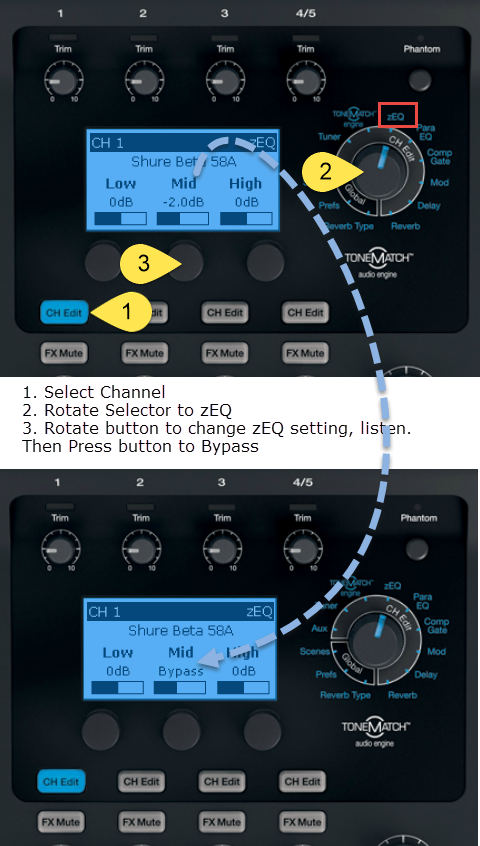
To bypass a zEQ setting on your T1®
Use this to compare the sound with and without a zEQ setting to really hear what the zEQ is doing to the sound in the room.
Bypass zEQ
To bypass a zEQ setting on your T1®
Use this to compare the sound with and without a zEQ setting to really hear what the zEQ is doing to the sound in the room.
Passive Piezo Pickups
If you have instruments with passive pickups, and instruments with active pickups or preamps, try the passive pickups in T1® Channels 1, 2, or 3. You can put the instruments with active pickups or preamps into Channels 4/5. Bouzouki with passive McIntyre Pickup to T1® - MBanshee.
Switching between Instruments
Mary (Banshee in the Kitchen) noted [2]
- The main trick for me was to remember to hit the channel edit button for the instrument you want to change. For instance, I'd be playing guitar and want to tune in between numbers, so I'd crank around to the tuner and wonder why it wasn't picking up my signal well. Well, I'd been playing with my 12-string settings a while back and that Channel Edit button was still pushed, even though I'd gone on to playing another instrument.
I'm going to develop the habit of hitting the Channel Edit button before doing anything instrument in hand.
Hilmar-at-Bose replied
Do you mute the "unused" channels when you switch instruments ? If you do, you could try to make a habit of hitting the "channel edit" every time you take a channel out of mute. I've tried that a couple of times when switching basses and it works fairly well for me. I do
- a) hit mute on Channel 1
- b) put bass 1 down
- c) pick up bass 2
- d) hit unmute and Channel Edit on channel 2
This way I don't even have to touch the volume controls on the bass and can go directly back to where I was.
One Source to Two Channels
If you have one source like a cable that you switch between two instruments, or a wireless receiver with two transmitters you can split that input to two Channels. The reason for doing this is to have two different settings - one for each instrument.
- Run the source to one T1™ Channel
- Connect the Channel Preamp Out to the input of a second T1™ Channel. Use a 1/4" to 1/4" cable, balanced or unbalanced should be fine.
- Note: you will probably have a lower trim setting on the second T1™ Channel
Use the CH Mute buttons to control which Channel is active.
Example:
I usually run my vocal microphone to Channel 1 and the Guitar to Channel 2.
So I set up like this.
- Channel 2 input - Guitar
- Channel 3 input - Channel 2 Preamp out
Expect that the signal coming from Channel 2 Preamp out will be hotter than your original Guitar signal. That's okay. I ended up with the trim on Channel 3 lower than on Channel 2. But it all worked fine switching back and forth by hitting the CH Mute buttons.
Use the T1 ToneMatch® Audio Engine with a non-Bose PA
- If your mystery system is voiced to a normal-sounding spectral distribution (like the L1's), the presets in the T1 will work fine. If not (a really good probability, especially if it's an odd-brand "installed" system), all bets are off. Actually, even if it's a really good installed system but all the controls (like the house EQ) are readily accessible, chances are this will fall into the "not" category too. In either case, the loop is wide open at this point. Might as well leave the T1 in the car.
- -- Cliff-at-Bose [3]
- What Cliff is getting at is the fact that the house system may be 'voiced' any number of ways. In almost all cases a house system will be voiced quite differently from an L1, which will make the presets sound much differently than intended.
- We just don't know what will happen. The presets may work great, they may not work well. No way to tell until soundcheck.
- Bring the T1 though - worst case scenario is you leave your EQ's flat.
- -- MikeZ-at-Bose [4]
Routing Effects
|
This article addresses some interesting options you have for routing your signal through the T1® to process effects more than once. For ideas on how you can work with an external effects unit see: T1 ToneMatch® Audio Engine / Insert for External Effects |
There are several less than obvious things you can do with effects through the T1 ToneMatch Audio Engine.
Parallel Effects
If you want to swap between two sets of effects or run two sets of effects at the same time (for example: two delays, two modulation effects, two reverbs) try this.
Assume that you are using Channel 1 as the input where you want to do this:
- Set the effects you want on Channel 1
- Take a ¼ inch jack cable from the Channel 1 PreAmp Out to Channel 2 input
- Add the second layer of effects you want to Channel 2
- Now use the FX Mute buttons for Channels 1 and 2 to set which banks of effects will be used
- Channel 1 only
- Channel 2 only
- Channel 1 and Channel 2 in parallel
Serial Effects
If you want to run some effects and then add more effects in series then take the output of one or more T1 ToneMatch Audio Engine Channels to the Aux Output, then take the Aux Output and use that as the input to another T1® Channel
Assume that you are using Channel 1 as the input where you want to do this:
- Set the effects that you want on Channel 1
- Set the Aux tap to Pre
- Take a ¼ inch jack cable from the Aux Out to Channel 2 input
- Apply effects that you want applied to the output of Channel 1
- Now use the FX Mute buttons for Channels 1 and 2 to set which banks of effects will be used
- Channel 1 only
- Channel 2 only
- Channel 1 and Channel 2 in series
Foot Switch to Mute Effects
From Andy-at-Bose UK
First up hook up your vocal mic to, say, Channel 1 on the T1®. Next take a jack lead and connect it to the PRE AMP out on Channel 1. Take this lead and run it through either a keyboard style volume pedal or a make or break style footswitch. Run the signal from the pedal/footswitch into another T1® channel and set this channel up with the chosen vocal effects but make them 100% effect. Adjust the effected channel volume to get the desired blend of dry vocal to effected vocal. The pedal/footswitch will determine how much or if any signal will go to channel 2 and therefore whether or not an effect is added.
- ↑ T1 Newbie Questions/Solutions
- ↑ Mary (MBanshee) in the Bose Community Message Boards
- ↑ Cliff-at-Bose Value of Presets
- ↑ MikeZ-at-BoseValue of Presets
|}

